Step a.4 – Measurement Computing DaqBook 2000 Series Installation User Manual
Page 7
Section A
969696
Connecting a
DaqBook/2000A or /2000X to a PC Parallel Port A-3
How to make the connection:
1. Place the DaqBook/2000 Series device power switch in the “OFF” (0) position, if it is not
already OFF.
2. Connect the DIN5 end of the adapter’s cable to the power in connector on the DaqBook/2000
Series device (see the preceding figure).
If using a power source other than the adapter, consult the Power Management Section of your
DaqBook/2000 Series User’s Manual (p/n 1103-0901) before doing so.
3. Connect the adapter’s plug to a standard AC outlet.
4. If your adapter has a power switch, position it to “ON.”
5.
T
urn ON the DaqBook/2000 Series device’s power by placing the power switch to the “1”
position. The power led will light up.
STEP A.4 –
Configure and Test the Hardware
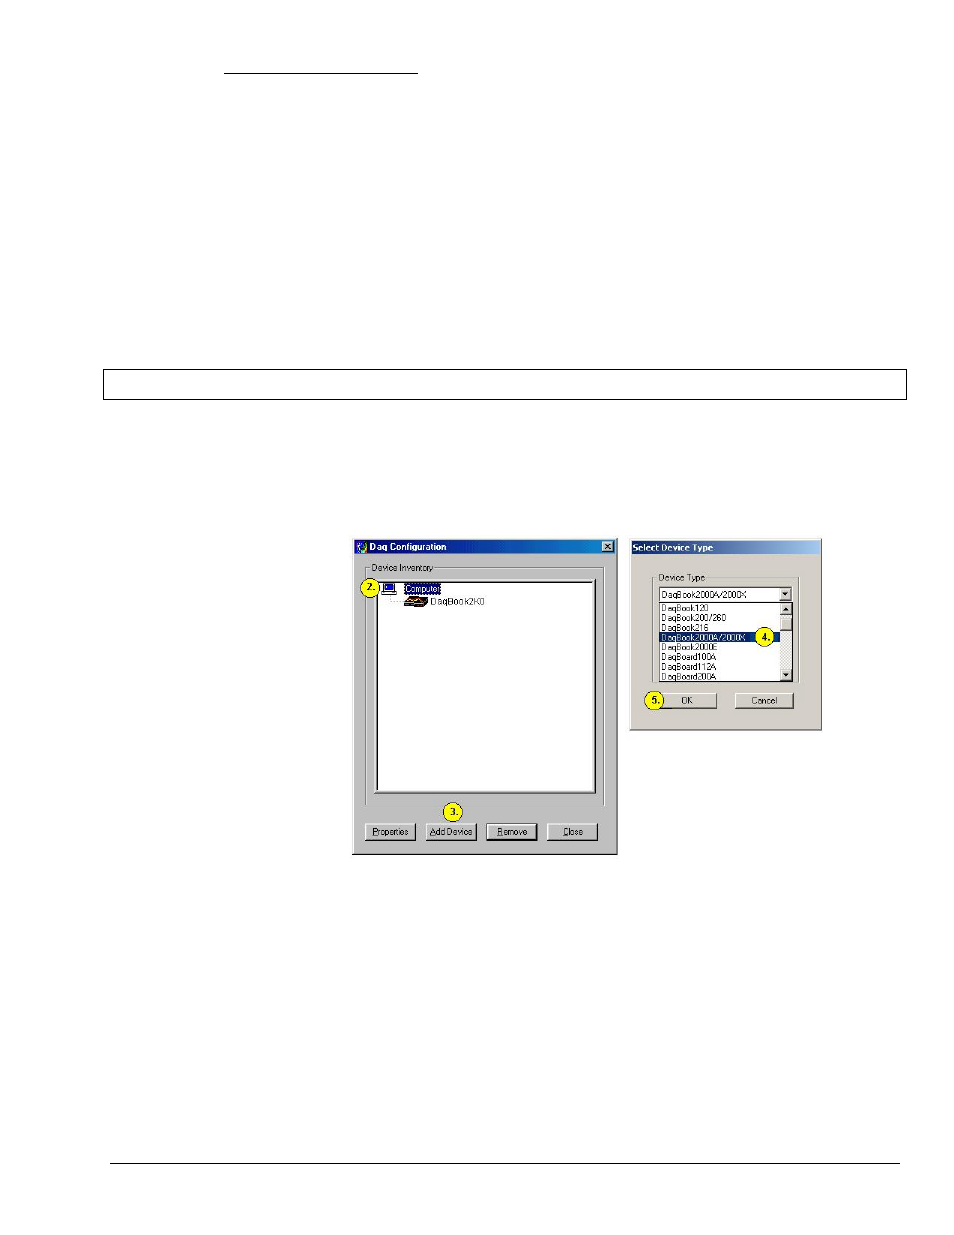
1. Run the Daq*Configuration control panel applet. The applet can be accessed by navigating
from the Windows’ Desktop as follows:
Start
⇒
⇒
⇒
⇒ Settings ⇒
⇒
⇒
⇒ Control Panel ⇒
⇒
⇒
⇒ Daq* Configuration
2. Select the “Computer” image in the Device Inventory configuration tree (see figure).
3. Click the <Add Device> button. The “Select Device Type” box will appear.
4. Select “DaqBook2000A/2000X” from the “Device Type” scroll-down.
Note that the default name that appears in the Device Inventory configuration tree, e.g.,
“DaqBook2K0” can be renamed.
5. Click the <OK> button. The “Properties” box will appear for the selected device.
6. Ensure settings are correct, and make changes if needed. Refer to the following table for
throughput speeds.