Step 7 – Measurement Computing DaqBook 2000 Series User Manual
Page 53
STEP 7 –
Configure and test the System using the Daq* Configuration Applet
The Daq* Configuration applet, designed for 32-bit Windows NT/2000/XP systems, is located in the
Windows Control Panel. It allows you to add or remove a device and change configuration settings. The
included test utility provides feedback on the validity of current configuration settings, as well as
performance summaries.
1. Open the Daq* Configuration Applet.
a. Open the Control Panel by navigating from the Windows’ Desktop as follows:
Start Menu ⇒ Settings ⇒ Control Panel
b. From the Control Panel, double-click the Daq* Configuration icon.
2. Add the first-level device to the list of installed devices.
The first-level device is the device that will be connected directly to the Ethernet, via a host computer’s
Ethernet jack or a jack on a network hub. The DaqBook/2020 is an example of a first-level device.
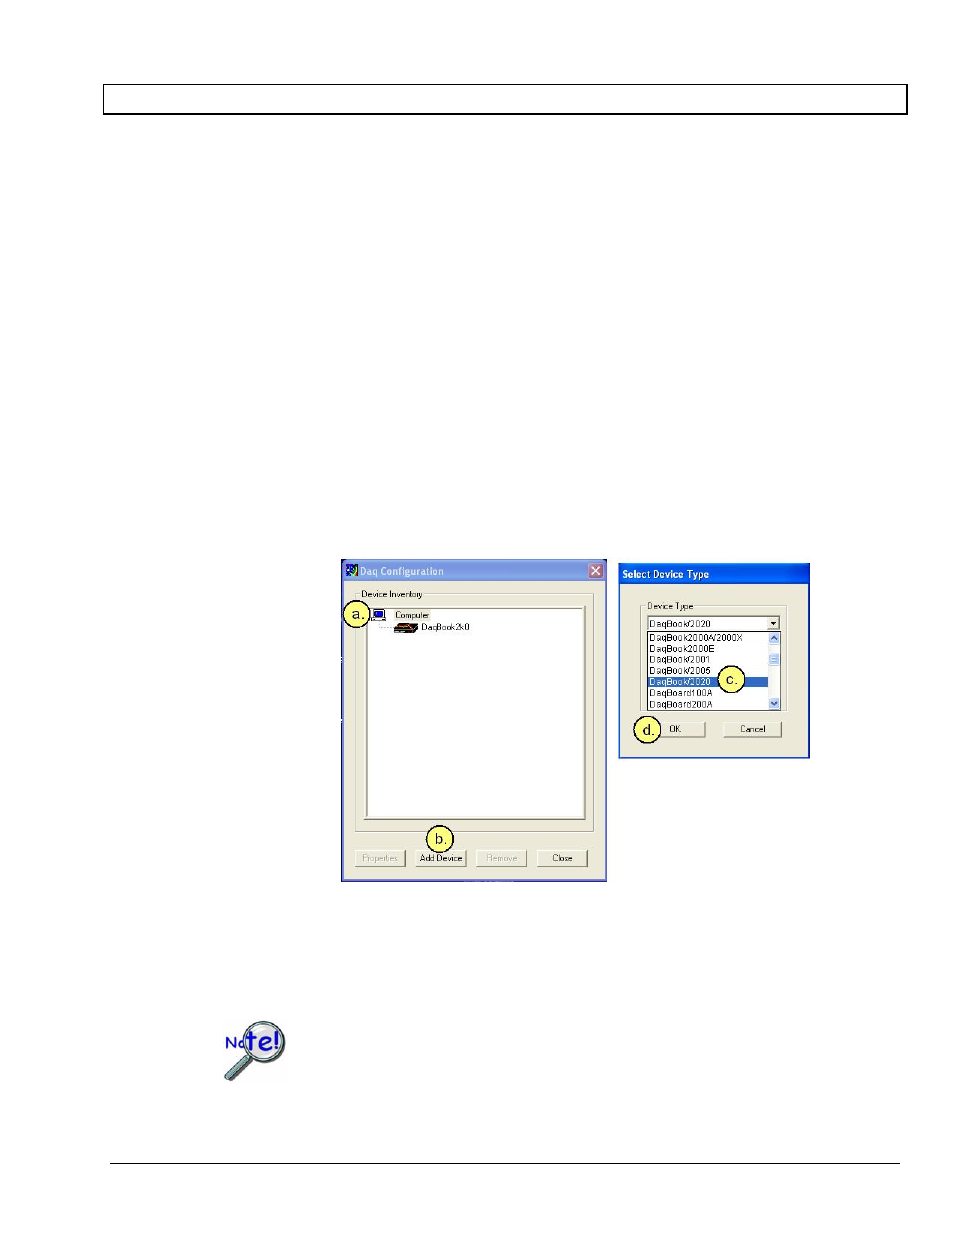
a. Select the Computer image in the Device Inventory configuration tree (following figure).
b. Click the <Add Device> button. The “Select Device Type” box will appear.
c. Select the DaqBook/2020 from the list of devices.
d. Click the <OK> button. The “Properties” box will appear for the selected device.
Using Daq* Configuration Device Inventory & Select Device Type to Add a Device
Note: Although the above figure indicates that a DaqBook/2020 was selected as the first level
device, we could similarly have selected another device, i.e., a DaqBook/2001 or a
DaqBook/2005.
If your device is a DaqOEM/2001 or a DaqOEM/2005 you will select DaqBook/2001 or
DaqBook/2005, respectively. This is because the DaqOEM/2000 Series boards are
electronically and functionally identical to their DaqBook/2000 Series counterparts.
DaqBook/2000 and DaqOEM/2000 Series
898095
Configuring the System for Operation 6-11