Remove old track, Drill, tap, and fasten, Considerations for determining track length – Harken 3813 System AA Battcar User Manual
Page 11
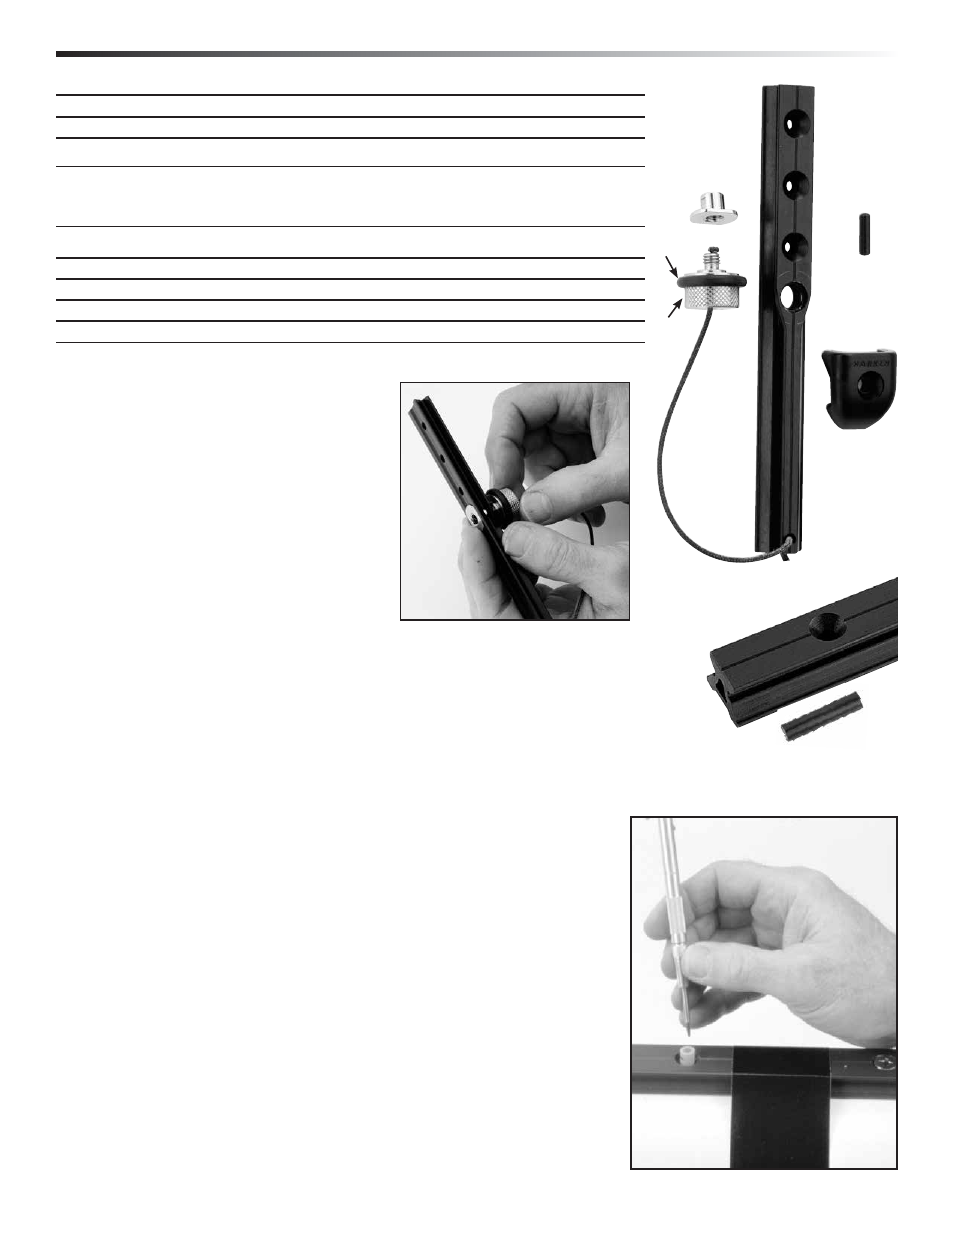
2707
2711
Preassembly/Installation – CB System (Drill & Tap)
Parts/Remove Track/Install Track
System AA (CB)
11
Important! Be careful not to lose
the threaded backing plate.
3837
Screwpin
endstop kit
H-45685
H-34380A
H-34382A
H-28411C
2711
Remove old track
IMPORTANT! Before removing old track,
scribe pencil line down either side.
Drill, Tap, and Fasten
After old track is removed, attach string to mast to line up track during installation.
1. Start at one end of track and work down: Do not drill and tap from
both track ends.
Clamp or duct tape track on mast. Center punch in center of track hole.
Tip: Use a narrow shaft spring-loaded machinist's center
punch with plastic centering tube or a transfer punch.
Part No.
Description
Includes
Purchase from Harken
3837
Screwpin endstop
kit
(a) 1 x 152 mm (6") end track with screwpin stop; (b) 1 x 2711 splice link;
(c) 1 x H-28411C endstop (d) 1 x tube blue Loctite
®
2707
Track (micro CB)
Use for masts without grooves or when slugs will not fit. Purchase stainless steel
4 mm (#8) screws separately. Do not use 3817 open-backed track. It requires
mounting slugs. See page 11 for drill/tap sizes and mounting instructions.
2711
Splice links
One needed for each track joint
Purchase Separately
#8 (4 mm) Flathead screws
Purchase 20 fasteners/meter of track
Drill
3 mm (1/8")
Tap
8-32 (M4)
Track and Accessories
Considerations for
Determining Track Length.
Note: Track is longer than sail luff length.
1. Upper end: Extend track 203 mm (8") above
headboard halyard attachment point to allow for
sail stretch as main ages. Track must not block
mast halyard exit.
2. Lower end: Place 152 mm (6") Screwpin
Endstop track on mast. Make sure car clears
gooseneck fittings and adjust height as
necessary. Measure to lower end of track.