Gasboy Hi-Flow Sat Pipng Conversion Kits User Manual
Page 7
MDE-4514 Instructions for Installing Atlas™ Hi-Flow Satellite Piping Conversion Kits M06391K00X • June 2006
Page 7
Installing Atlas Hi-Flow Satellite Conversion Kits M06391K001, K002, K003 and K004
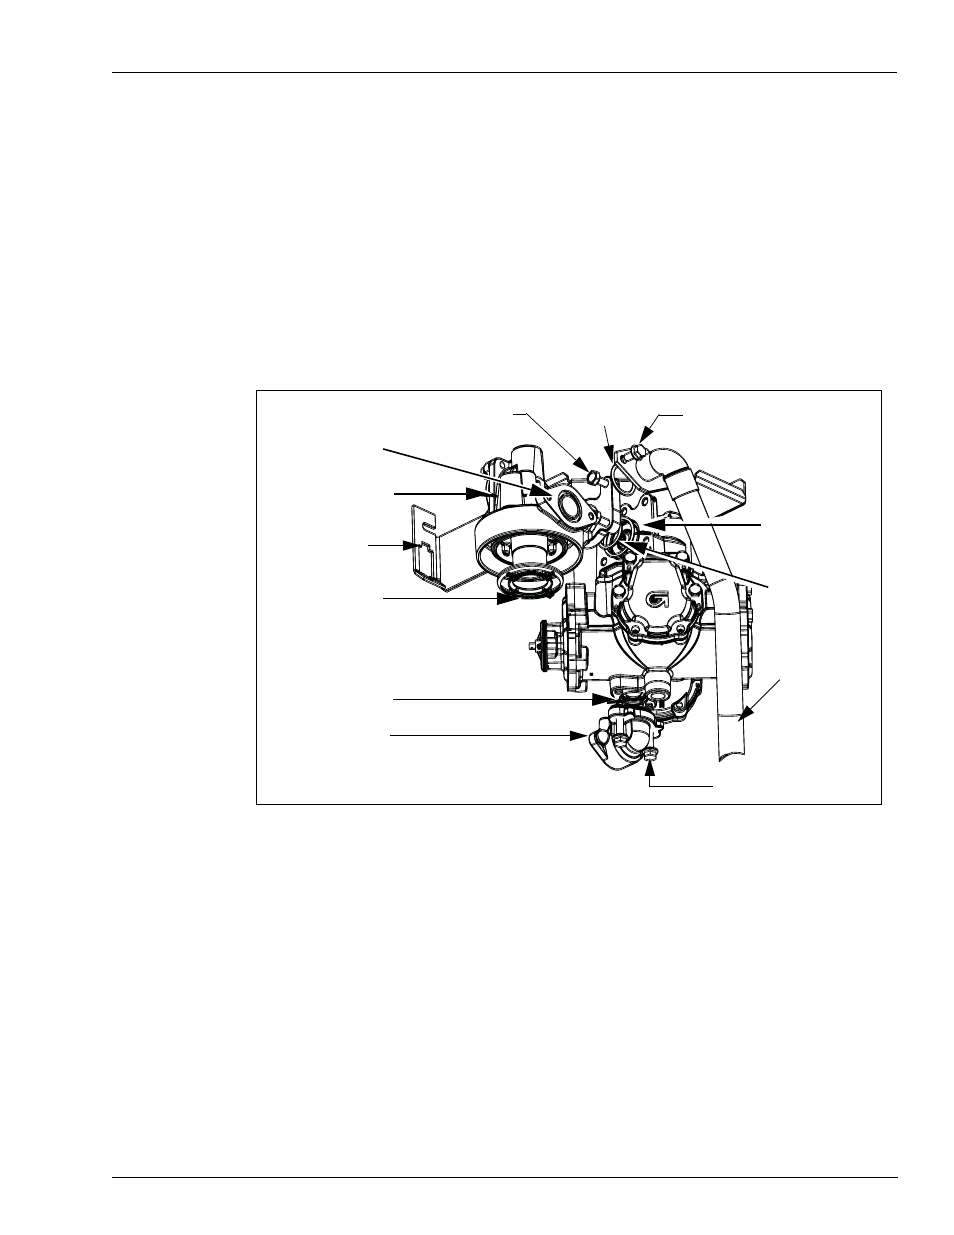
Mounting the No-Valve Filter Manifold and Meter Discharge Fitting
See
.
1
Insert the filter strainer (R19457) into the no-valve filter manifold (M04607B005) from the
kit. Push the strainer fully into the cavity so that it does not interfere with the filter boss
threads.
2
Ensure that the meter check valve is still in place in the meter inlet, and grease the O-Rings
and insert them into the grooves in the meter inlet and in the no-valve filter manifold discharge
flange. Attach the flange to the meter inlet and replace the two screws on the right. Reposition
the meter stabilizer bracket to the back side of the manifold flange and replace the two screws
on the left. Tighten all four screws. Tighten the meter stabilizer bracket nut against the frame.
Figure 2: No-Valve Filter Manifold and Meter Discharge Fitting
(4) 5/16 x 1” Screw (Existing)
(2) M8 x 16 Flange Screws
(Existing)
(M00415B009)
(2) M8 x 25 Flange Screws
(Existing)
No-valve filter manifold
(M04607B005)
Strainer insert
high capacity
(R19457)
O-Ring 0.862 x
0.103 (N16891-32)
Casting discharge
(M04624B040)
O-Ring 1.609 x
0.139 (Q10068-09)
O-Ring 1.234 x
0.139 (Q10068-09)
O-Ring 1.234 x
0.139 (Q10068-09)
Meter Stabilizer
bracket (Ref)
Feedline (Ref)
Manifold inlet
3
Insert the feedline O-Ring into the manifold inlet and lightly grease to retain and attach the
feedline. Insert and tighten the two screws.
4
Lightly grease the meter discharge O-Ring and insert it into the groove in the meter discharge.
Ensure that the O-Ring is fully seated in the groove and is not offset by the O-Ring retainer
tabs in the meter discharge.
5
Attach the meter discharge casting to the meter discharge and insert the two screws and tighten
them.