4 reassemble the sheathing to the unit, 7 rewire the solenoid valves in the junction box, N in – Gasboy Hi-Flow Sat Pipng Conversion Kits User Manual
Page 11: Chec
MDE-4514 Instructions for Installing Atlas™ Hi-Flow Satellite Piping Conversion Kits M06391K00X • June 2006
Page 11
Installing Atlas Hi-Flow Satellite Conversion Kits M06391K001, K002, K003 and K004
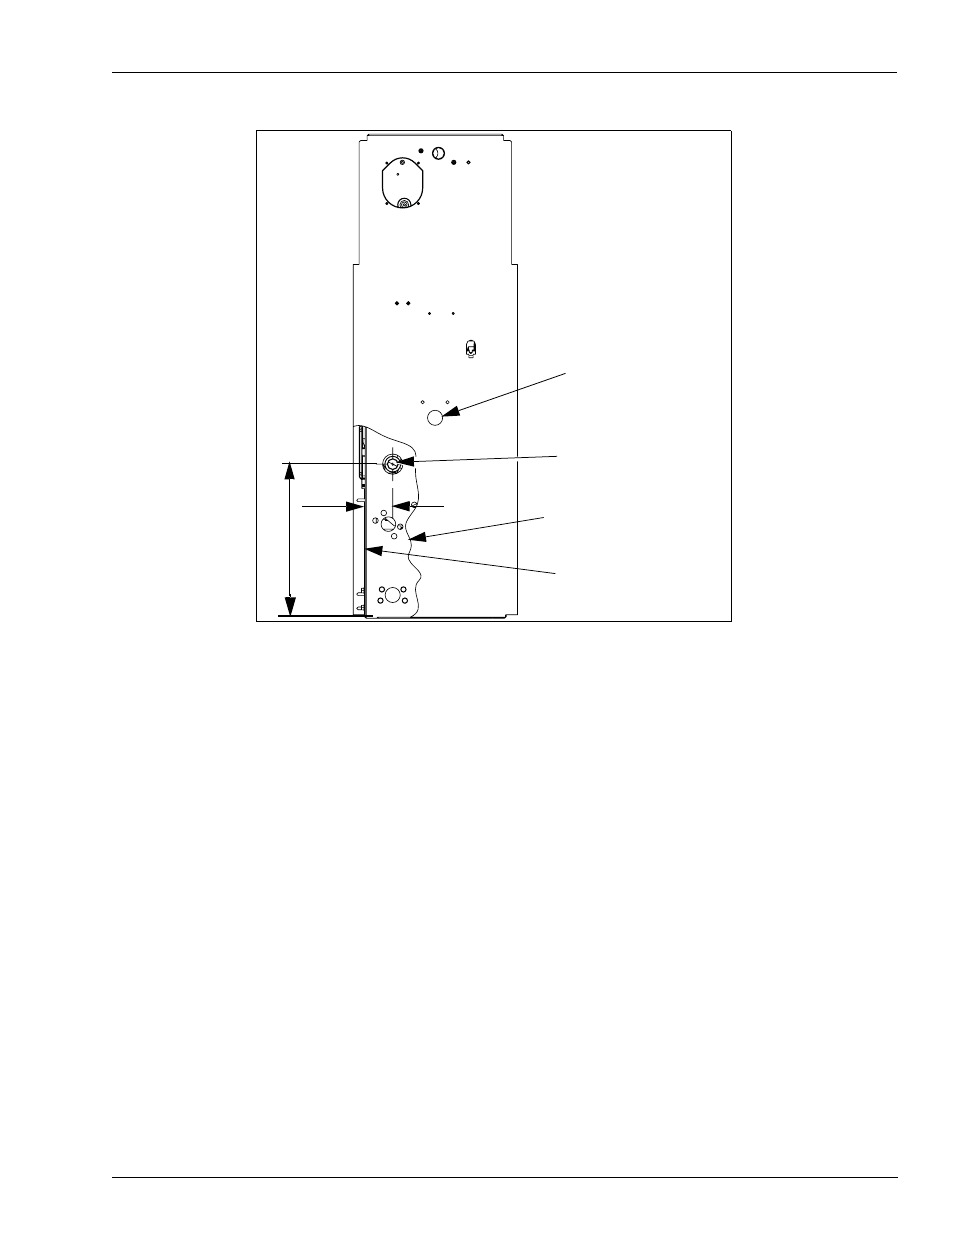
Figure 5:
Q10554-21 Plug
Ø1.75 hole (cut this hole
through sheathing and frame)
Face of frame
column
3.04
17.12
Sheathing shown cutaway for
clarity
Frame Modification (Dimensions are in inches)
3
Using a 1-3/4 inch diameter cutter, cut a hole through the sheathing so the discharge can
protrude through when completed. Deburr the hole on the sheathing.
4
Reassemble the sheathing to the unit.
5
Assemble the black painted elbow
) and the 1 x 1-1/2 inch nipple. Insert the
grommet (
) over the nipple. The elbow should point down.
6
Remove the rag from the elbow in the discharge assembly. Insert the nipple from the assembly
made in step
through the hole cut in the frame and screw it into the discharge elbow on the
assembly. Tighten the nipple. Use UL approved sealant suitable for use with the fuel involved.
Note: If a Grade 2 exists, repeat all the steps from
“Removing the Existing Solenoid Valve and
till step
in this procedure.
7
Rewire the solenoid valves in the junction box.
8
Connect the satellite piping to the elbow on the lower end of the assembly.
9
Insert Q10554-21 (1-3/4 inches diameter) plastic plug into the hole where the previous
discharge exited the unit.