Dish Network Solo 351 User Manual
Page 28
Page 23
Connecting the Receiver to the TV(s) in Another Room(s)
9. If your TV is in off-air mode for the channels you picked in step 7, write
“Air” in the blank provided in the margin. If your TV is in cable mode
for the channels you picked in step 8, write “Cable” in the blank
provided in the margin.
10. Set all of your remote TV(s) to the channel mode (Off-Air or Cable)
you wrote in the margin.
11. Tune all of your remote TV(s) to the channel you wrote in the margin.
This is the channel you will use to receive your satellite programming.
12. Turn on the nearby TV (the TV that gets programming from the TV1
outputs).
13. Press the POWER button on Remote Control 1 to turn on the receiver's
green TV1 indicator.
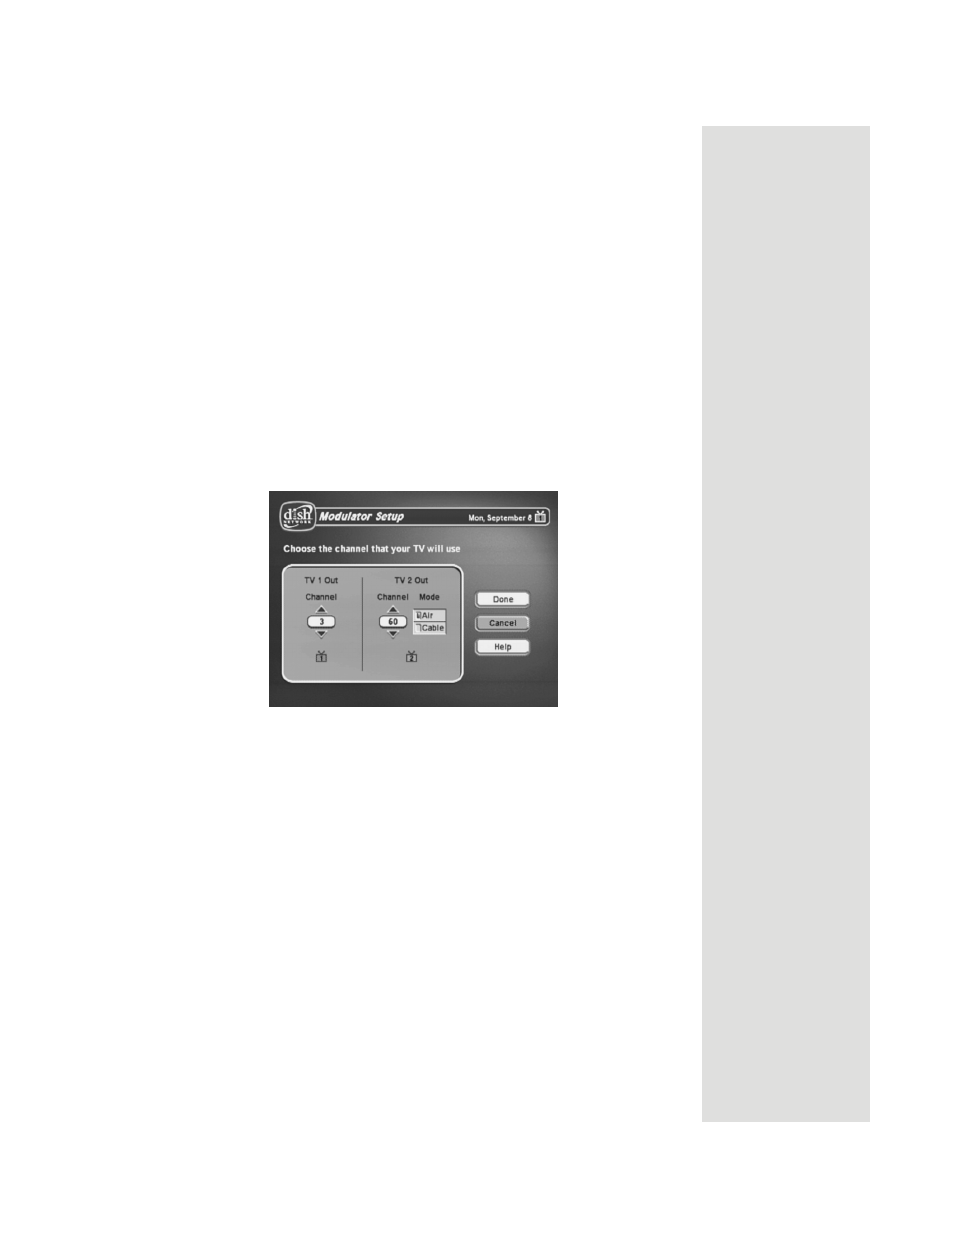
14. You should now be looking at the
Point Dish
screen on your nearby
TV. Select the
Modulator Setup
, if shown. If the option is not shown,
press MENU 6-1-5 on Remote Control 1 to get to the
Modulator Setup
screen.
15. With the
Modulator Setup
screen displayed on the nearby TV, use
Remote Control 1 to do the following:
a. Under
TV2 Out
, select either
Air
(for off-air channel numbers) or
Cable
(for cable channel numbers) based on what you wrote down in
the margin in step 9.
b. Under
TV2 Out
, use the up and down arrow buttons to change the
modulator channel to the one you wrote in the margin in step 8.
c. Select
Done
to save the changes.
16. Using Remote Control 2, press the POWER button and make sure the
receiver's blue TV2 indicator turns on.
17. For some TVs, you must run a channel scan so that the TVs will find
and display the selected channel from the receiver. Run channel scan on
all remote TV(s), if available. See your TV user guide for instructions.
18.
C
onfirm that you see a picture from the receiver TV2 output, likely the
Point Dish screen, on your remote TV(s).
•
If your picture looks good, go to step 26.
•
If your TV(s) do not have a picture or if it is not as clear as you
would like it to be, go to the next step.