Secure desktop reference, T the – equinux VPN Tracker 8.1.1 User Manual
Page 62
Secure Desktop Reference
This chapter describes the items available in Secure Desktop
and how to customize them to get the most out of Secure
Desktop.
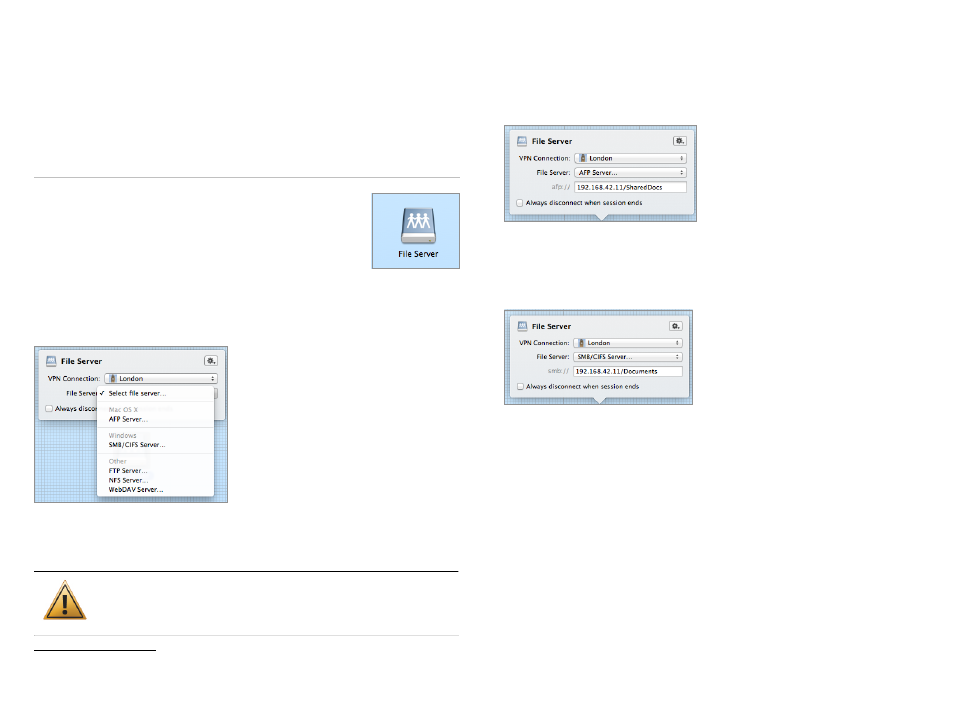
Connecting to File Servers
To connect to a file server (network share), drag the “File
Server” item to your Secure Desktop. Secure Desktop must
be in
→ Edit Mode to add items.
‣ Select the VPN that is required for accessing this file
server (here, the VPN is called “London”).
‣ Select the type of server that you would like to connect to, and enter its IP
address. There are several types of file servers that VPN Tracker can connect
to.
If your VPN has a working
setup, you can use a host name instead
of an IP address.
If there are file servers currently con-
nected to your Mac, they will be shown
in the list and you can select one of
those directly.
When you’re done setting up the file
server, leave the Secure Desktop’s edit
mode and click the item to test it.
You will be prompted for your username and password (if required), as well as
for the volume(s) on the file server that you would like to access
.
It is not possible to use Bonjour or NETBIOS names for accessing
file servers. Please use IP addresses instead, or set up
DNS to be able to use DNS host names.
OS X File Servers (AFP)
Select “AFP Server” if your file server is a Mac running OS X, or an Apple Time
Capsule. Some NAS (Network Attached Storage) devices can be accessed us-
ing AFP, please refer to your device’s documentation for details.
In addition to the server’s address, you
may optionally enter the volume after
the address, separated by a forward slash
(“/”), e.g. 192.168.42.11/SharedDocs.
Windows File Servers (SMB/CIFS)
Select “SMB/CIFS Server” if your file server is running Windows, or if you are
connecting to a file server with Windows-compatible network shares. Many
NAS devices offer SMB services.
In addition to the server’s address, you
may optionally enter the share after the
address, separated by a forward slash (“/”),
e.g. 192.168.42.11/Documents.
FTP Server
Select “FTP Server” if you are connecting to a file server running the File Trans-
fer Protocol (FTP). Many NAS devices offer FTP services, and FTP is a popular
protocol for uploading files to web hosting.
NFS Server
Select “NFS Server” if you are connecting to a file server running the Network
File System (NFS). You must specify the entire path to the network share, e.g.
192.168.42.11/export/docs.
WebDAV Server
Select “WebDAV Server” if you are connecting to a file server running the
WebDAV protocol. WebDAV is a popular protocol for uploading files to web
hosting.
62
1
For NFS file servers, the share must be specified in the Secure Desktop file server item.