Led module replacement, Power supply replacement, Led module replacement -4 – Daktronics AE-3010-7.6-R,G,A User Manual
Page 34: Power supply replacement -4, Figure 30: disconnecting power from led module -4, Figure 31: led module ribbon cable removal -4, Figure 32: loosening power supply screws -4
LED Module Replacement
If any LED modules fail, the recommended procedure is to replace the failed module
or send it to Daktronics or a Daktronics Sales and Service office for repair.
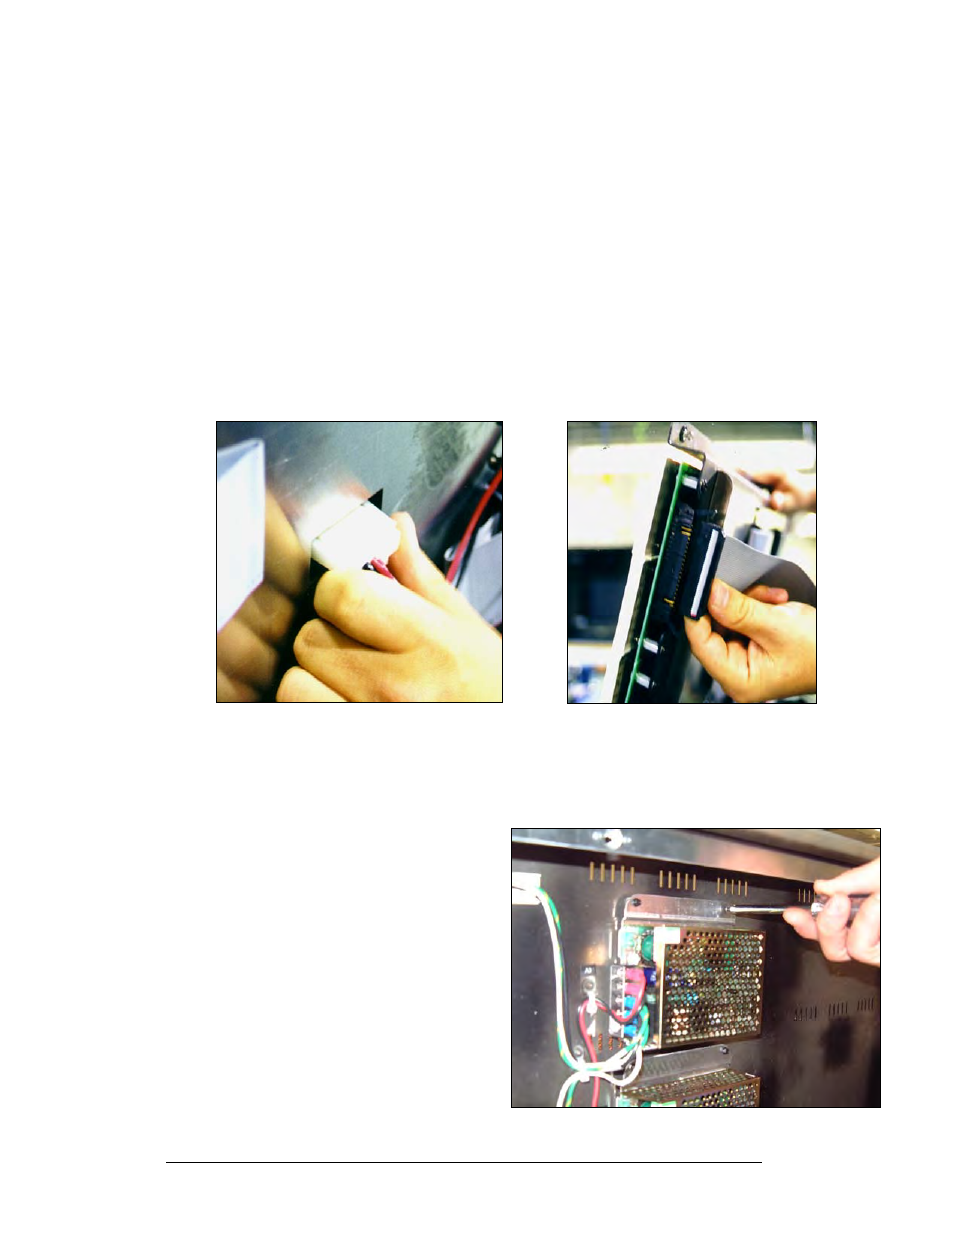
To remove an individual module:
1. Disconnect Power to the display.
2. Push the clips outward and gently pull the 40-pin ribbon cables from
the failed module as shown in
.
3. Open the display and access the display interior as previously
described.
4. Press the tabs on either side of the four-pin power connector to release
it and shown in
.
5. Each module is held in place by #6 screws. Using a 3/16” nutdriver,
remove the module screws from the rear of the panel.
6. Gently pull the failed module from the panel. Reverse the previous
steps to attach a new module.
Figure 30: Disconnecting Power from LED
Module
Figure 31: LED Module Ribbon Cable
Removal
Power Supply Replacement
Note: Disconnect power from the display before removing a power supply.
Figure 32: Loosening Power Supply Screws
Power to the LED modules is provided by
a small 5V power supply. Each power
supply can support up to three (3)
modules. They are located on the back
sheet of the display.
Each power supply is secured to a power
supply plate by two (2) 3x10 metric
screws. The plate is secured to the back
sheet by two (2) #6 hex head screws as
shown in
. Use a 3/16 nutdriver
to remove the #6 screws.
Maintenance and Troubleshooting
4-4