Dell Emphasis Lighting Control System User Manual
Page 54
50
Emphasis Visualization v1.4.0 User Manual
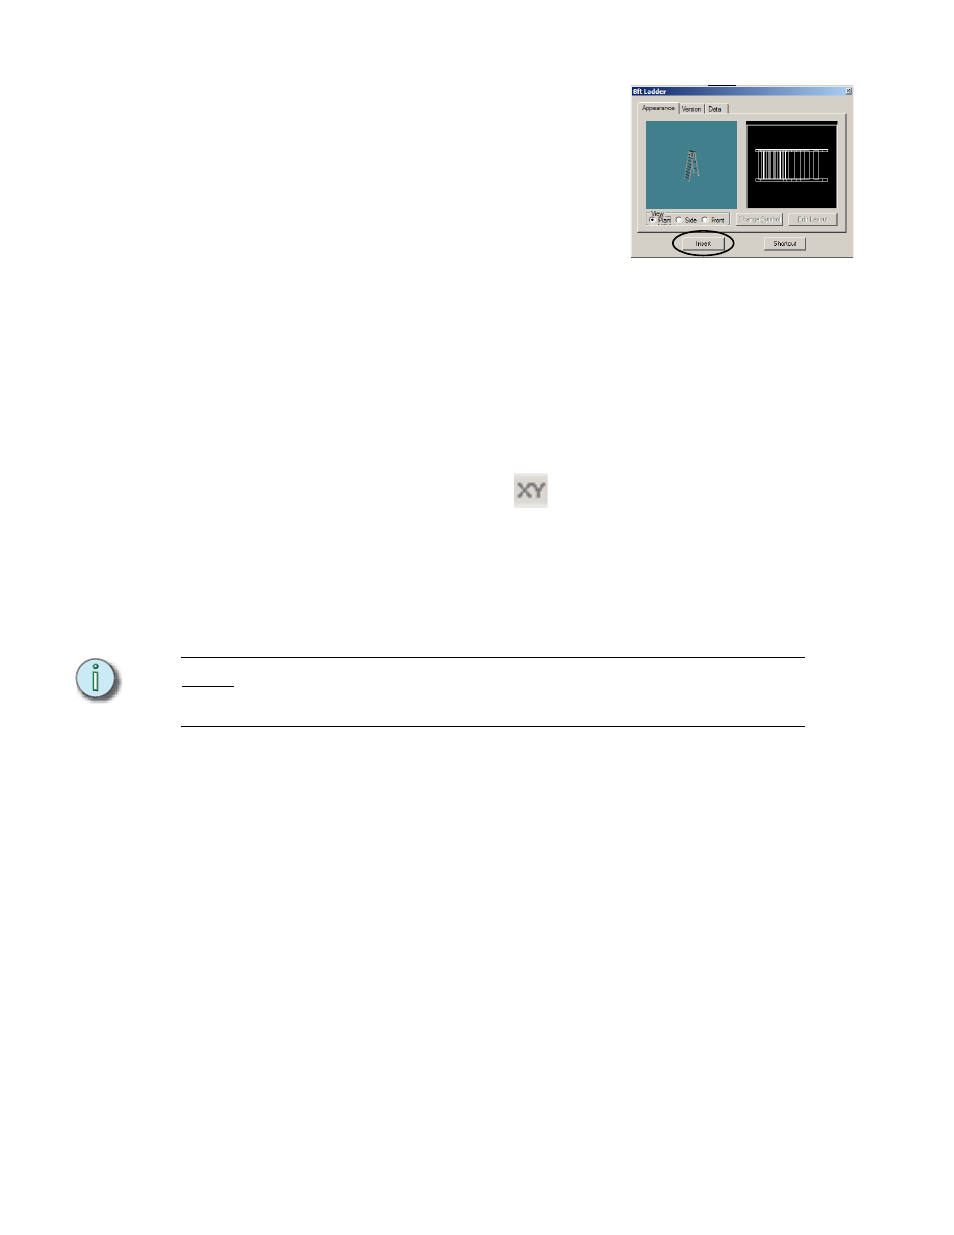
d. Right-click the 8’ Ladder and click
Property. This allows you to view the
object before you place it in your
drawing.
e. Click Insert.
f.
Drag the ladder to the upstage-right
corner and click to place it.
g. Click the “+” next to Outdoors.
h. Double-click “BBQ w/Hotplate”. Double-
clicking the BBQ executes the Insert
command without having to open the Properties window for the object. The
BBQ will attach to the cursor.
i.
Drag the BBQ to down-center and click to place it.
Step 11:
Rotate objects.
Objects are initially inserted into your drawing parallel to the X-axis (typically
stage left to stage right). If you want the object to be placed at an angle, you will
need to Rotate it.
a. Click the XY Ortho button
on the CAD Options toolbar to turn off Ortho
constraints.
b. Click on the BBQ to select it.
c. In the Edit menu, click Rotate.
d. Click on the object to set the base point for the rotation.
e. Drag the mouse to rotate the object. Click when the object is rotated to the
position you want.
N o t e :
You can also type in the rotation angle in the ComEdit toolbar. 90 degrees is to the top of
the screen in all views except isometric [Emphasis 3D Only], where it is dependent on the
working plane.
f.
Click on the ladder to select it.
g. Select the ladder and follow steps c-e to rotate the ladder.
Step 12:
Place objects on the Riser.
So far, you have placed objects directly on the stage floor. The stage floor has a
height (Z-coordinate) of 0’-0” in this drawing. If you want to place objects above
the floor, such as on top of the riser you have drawn, you will need to tell
Emphasis to draw at a different height in the plan view. This new height is the
“missing coordinate” for the plan view. Again, it’s the value for the coordinate you
can’t see in a 2D representation of a 3D space. In this case, in plan view, you can
see how wide and how deep an object is, but you can’t see how high (or how high
off the ground) it is. This step shows you how to set the missing coordinate to
draw objects above the stage floor while in the plan view.
a. In the plan view, press TAB and set the missing coordinate to 2’-0”.
b. In the Library Browser, click the “+” next to Electrical Equipment.
c. Scroll down to find the “ETC Sensor Dimmer”.
d. Double-click ETC Sensor Dimmer. A dimmer pack will attach to the cursor.