Dell Emphasis Lighting Control System User Manual
Page 51
3
Quick Start
47
Step 5:
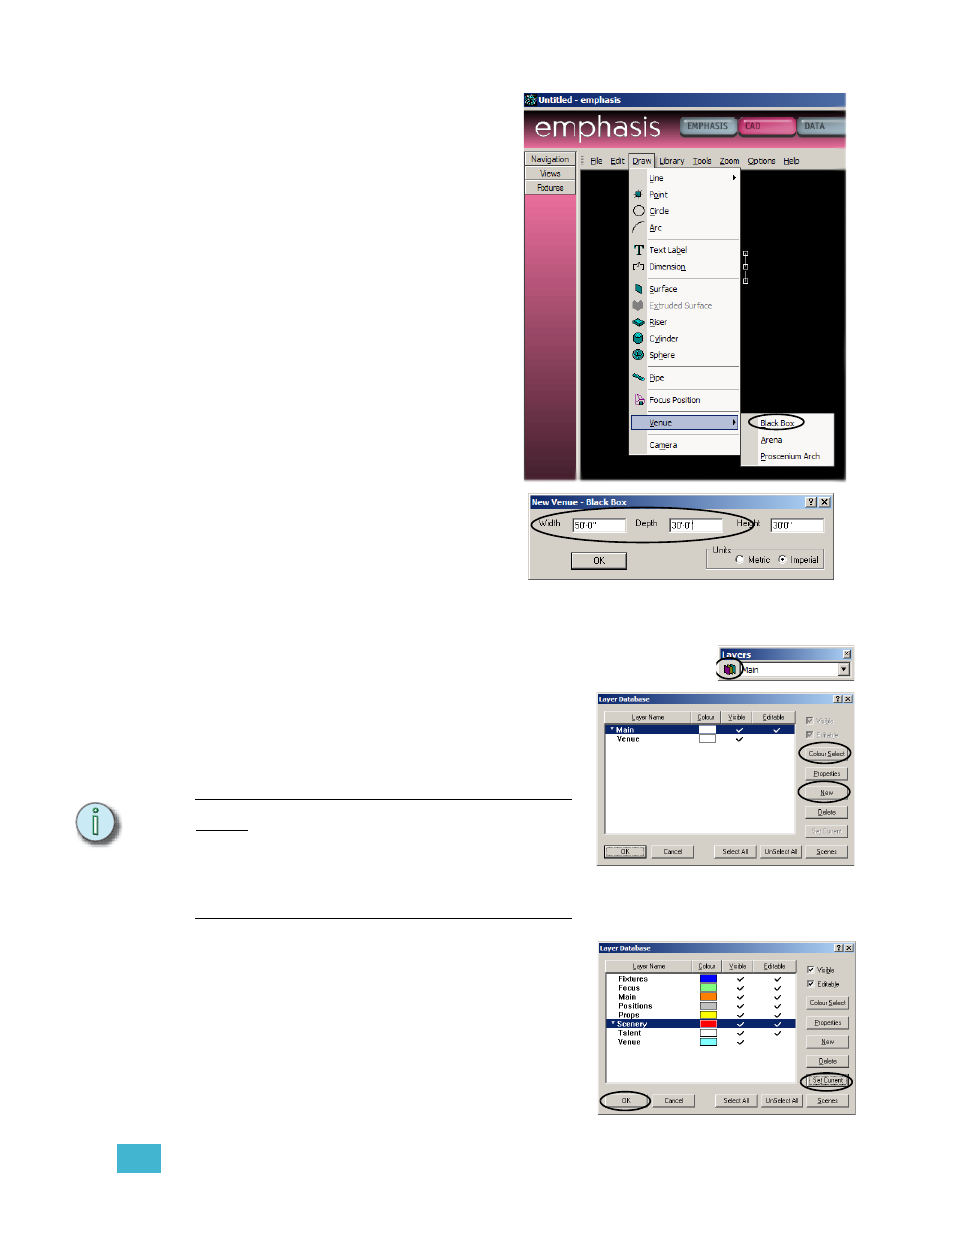
Insert a Venue.
The Venue is a
representation of your
theatre space. Emphasis
provides you with three basic
venue shapes: Black Box,
Arena and Proscenium Arch.
All of these venues can be
customized.
a. In the Draw menu, click
Venue, then Black Box.
b. In the dialog that opens,
enter 50’-0” for the width
and 30’-0” for the Depth
and click OK.
Step 6:
Create Layers.
Layers are very useful in
CAD drawings. You can
think of layers as being
different sheets of acetate or
tracing paper stacked on top
of one another. As you
create your drawing, put
things like scenery on one
layer, pipes on another,
props on yet another, and so on. Then you can pick and choose which layers you
want to see, edit or print at any given time.
a. Click the Layers Database icon on the Layers toolbar.
The Layers Database will open.
b. Click New.
c. Type “Fixtures” and click OK.
d. Click Colour Select.
e. Click a colour for this layer and click
OK.
N o t e :
Layers in black will be drawn in white when
the background colour is also black. Be
careful, the cursor crosshair lines are
displayed in the layer colour. A layer in black
may cause the cursor crosshairs to
“disappear” against a black background.
f.
Repeat steps c-e for the following
layers: Focus, Scenery, Props,
Positions, Talent.
g. Click on Scenery and click Set
Current. This sets the Scenery layer
as the current layer. All objects
drawn will be placed on the Scenery
layer.
h. Click OK.