Reur measurement procedure – Audioscan Verifit User Manual
Page 87
Verifit
®
User's Guide Version 3.12
May 2015
barcode scanner and Input device operation.
To enter data from a barcode see Barcode data input and:
1. Press the barcode trigger and center the red line on the barcode from a distance of 6 – 8 in. (15 – 20 cm). The
scanner will beep and the Barcode entry poster opens.
2. Highlight and
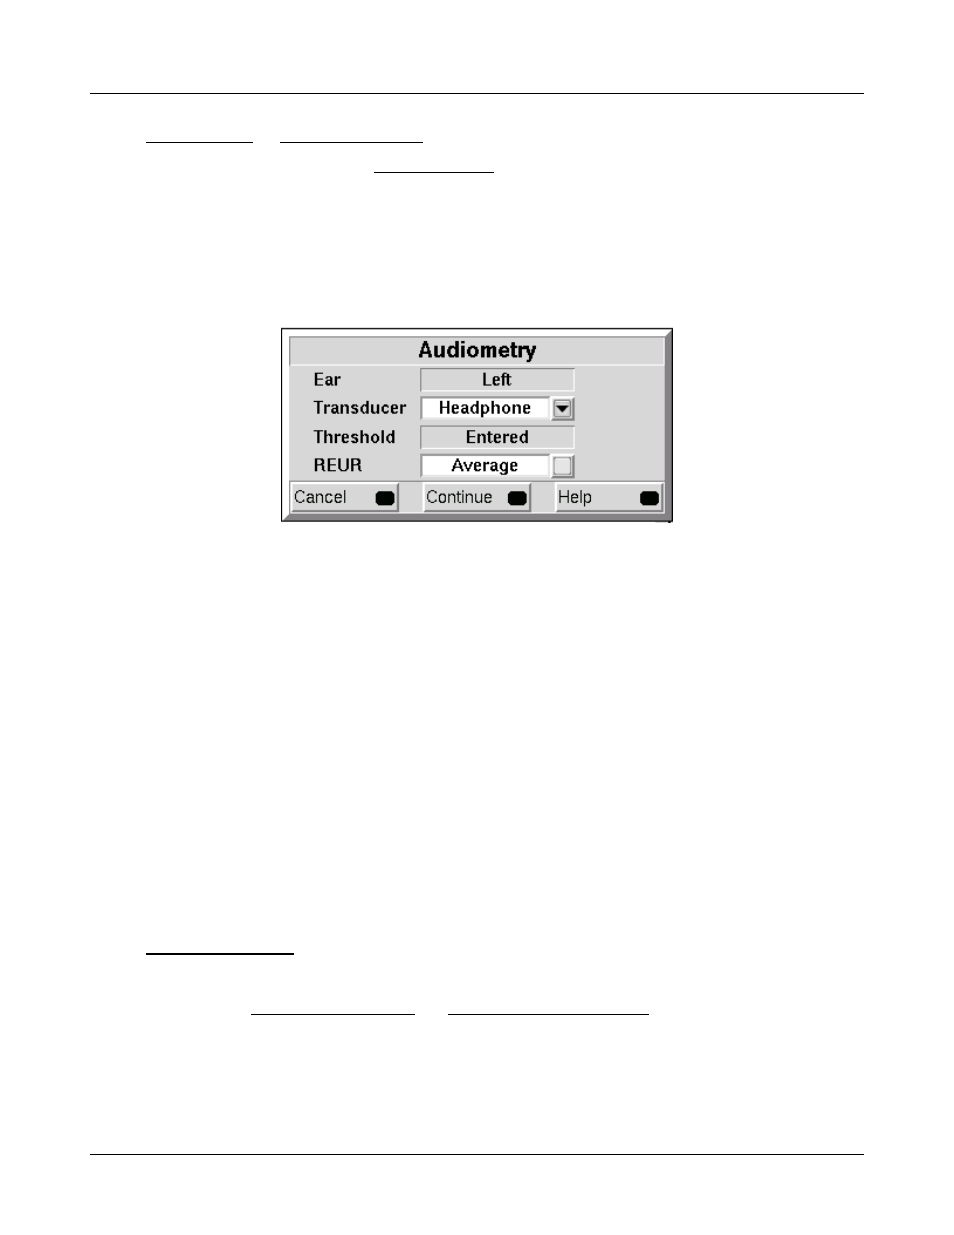
To enter assessment data and parameters manually:
1. Highlight and
2. Highlight and
3. Highlight and
Measured REUR should be used with a soundfield threshold because individual REUR is part of the threshold.
Average REUR should be used with headphone or insert phone thresholds because individual REUR isn’t part of
these thresholds.
4. When all selections have been completed, press
5. Enter HL threshold values using a mouse or keypad. Left click the mouse on the audiogram form to enter a
point. Click again to delete the point. On the keypad use the arrow keys to change frequency and level and
press
6. Press
The HL for the highest frequency is used for aided targets at higher frequencies.
REUR measurement procedure
Performing a REUR test erases all existing REAR and REIG data associated with the current test ear. REUR
should be measured only if Transducer = Soundfield. Otherwise it is more accurate to use average. See
Audiometric data entry.
1. Press
2. Referring to On-Ear Measures - Setup and On-Ear Measures Screen Setup, prepare the system, position the
patient and insert the probe tube.
3. If REUR is set to Average, highlight and
toggle to [Measure]. Press
data at this time (see Audiometric data entry) or press
87