Installation – Glow-worm Ultracom2 35 Store User Manual
Page 37
0020112185_PROTO_13 - 01/11 - Glow-worm
- 35 -
13.2.3
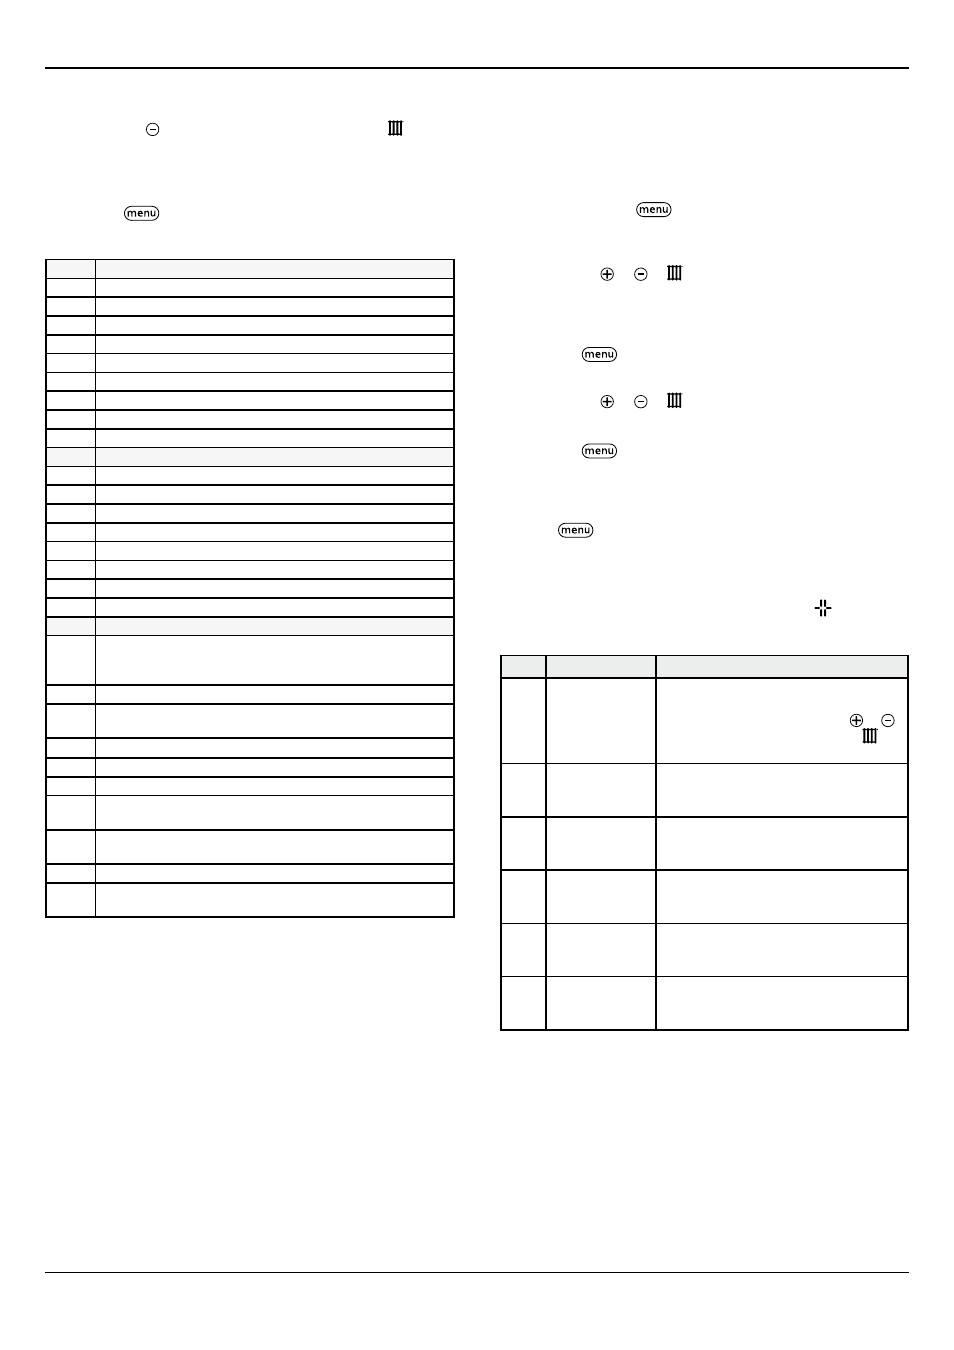
Status of the appliance
• Press button of the Heating temperature controls for
more than 3 seconds to learn the current state of functioning
of the appliance.
The screen displays the state of the appliance "S.XX".
• Press the
button
for more than 3 seconds to exit this
menu.
Status Heating Mode
S.00 No request for heating
S.01 Pre-run fan
S.02 Pre-run pump
S.03 Ignition
S.04 Burner lit
S.05 Post run pump/fan
S.06 Post run fan
S.07 Post run pump
S.08 Time delay anti short-cycles after heating
Status Domestic hot water heating
S.20 Pre-run pump
S.21 Pre-run fan
S.23 Ignition
S.24 Burner lit
S.25 Post run pump/fan
S.26 Post run fan
S.27 Post run pump
S.28 The boiler blocks tank reheating after a reheating cycle.
Status Specific messages
S.30
Default status, no request for heating or domestic water. If an
EBUS controller is connected to the boiler, check that a wiring
link is present on terminals 3 and 4 of the boiler's main board.
S.31 "Hot water only" mode
S.32 Control cycle: the speed of the fan in the functioning phase is
outside tolerance.
S.34 "Frost protection" mode
S.39 Underfloor heating contact open.
S.41 Water pressure too high.
S.53 Waiting cycle: temperature differential between heating flow
and return is too high. If ∆T > 30, forcing to Pmin.
S.54 Waiting cycle: lack of water in the installation/temperature rise
between heating flow and return is too high.
S.96 Test temperature sensor for heating return.
S.98 Test temperature sensors for heating flow and return, or the
appliance has a fault.
13.2.4
Test modes
By activating these various test modes, you can enable special
functions on the appliance.
• Press the on/off button to switch off the appliance.
• While keeping
the
button
pressed for more than 5
seconds, press the on/off button.
The screen displays the first test mode "P01" and "Off".
• Press button or
of mode
to choose the test mode that
you wish to launch.
• Test mode "P.01" :
- Press the
button
to display the burner forcing setting.
The screen displays "P.01" and "0".
- Press button or
of mode
to modify the value of the
setting from "0" (0%) to "100" (100%).
- Press the
button
for 1 second to exit the submenu or for
more than 7 seconds to access the configuration menu.
• Test mode "P.02" to "P.07" :
- Press
to launch the test mode. The screen displays
"P.0X" and "On".
- The test mode will be automatically stop after 15 minutes.
• When you have finished, press the reset button or the On/
Off button to exit the test modes.
Code Parameter
Description
P.01
Forcing the
adjustable-power
burner when
heating
The appliance functions at a power
adjustable from "0" (0% = Pmin.) to "100"
(100% = Pmax.) by using buttons or
of the Heating temperature controls
after successful ignition.
P.02
Forcing the
burner to heating
ignition power
The appliance functions at ignition power
after successful ignition.
P.03
Forcing the
burner to Heating
Pmax.
The appliance functions at its maximum
power after successful ignition.
P.05 Filling the
appliance
The 3 way valve is in the central position,
the pump and the burner stop so that the
appliance can be filled.
P.06 Venting the
installation
The function is activated for a period of 5
minutes on the heating circuit.
Make sure that the air vent is open.
P.07 Venting the
appliance
The function is activated for a period of 5
minutes on the short circuit.
Make sure that the air vent is open.
INSTALLATION