Installation – Glow-worm Ultracom2 35 Store User Manual
Page 15
0020112185_PROTO_13 - 01/11 - Glow-worm
- 13 -
3
2
1
3
2
1
4
8
9
7
5
7
6
5
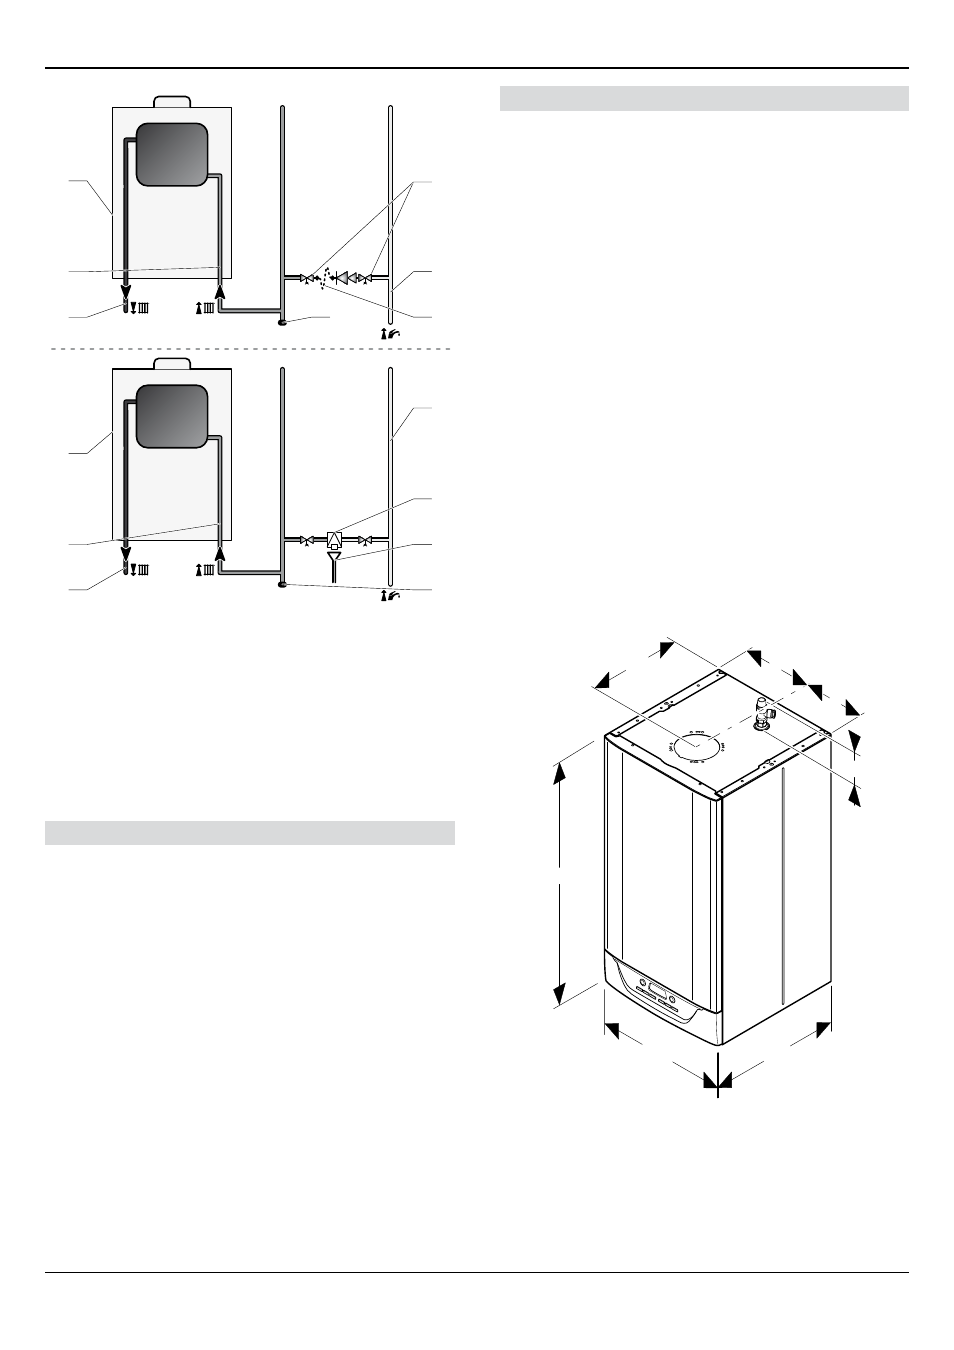
Key
1 Heating flow circuit
2 Heating return circuit
3 boiler
4 Double check valve assembly
5 Domestic cold water supply in
6 Temporary filling loop (remove immediately after filling)
7 Drain point
8 back flow prevention device
9 Tundish
The system should be pressurised to 0.8bar, indicated on the
digital display with no heating demand.
Drain points
Drain taps must be provided at all low points of the system, which
will allow the entire system to be drained.
Drain taps shall be to the current issue of BS2879.
Water treatment
Existing system- It is essential that prior to installing the new
boiler the system is thoroughly flushed.
New system- For optimum performance after installation, the
boiler and its associated central heating system should also be
flushed.
Flushing shall be carried out in accordance with BS 7593, a
chemical cleanser can be used either Sentinel X300, X400 or
Fernox F3 are suitable.
It is recommended to flush existing systems first before fitting the
new boiler.
• Ensure all cleanser is removed from the whole system before
adding an inhibitor.
For long-term corrosion protection after flushing, an inhibitor
suitable for stainless steel heat exchangers can be used. Either
Sentinel X100 or Fernox F1 inhibitor can be used.
Artificially softened water- BS7593 notes that soft water has
an increased potential for corrosion and this may influence the
choice of corrosion inhibitor. Where water is artificially softened,
it is advisable to feed unsoftened water to drinking water taps.
The boiler primary circuit should only be filled with unsoftened
water.
7.3
Dimensions
470
561
361
890
100
=
=
INSTALLATION