Installation – Glow-worm Ultracom2 35 Store User Manual
Page 31
0020112185_PROTO_13 - 01/11 - Glow-worm
- 29 -
• Activate the Heating and Domestic Hot Water functions.
• Run the appliance for at least 15 minutes, with a heating
temperature set to greater than or equal to 50°C (not
applicable for an installation with underfloor heating).
• Vent air from each radiator again until the water flows
normally, then close the vents.
b
Verify that condensates drain correctly via the flexible
pipe. If not, prime the siphon by pouring a ¼ litre of
water down the combustion products
flue outlet
.
• If you have difficulties in removing the air, launch the air-
removal programs in the heating circuit (see the chapter
("Technical settings for the appliance and list of parameters").
• Make sure that the pressure indicator shows a value of 0.8
bars; otherwise, fill the appliance again.
12.5 Initial lighting
12.5.1
Control
i
The combustion for this appliance has been checked,
adjusted and preset at the factory for operation on
natural gas (G20) as defined on the appliance data
label.
No measurement of the combustion is necessary.
Should the appliance require to be converted to LPG
gas ensure you follow the gas conversion section
before lighting the boiler.
• Check that the appliance has been installed in accordance with
the instructions.
• Check the integrity of the flue system and flue seals.
• Check the integrity of the appliance combustion circuit and
relevant seals.
• Check that all internal/external controls are calling for heat.
• Check that the gas service isolation is open.
• To adapt the appliance to another type of gas, see chapter
"LPG conversion".
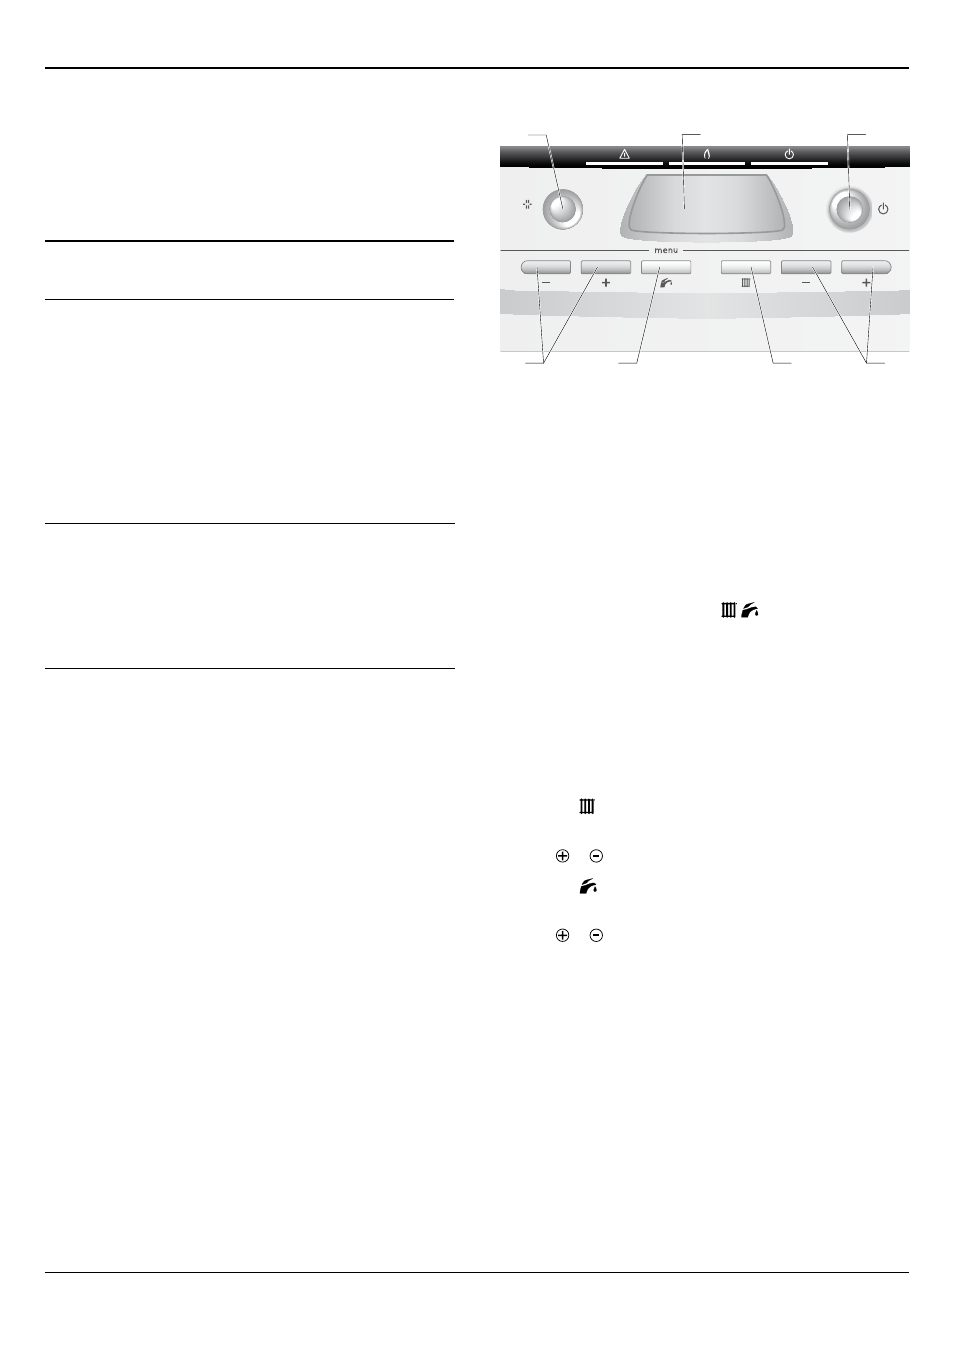
12.5.2
Adjusting the temperature
reset
7
1
3
2
4
5
6
Key
1 Reset button
2 Display
3 On/Off button
4 Heating temperature controls (+/-)
5 Central Heating function button/Indicator
6 Domestic hot water function button/Indicator
7 Domestic hot water temperature controls (+/-)
• Light the appliance by following the procedure below.
• Select the "Heating + domestic hot water" function by pressing
the “Central Heating Function Button/Indicator and Domestic
hot water Function Button/Indicator” buttons repeatedly to
scroll through your options until are shown.
The appliance will enter a self checking routine, then the fan
will start and the ignition sequence commence. The boiler, if
necessary, will automatically repeat the ignition sequence a
further 4 times.
If the burner fails to ignite “F28” will be displayed, initially, this
may be due to air in the gas supply line. Press the reset button.
Do not use the reset button to purge the installation - never press
reset more than 3 times.
• Press the Central Heating Function Button/Indicator button
and the factory setting temperature will be displayed.
• Press or buttons to adjust.
• Press the Domestic hot water Function Button/Indicator
button and the factory setting temperature will be displayed.
• Press or buttons to adjust.
• Open a hot water tap, the display will indicate the domestic
hot water temperature.
• Check that hot water is available at all taps, then close.
INSTALLATION