Before operation, Sehing the clock, 1 press the ii set button – Aiwa NSX-V9000 User Manual
Page 6: 2 press the down or up button to, Designate the hour, 3 press the ii set button to set the hour, 4 press the down or up button to, Designate the minute, Before operation setting the clock, Before operation sehing the clock
Attention! The text in this document has been recognized automatically. To view the original document, you can use the "Original mode".
BEFORE OPERATION
SEHING THE CLOCK
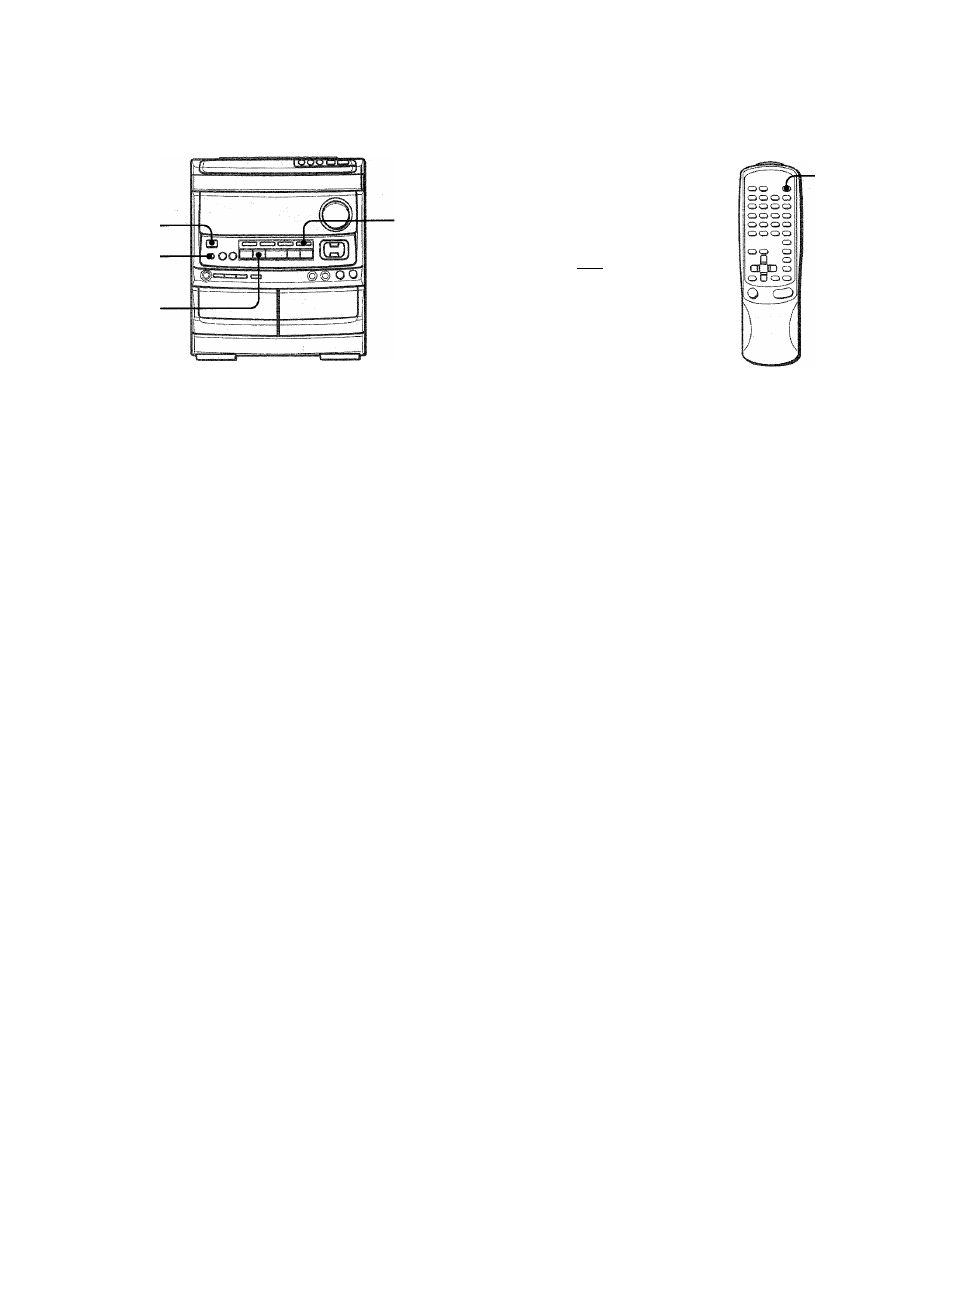
POWER
DEMO
■CD
To turn the unit on
Press one of the function buttons (TAPE, TUNER, VIDEO/AUX,
CD).
Playback of the inserted disc or tape begins, or the previously
tuned station is received (Direct Play Function).
The POWER button is also available.
The disc compartment may open and dose to reset the unit.
DEMO (Demonstration) mode
When the AC cord is connected for the first time, the display
window demonstrates the functions of the unit. When the power
is turned on, the DEMO display is overridden by the operation
display. When the power is turned off, the DEMO mode Is
restored.
To cancel DEMO mode
Press the DEMO button. To reenter, press again.
Illumination guides
Whenever the AC cord is connected or one of the function buttons
is pressed, the buttons for that operation light up or flash.
Example: When the AC cord is connected, the
II
SET button
flashes as a guide to setting the current time.
Flash windows
The windows on the top of the unit and the cassette decks light
up or flash while the unit is being powered on.
To turn off the light of the top window, press the ■ button while
pressing the CD button. To turn back on, repeat the above.
To turn off the light of the cassette decks, press the ■ button
while pressing the TAPE button. To turn back on, repeat the
above.
After use
Press the POWER button to turn off the power. The display
changes to the clock.
1,3,5
2,4
m
□
oOOt
CLOCK
When the AC cord is connected for the first time, the
II
SET
button flashes.
Set the time as follows while the power is off.
1
Press the II SET button.
The hour flashes.
2
Press the
DOWN or
UP button to
designate the hour.
3
Press the II SET button to set the hour.
The hour stops flashing and the minute starts flashing.
4
Press the
DOWN or
UP button to
designate the minute.
5
Press the II SET button to set the minute and
compiete setting.
The minute stops flashing on the display and the clock starts
from 00 second.
To correct the current time
Press the POWER button to turn the unit off. Press the II SET
button and carry out steps 1 to 5 above.
To display the current time
Press the CLOCK button on the remote control. The clock is
displayed for 4 seconds.
However, the time cannot be displayed during recording.
To switch to the 24-hour standard
Press the CLOCK button on the remote control and then press
the ■ button within 4 seconds.
Repeat the same procedure to restore the 12-hour standard.
If the clock display flashes while the power is off
This is caused by a power interruption. The current time needs
to be reset.
If power is interrupted for more than approximately 24 hours, all
settings stored in memory after purchase need to be reset.
ENGLISH