Ariens 929001 User Manual
Page 19
Attention! The text in this document has been recognized automatically. To view the original document, you can use the "Original mode".
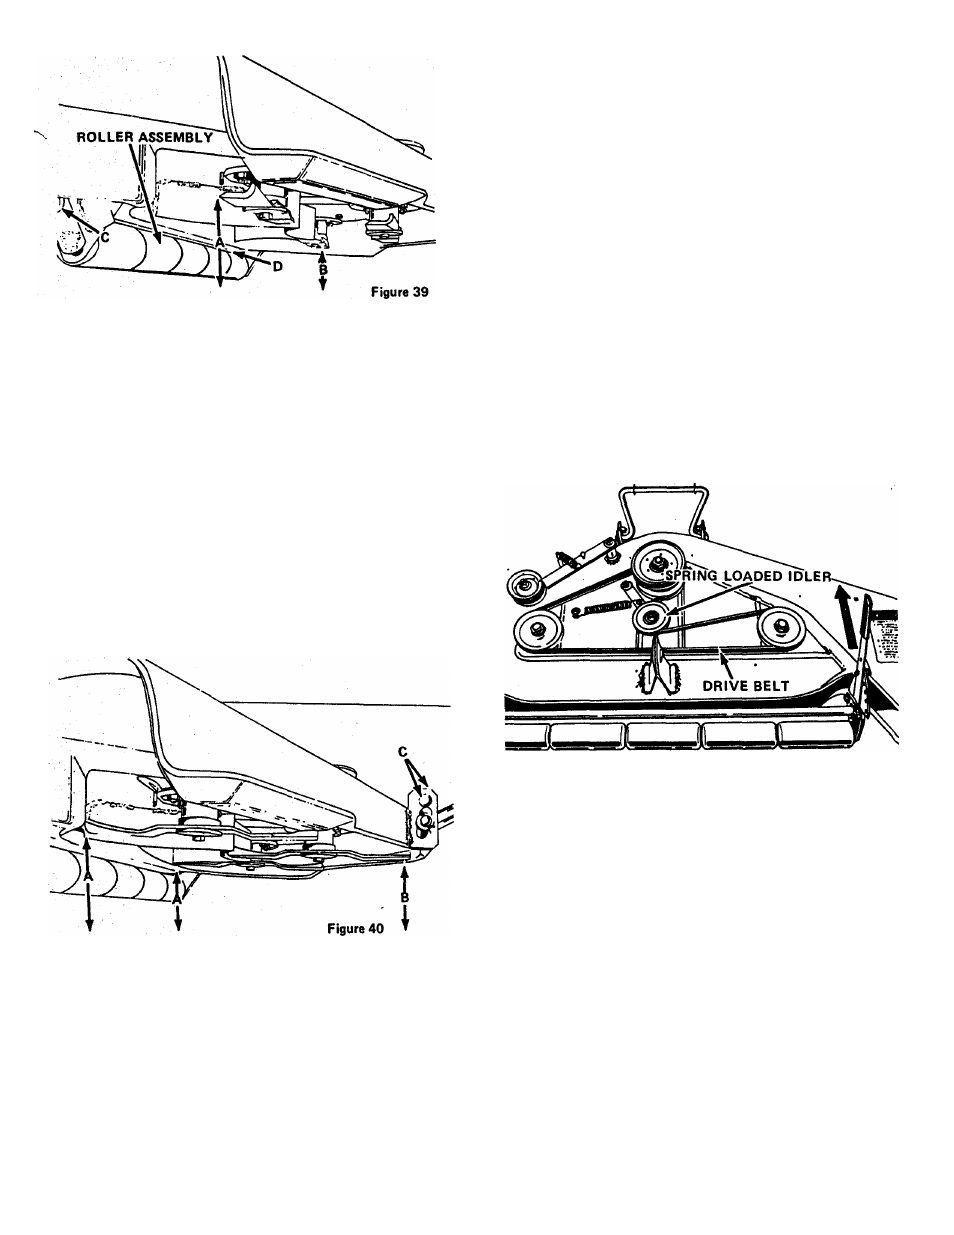
NOTE: If there are any indications of damage to the mower
deck, blades or blade spindles, measure the blade tips at A and
B, then rotate the blades 180 degrees and measure the oppo
site blade tip ends. If the measurements vary more than 1/8"
on any blade, see yourAriens dealer for service. If the variation
is not excessive, level the mower using the lowest measurement
from blade tip to ground at A and B.
6. Tighten roller assembly mounting bolts securely.
7. Rotate the blades until they are perpendicular to the roller
assembly as shown in Figure 40.
8.
Measure distances A (from both outboard tips to the
floor). Then measure distance B. The front blade tip
(distance B) should be 1/8" less than the rear blade tip
(distance A). Loosen both front support mounting bolts
C and pivot front of mower "up" or "down" until the
front blade tip B is 1/8" closer to the floor than the rear
blade tips A.
CUTTING HEIGHT
The cutting height is adjustable to any of six different
positions by moving the cutting height adjustment lever shown
in'* Figure 37. Raise the lever to decrease cutting height.
Lower the lever to increase cutting height.
MOWER DRIVE BELT REPLACEMENT
Constant tension is maintained on the drive belt by a spring-
loaded idler. Therefore, belt adjustment is not required.
Figure 41 shows the correct belt rotating (with shield re
moved) in case it ever becomes necessary to replace a worn or
damaged belt.
MOWER BLADE CARE
Blades should be kept sharp and tightly mounted at all
times. They can be sharpened on the mower with a file or re
moved and sharpened on a grinding wheel.
IMPORTANT:
ALWAYS FOLLOW THE ORIGINAL
CUTTING
EDGE
BEVEL
WHEN
SHARPENING
THE
BLADES
AND
SHARPEN
BOTH
ENDS
EVENLY
TO
MAINTAIN PROPER BALANCE!
Special "cupped" washers help protect the mower by
allowing the blade to slip on the spindles if a solid object is
struck.
NOTE: WHEN REPLACING A BLADE, ALWAYS INSTALL
THE
SPECIAL
"CUPPED"
WASHER
WITH
THE
CON
CAVE SIDE FACING THE BLADE AND TIGHTEN THE
BLADE MOUNTING BOL TS TO 50-60 FT-LBS TOROUE.
FIGURE 41
STORING THE MOWER
The following maintenance is recommended at the end of
each mowing season.
1. Remove mower from the tractor using the procedure out
lined in this manual.
2. Remove all buildup of material under the deck.
3. Remove rust from any exposed metal and cover the areas
with paint or a light coat of oil.
4. Store the mower in a dry place.
OPTIONAL EQUIPMENT - MULCHING KIT
An optional mulching kit is available for the 36 RM
Rotary Mower. This kit can be used when grass or leaves are
to be finely chopped and discharged into the stubbie under
mower deck rather than through the discharge opening.
Page 19