9 bellcrank and slider, Handelbars and controls – Ariens 924 User Manual
Page 15
Attention! The text in this document has been recognized automatically. To view the original document, you can use the "Original mode".
Handelbars and Controls
2.8 Mechanical Interlock Adjustment
A
WARNING: With improper usage of unit,
failure
of
interlock
if
unnoticed,
could
result in severe personal injury.
1
.
2.
3.
Setscrew
Traction Clutch Clevis
Slider
Check interlock by pressing down on clutch levers
(engaging both clutches). Remove hand from
attachment clutch lever, attachment clutch should
remain engaged until traction clutch lever is re
leased then both clutches must disengage.
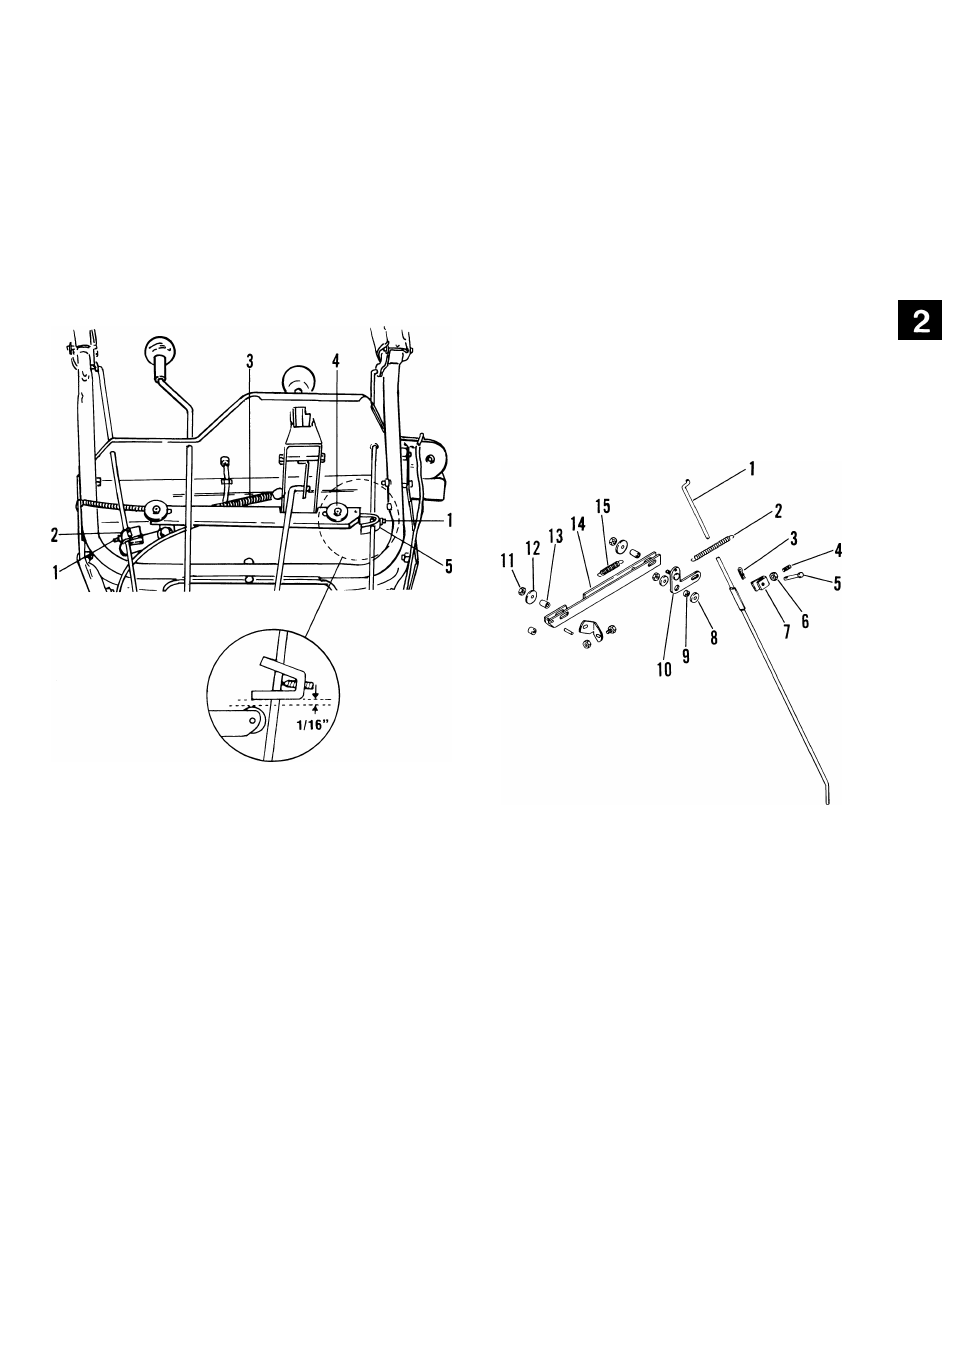
2.9 Bellcrank and Slider
Remove nut and washer holding bellcrank to upper
handlebar panel.
Remove nut and washer holding slider to upper
handlebar panel and disconnect spring from upper
panel.
4. Roller
1. Attachment Clutch Rod 9.
Spacer Bushing
5. Attachment Clutch Clevis
2. Extension Spring
10. Bellcrank
3. Hair Pin
11.
Lock Nut
Figure 2-7: Interlock
4. Setscrew
12. Washer
5. Clevis Pin
13. Bushing
6. Jam Nut
14. Slider
With traction clutch lever "UP" (disengaged) loosen
clevis set screw on traction clutch rod, pull clevis
7. Clevis
8. Washer
15. Extension Spring
down until slider is at end of slot and tighten set
screw.
Figure 2-8: Bellcrank and Slider
Engage both clutch levers "DOWN", loosen clevis
set screw on attachment clutch rod and slide clevis
to clear roller on slider by 1/16 inch. Tighten set
screw with leg of clevis parallel to slider.
Remove slider assembly and check all parts for
replacement or repair.
NOTE:
Be sure to check bushings and spacers for
wear.
Assemble, using reverse procedure.
2-7