Handelbars and controls – Ariens 924 User Manual
Page 14
Attention! The text in this document has been recognized automatically. To view the original document, you can use the "Original mode".
2.6 Clutch Yoke and Fork
Handelbars and Controls
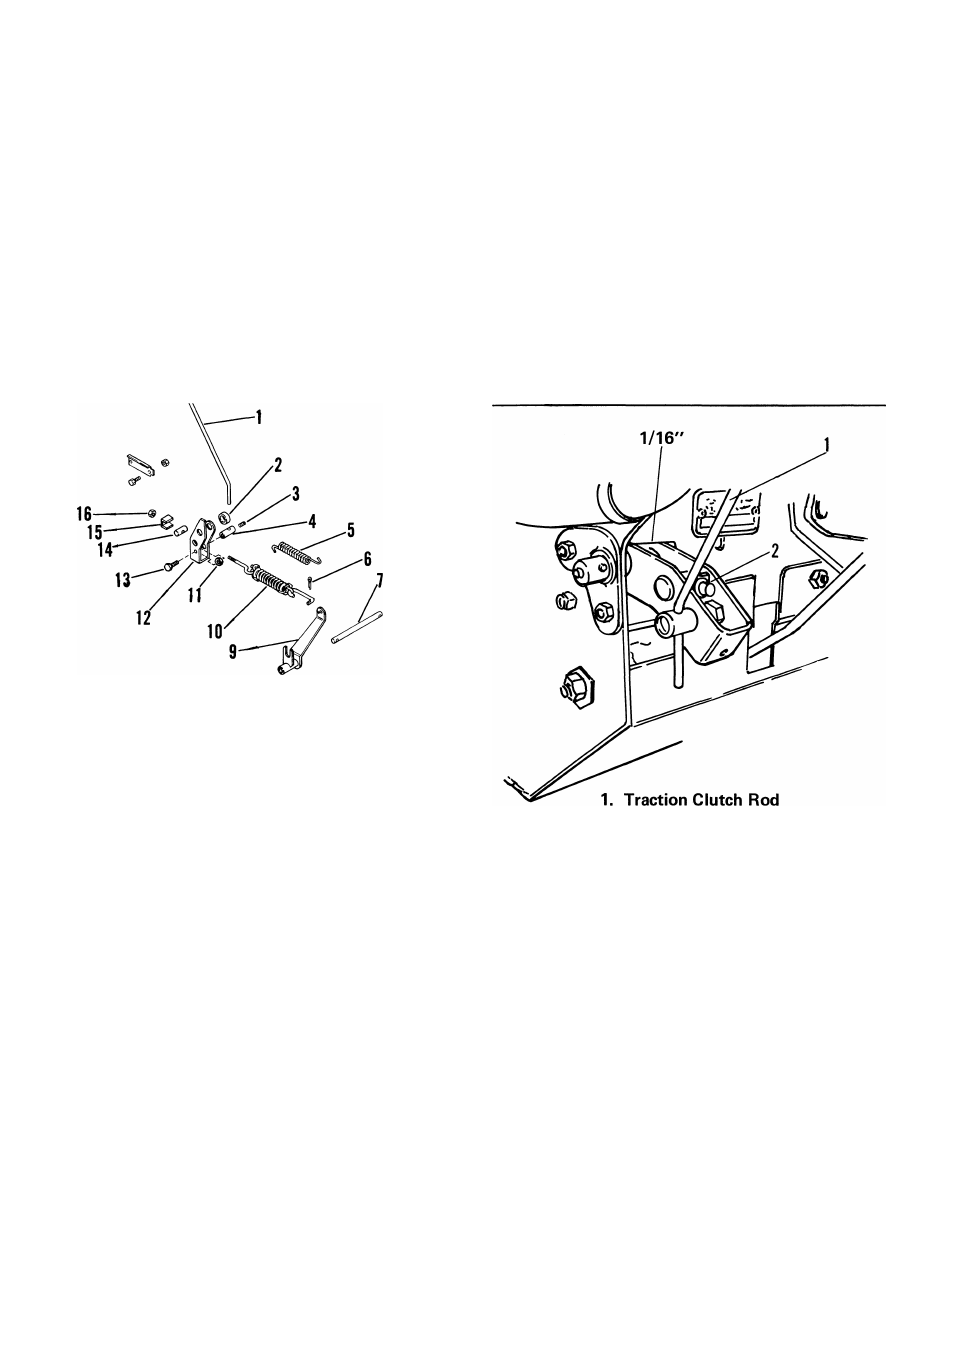
2.7 Traction Drive Clutch Adjustment
Remove locknut and adapter spacer holding spring
assembly in clutch yoke.
Remove capscrew, nut and rod adapter from yoke.
Remove cotter pin from end of spring assembly
in clutch fork and remove spring assembly and
extension spring.
1. Traction Clutch Rod
9. Clutch Fork
2. Spacer
10. Spring Assembly
3. Setscrew
11. Nut
4.
Rod Adapter
12. Clutch Yoke
5.
Extension Spring
13. Capscrew
6. Cotter Pin
14. Adapter
7.
Fork Pivot Rod
15. Adapter Spacer
8. Cotter Pin
16. Lock Nut
Figure 2-5: Clutch Yoke and Fork Assembly
Punch out roll pins holding fork pivot rod in frame
and remove rod and clutch fork.
Check parts for wear or replacement.
Assemble, using reverse procedure.
A
A
WARNING:
Gasoline
is
highly
flammable
and its vapors are explosive. Handle with
care. Never allow smoking materials, sparks
or
flame
(match,
pilot
light,
etc.)
near
equipment or fuel container.
CAUTION: When unit is tipped up onto
housing remove enough fuel so that no
spillage will occur.
2. Adjustment Nut
Figure 2-6: Traction Drive Clutch
Adjust traction clutch to compensate for wear of
friction wheel when slippage occurs.
To adjust traction clutch, place speed selector in
First (1) and tip machine forward onto housing.
With traction clutch disengaged turn wheels while
tightening adjustment nut, at clutch yoke, until
wheels begin to drag. Engage and release traction
clutch to align clutch linkage. Repeat procedure as
necessary. When wheel drag is obtained with linkage
aligned, turn nut back three turns. Wheels will then
turn freely.
2-6