Cross stitch |3 – Sears KENMORE 385.1915 User Manual
Page 85
Attention! The text in this document has been recognized automatically. To view the original document, you can use the "Original mode".
Cross Stitch |3^
SECTION 5. LEARN THE STITCHES
You can make beautiful designs with this
embroidery stitch pattern, m half the time
it would take if embroidered by hand. You
can also combine cross stitches with the
other decorative patterns and letters or
numbers for attractive samplers and other
sewing projects.
1.
2
.
3.
Choose a plain close weave fabric such as linen or
wool flannel for the background fabric.
If you choose light weight fabric, use a tear away
fabric backing for support.
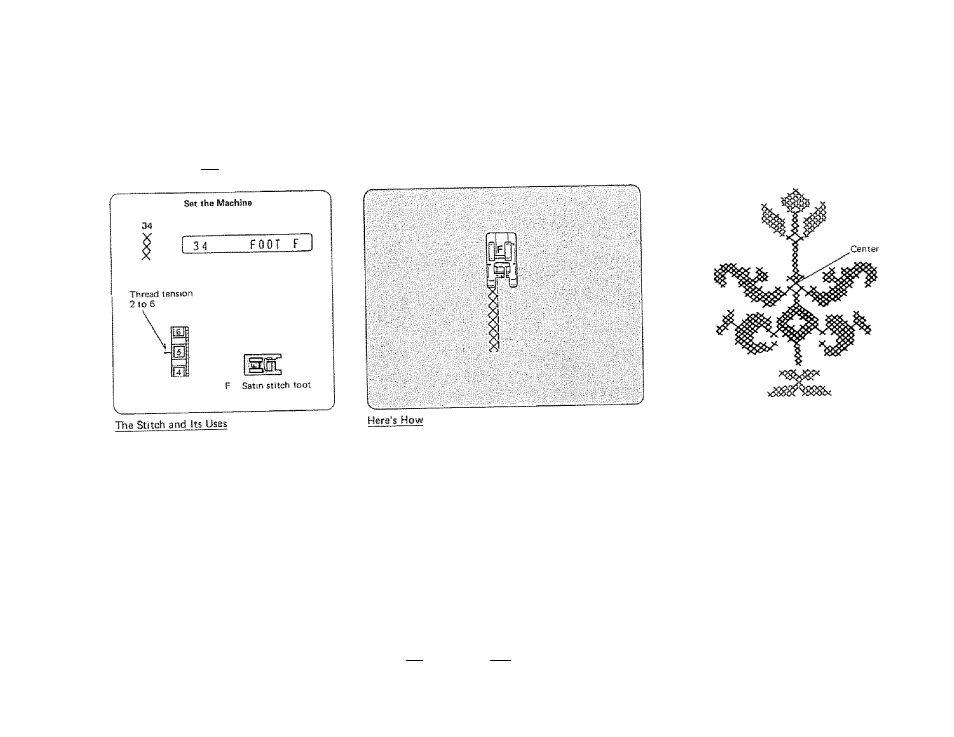
Adlust the stitch width and length as you desire to
match the pattern you have or plan.
4. Find the center of the design, or if the design is a
border, choose a starting point.
5. Count the cross stitches from the center up and
program the number.
(See p. 90, Pattern Sirtgle Units.)
Use Auto-Lock to begin and end.
For example: For 2 cross stitches.
r®l
34 [Mii]
For Cross-Stitching Without a Pattern:
1. Start in the center of the design and sew the
first row, letting the fabric feed naturally.
2. Then count the next row of stitches to the
left or right.
3. Add or delete stitches by pressing the Clear
button and reprogramming.
4. Begin each row by lowering the needle at the
corner of a previous stitch.
5. Use the placement arrow " A " on Foot F to
insure straight, even rows.
MEM
83