Figure 4 – Tuffy Security 173 User Manual
Page 5
Page 5 of 8 – 12/20/06 – Rev 11/4/13
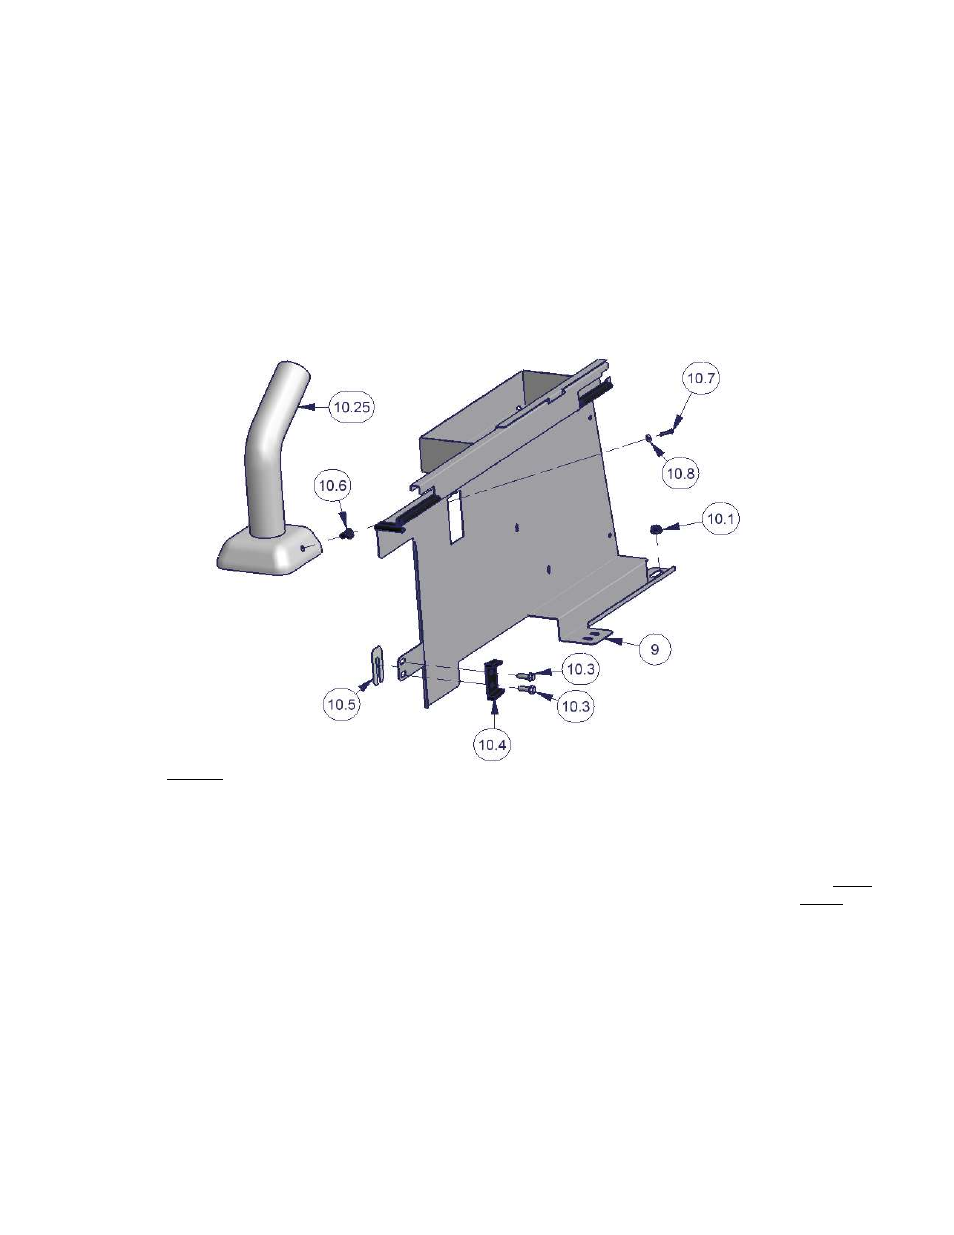
11. 4-door models only - Unfasten the two rear original factory nuts #10.1 on the rear seat mounting brackets. The two
front nuts do not need to be removed. Save this hardware you will reuse it. (See Figure 4 & 5 shows the location
when reinstalling this hardware)
12. Install the left side panel #9 by pressing the well nut #10.6 into the hex shaped hole that is located under the carpet at
the base of the roll bar mount #10.25. The carpet will need to be cut. Then fasten using bolt #10.7 and washer #10.8
through the obround hole in the #5 Bracket. (See Figure 4)
13. Fasten the left side panel #9 to the original door alignment mounting points. The door alignment spacer #10.5 should
be first then the left side panel #9 with the door alignment block #10.4 next and fasten all with the original mounting
hardware #10.3. Align the bracket by not fully tightening the screws then shutting the rear door to align the bracket
then fully tighten and check the door operation. (See Figure 4)
14. 4-door models only - Fasten the front of the left side panel #9 to the studs on top of the original seat mounting
bracket using the original nuts #10.1. (See Figure 4)
Figure 4
15. All models without subwoofer - Install the right side panel #8 by pressing a well nut #10.6 into the hex shaped hole
that is located under the carpet at the base of the roll bar mount #10.25. Also, remove the rubber plug and press a
well nut #10.6 into the hex shaped hole that is located under the carpet on the floor. The carpet will need to be cut.
Then fasten the right side panel #8 and #5 Bracket to both of these well nuts using bolts #10.7 and washers #10.8.
(See Figure 5)
16. All models with subwoofer – Position the original subwoofer #10.23 so the bottom front mounting flange is under
the bottom flange on the right side panel #8. Position the top mounting flange on the subwoofer #10.23 on top of the
right side panel #5 Bracket. Then fasten using the original nuts #10.2. (See Figure 5)
17. 4-door models only - Fasten the front of the right side panel #9 to the studs on top of the original seat mounting
bracket using the original nuts #10.1. (See Figure 5)