Figure 2a – Tuffy Security 173 User Manual
Page 3
Page 3 of 8 – 12/20/06 – Rev 11/4/13
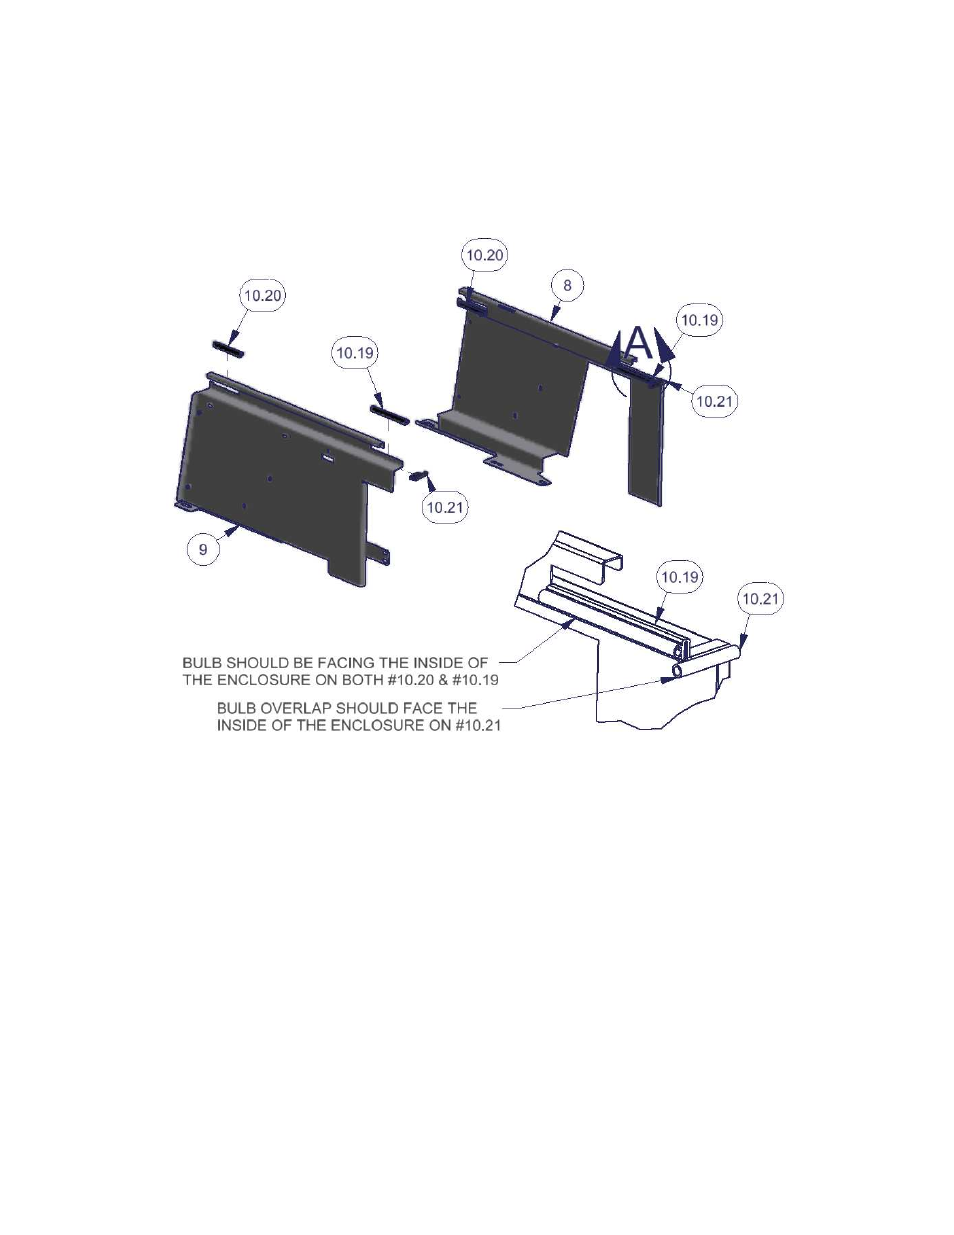
4. Install the pre-cut trim seal #10.20 and #10.19 on both sides #8 and #9 as illustrated with the bulb facing the inside of
the enclosure assembly. (See Figure 2a)
5. Install the pre-cut trim seal # 10.21 on both sides #8 and #9 with the bulb overlap protruding toward the inside of the
enclosure assembly. (See Figure 2a)
Figure 2a
6. Install the #5 Brackets to the #8 and #9 sides. The slotted holes in the #5 Brackets should be towards the outside of
the enclosure. The #5 Brackets should be mounted to the inside face of the #8 and #9 sides as illustrated. The #5
Bracket will pass through the slot in the #9 side. (See Figure 2b)
See also other documents in the category Tuffy Security For the car:
- 082 (2 pages)
- 089 Manual (3 pages)
- 089 Installation Manual (1 page)
- 101 (2 pages)
- 073 (3 pages)
- 198 (2 pages)
- 189 (1 page)
- 292 (2 pages)
- 282-BTL (1 page)
- 137 (2 pages)
- 295 (3 pages)
- 862 (2 pages)
- 863 (3 pages)
- 311 (2 pages)
- 312 (2 pages)
- 046 (3 pages)
- 145 (4 pages)
- 131 (2 pages)
- 297 (3 pages)
- 296 (3 pages)
- 240 (10 pages)
- 238 (2 pages)
- 058 (3 pages)
- 219 (2 pages)
- 195 (2 pages)
- 144 (2 pages)
- 274 (10 pages)
- 139 (3 pages)
- 157 (10 pages)
- 052 (2 pages)
- 164 (1 page)
- 104 (1 page)
- 043 (1 page)
- 027 (2 pages)
- 035 (2 pages)
- 108 (2 pages)
- 149 (2 pages)
- 049 (2 pages)
- 036 (2 pages)
- 160 (3 pages)
- 289 (2 pages)
- 287 (3 pages)
- 283 (3 pages)
- 309 (2 pages)
- 182 (2 pages)