Main setup screen, Master screen, Isobus job computer : ic18 spreader european – TeeJet IC18 SPREADER JOB COMPUTER User Manual
Page 12
8
www.teejet.com
OVER
VIE
W
SE
TUP
APPENDIX
GE
TTING ST
AR
TED
OPER
ATION
ISOBUS Job Computer : IC18 Spreader European
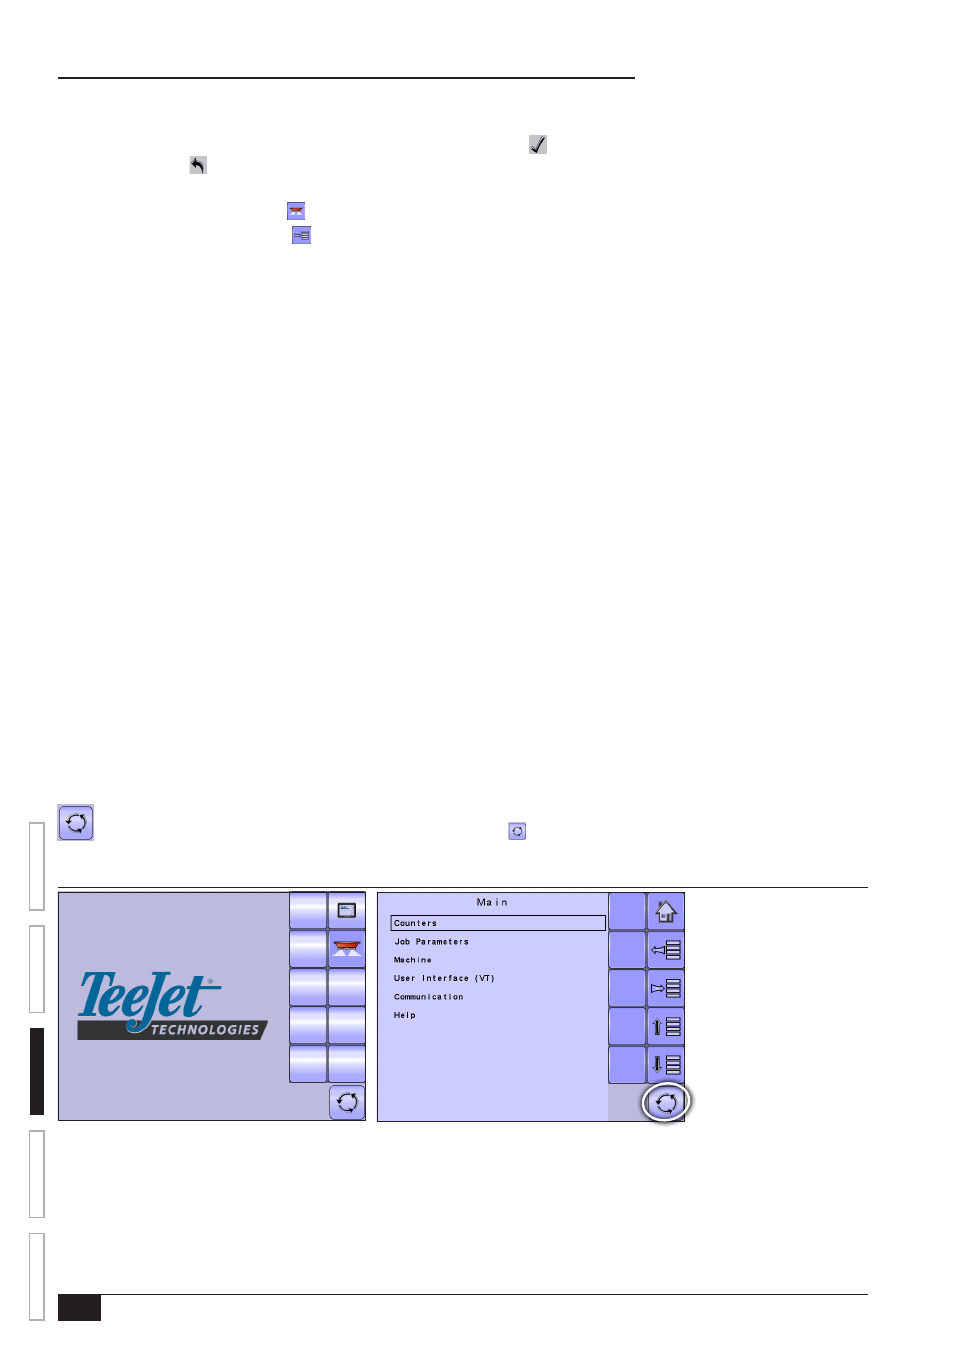
Main Setup Screen
NOTE: Settings are NOT automatically saved when selected. The ACCEPT KEY must be selected to save the setting. Select the
ESCAPE KEY to escape without saving settings and return to the previous menu.
To access the Main Setup screens:
1. Select IC18 JOB SPREADER KEY from the Master Screen.
2. Select MAIN SETUP SCREEN KEY from the Home Screen.
3. Select from:
►Counters – used to provide an overview of various system counters:
◄ Trip – used to display information regarding area, distance, time and amount applied.
◄ Campaign – used to display information regarding area, amount applied and time for all trips
◄ Total – used to display information regarding area, amount applied, and time for all activity
◄ Export Counters – allows counter information to be exported in HTML or CSV format
►Job Parameters – used to configure application settings including trip counter, application rate, tonnage, gate height and density:
►Machine – used to configure machine settings:
◄ Filling – establishes the amount of material remaining in the tank.
◄ Operation – establishes Speed Source, and Simulated Speed
◄ Implement Parameters – establishes the Working Width, Fast Empty Bed RPM and Master Switch location
◄ Calibrations – establishes either manual or automatic settings of the sensors
◄ Alarm Configurations – establishes alarms on or off as well as sets their trigger level
◄ OEM – the OEM setup menu is password protected and the settings in this menu are directly related to the fitted OEM
equipment. Refer to the OEM Setup Manual for information regarding OEM settings.
►User Interface – used to allow the operator to select the system virtual terminal (VT) if more than one VT is available on the ISOBUS
CAN:
►Communication – used to establish the IC18's ability to communicate with an external computer:
►Help – allows the operator to choose between Diagnostics and the About screen:
◄ Diagnostic – used to troubleshoot input/output of the controller (sensor or actuator).
◄ About – used to provide information on the console such as software version, build number, etc
NOTE: The menu structure on your display might vary from the one displayed in this User Guide depending on the virtual terminal being
used. This User Guide will display all possible options.
Master Screen
The Master Screen gives access to the systems currently available on your VT.
• To view the Master Screen options, select MASTER SCREEN KEY in bottom right corner of any screen.
Figure 3-3: Master Screen
Master Screen Key on Main Setup Screen