Connect the co, Supply to the incubator, Installation (continued) – Shellab SCO6AD User Manual
Page 14: Onnect the, Upply to the, Ncubator
14 |
P a g e
INSTALLATION (CONTINUED)
C
ONNECT THE
CO
2
S
UPPLY TO THE
I
NCUBATOR
Note: Always use medical grade CO
2
. Use of non-medical grade CO
2
risks introducing
contaminants into the chamber, may damage the incubator,
and will void the incubator’s
warranty. Failure to use the in-line HEPA filter also voids the warranty.
Always install the in-line HEPA filter (Part Number 2800525) provided with the SCO6AD tubing
kit between the gas source and the incubator. The filter is directional. Make sure that it is installed
correctly for the flow direction (see page 41). Failure to install the filter will decrease the lifespan of
the SCO6AD, and risks allowing contaminants into the incubation chamber.
During normal operations the incubator uses only small quantities of CO
2
. Precise regulation of the
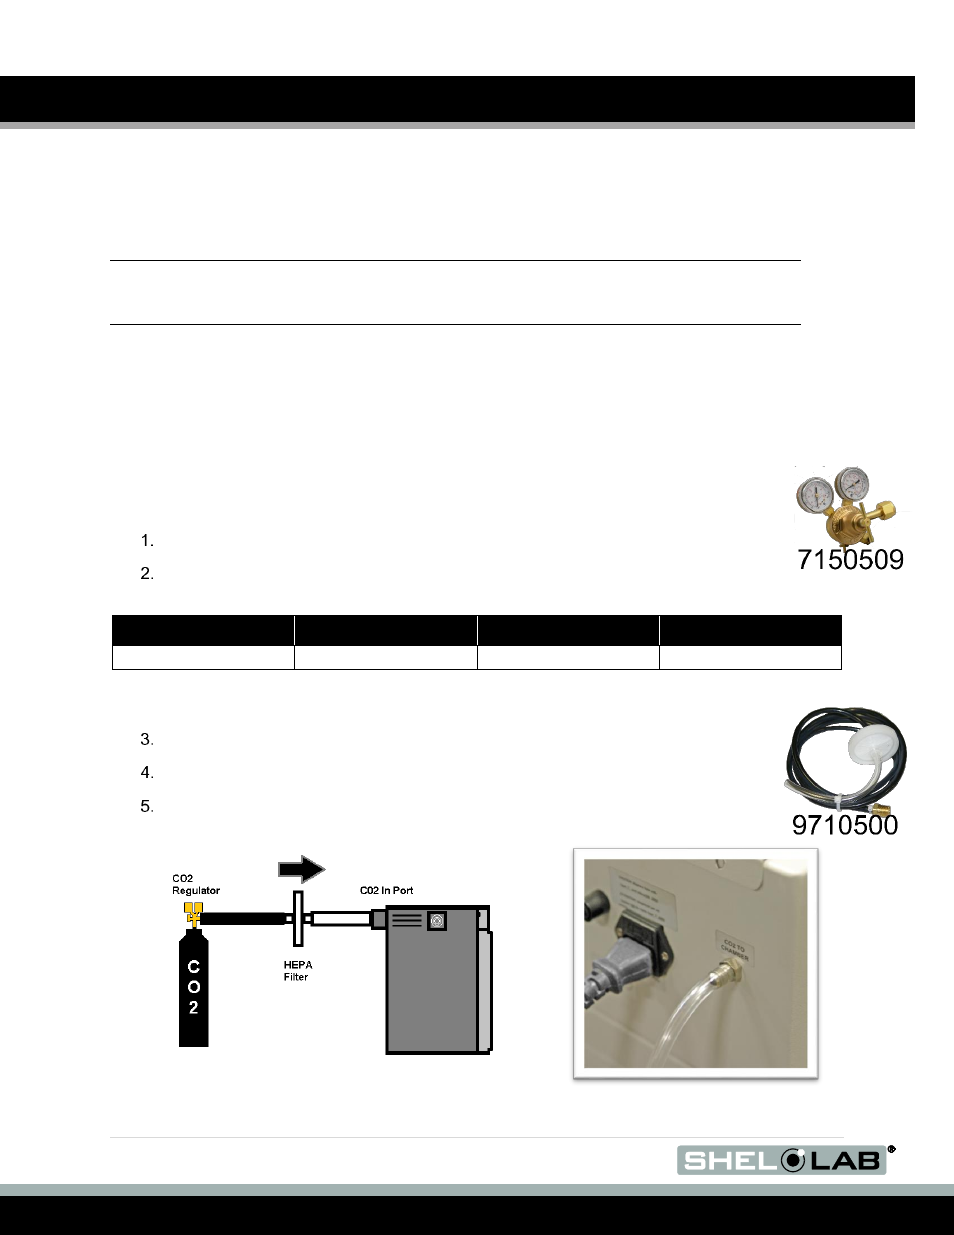
gas input flow is vital for the incubator performance. Always use a two-stage CO
2
pressure
regulator. Some single-stage regulators have 2 gauges. Make certain your regulator is a two-
stage regulator.
Connect the CO
2
regulator to a medical grade CO
2
cylinder or source.
Set the CO
2
cylinder regulator or wall source regulator to 15 - 20 Pounds per Square
Inch (psi). Do not exceed 20 psi.
PSI
Megapascals
Kilopascals
Bar
15 - 20 psi
0.103 - 0.137 Mpa
103.42 - 137.89 Kpa
1.03 - 1.378 bar
Pressure Units Conversion table
on page 43 in the Unit Specifications section for
the formulas for converting psi into other units of pressure measurement.
Attach the black 1/8 OD tubing of the tubing kit to the regulator or wall source.
Attached the clear 5/16 OD to the CO
2
In Port on the back of the incubator.
Do not open the regulator the CO
2
incubator at this time.