PRG Mbox Remote Manual 3.9 User Manual
Page 96
90
MBOX
®
REMOTE USER MANUAL
Step
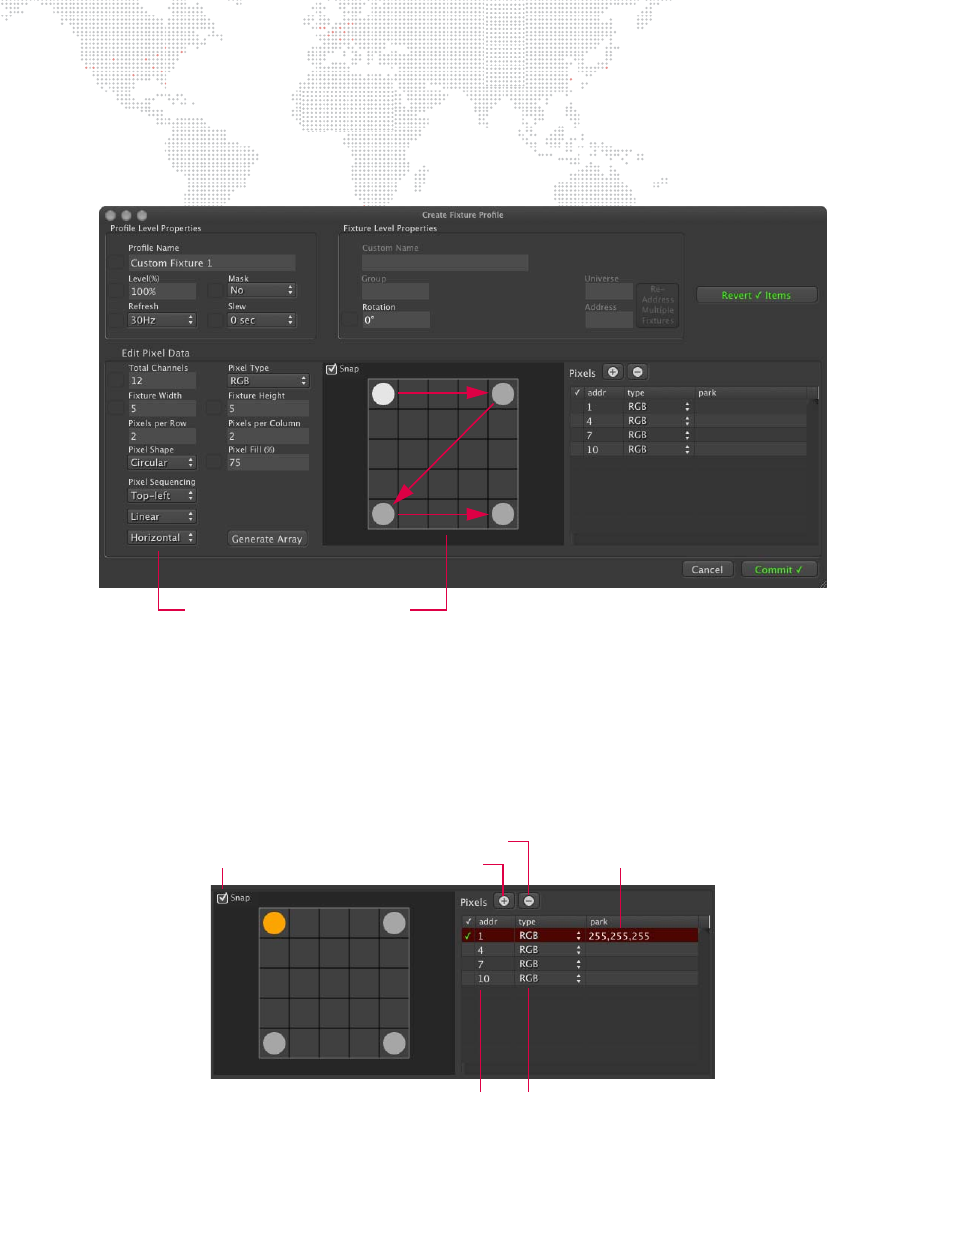
3. Enter necessary values/properties for the pixels in the fixture. (Refer to the explanations and guidelines
above.) All active pixels must be of the same type to begin with, but can be changed in a later step (see
below).
Step
4. Click Generate Array button to create the initial arrangement of pixels.
Step
5. Once the initial array has been created, various properties can be changed:
a.
Layout of the pixels (snap or arbitrary).
b.
Pixel addressing within the profile’s total channel count (address field).
c.
Pixel types (using the type pop-up menu).
d.
Park values can be assigned and additional pixels can be added (parked pixels or extra color pixels) by
clicking the [+] button. (For complete instructions on park values, refer to
e.
Pixels can be removed by selecting a pixel and pressing the [-] button.
Step
6. Press the Commit button to accept the entered info and create the profile.
1
2
3
4
The sequencing pattern in the array is
determined by the Pixel Sequencing settings
Enables Snap-To-Grid
Pixel Address
Parked Pixel
(Red=255, Green=255, Blue=255
would output a solid white pixel)
Add Pixel
Delete Pixel
Pixel Type