Neuspeed 49.10.95 User Manual
Page 10
28. Reconnect battery. Re-install upper front strut tie-bar.
29. Clean front plastic radiator cover, and apply your
NEUSPEED Exemption Plate, and Belt Path routing decal. Then
apply the supplied Premium Fuel Only decals to fuel door and
over factory lettering on fuel gauge.
30. Clean area, align carefully and apply NEUSPEED
Supercharger badge to rear hatch, trunk lid or your preference.
31. When you receive your ECU, re-install in reverse of
disassembly, and reconnect battery cable. DO NOT START
ENGINE YET! Turn ignition key to ON position, wait for 30-
seconds and then you can start engine. The throttle body
MUST be given time to adapt to the ECU.
32. Double-check complete installation, tightness of all nuts and
bolts, and TEST DRIVE CAREFULLY!
33. NOTE: If you do not have a full tank of premium fuel, drive
under very low boost until your tank is just about empty and fill
with premium fuel. Maximum boost can now be used.
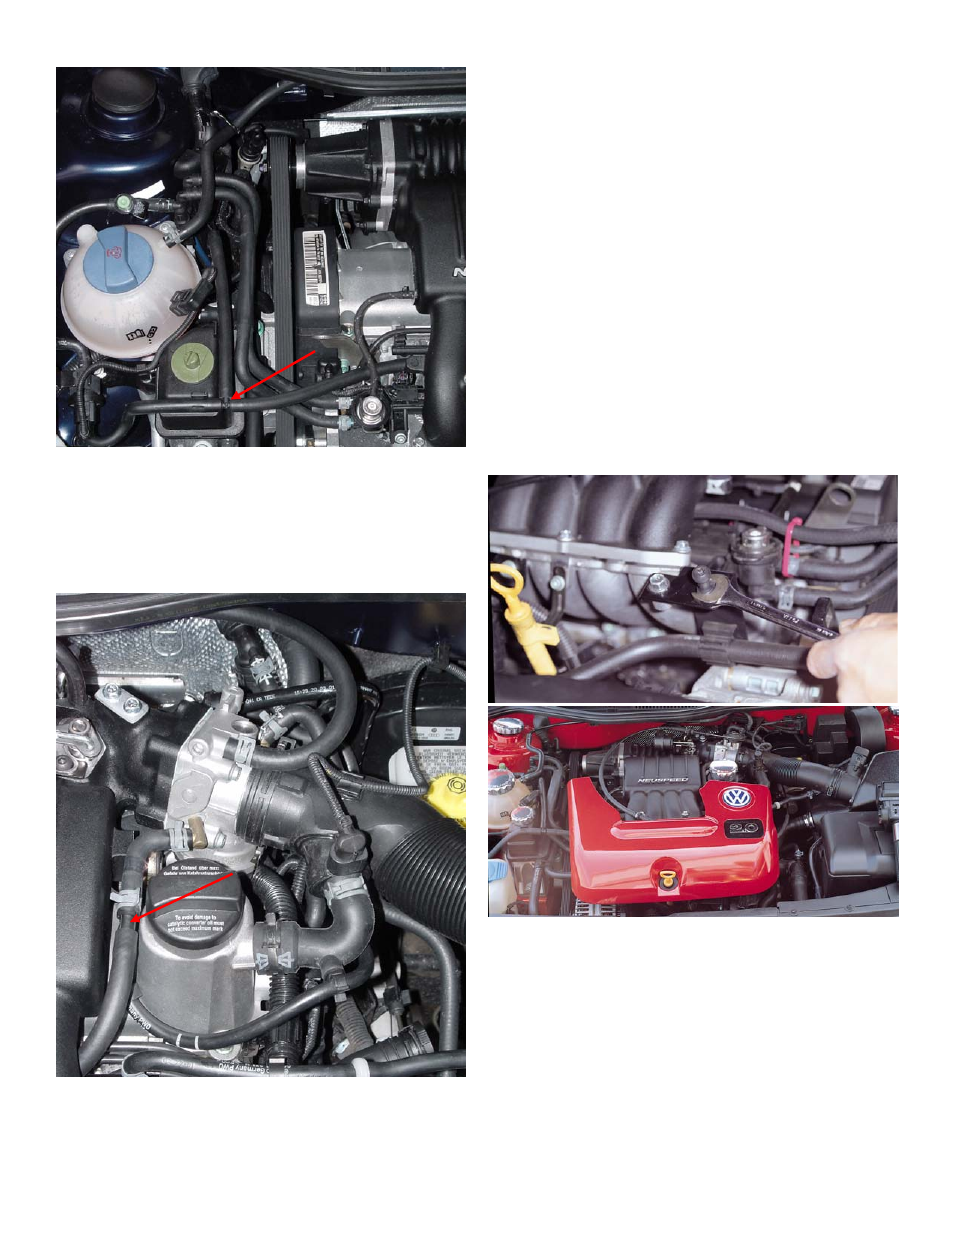
27A. Cut hose leading from intake manifold to EVAP purge
valve in area shown (arrow) and pull hose through heat-shrink
sheathing and remove. Insert
5
/
16
” T-fitting to remaining hose
and connect new EVAP hose supplied (
5
/
16
” X 28”) to opposite
end of T-fitting – route hose under Supercharger plenum. Cut off
an 8” section of hose and use this to connect from leak detection
pump fitting (white plastic line) to new T-fitting.
27B. Remove stock T-fitting and 90° rubber hose found on
underside of intake manifold. Connect T-fitting to EVAP hose
and 90° rubber hose to throttle body. Cut small PCV vacuum
hose to length and connect to T-fitting.
ENGINE COVER MODIFICATION/INSTALLATION: If you
want to use the factory engine cover, it’s easy to modify and
install on the Golf and Jetta as shown. The special NEUSPEED
bracket that mounts the factory coolant hose also has a special
threaded insert installed where the factory engine cover mount
would normally screw into. The Golf and Jetta use the factory
ball mount as shown. It’s easy to trim the plastic cover with a
hacksaw, and then file the edges round and smooth. Follow the
shape as shown in the photo. The cover can be used in the factory
finish, or painted to match using standard finishing procedures
for ABS plastic
Page 10