Tail feathers – Great Planes Super Skybolt 60 Kit - GPMA0170 User Manual
Page 7
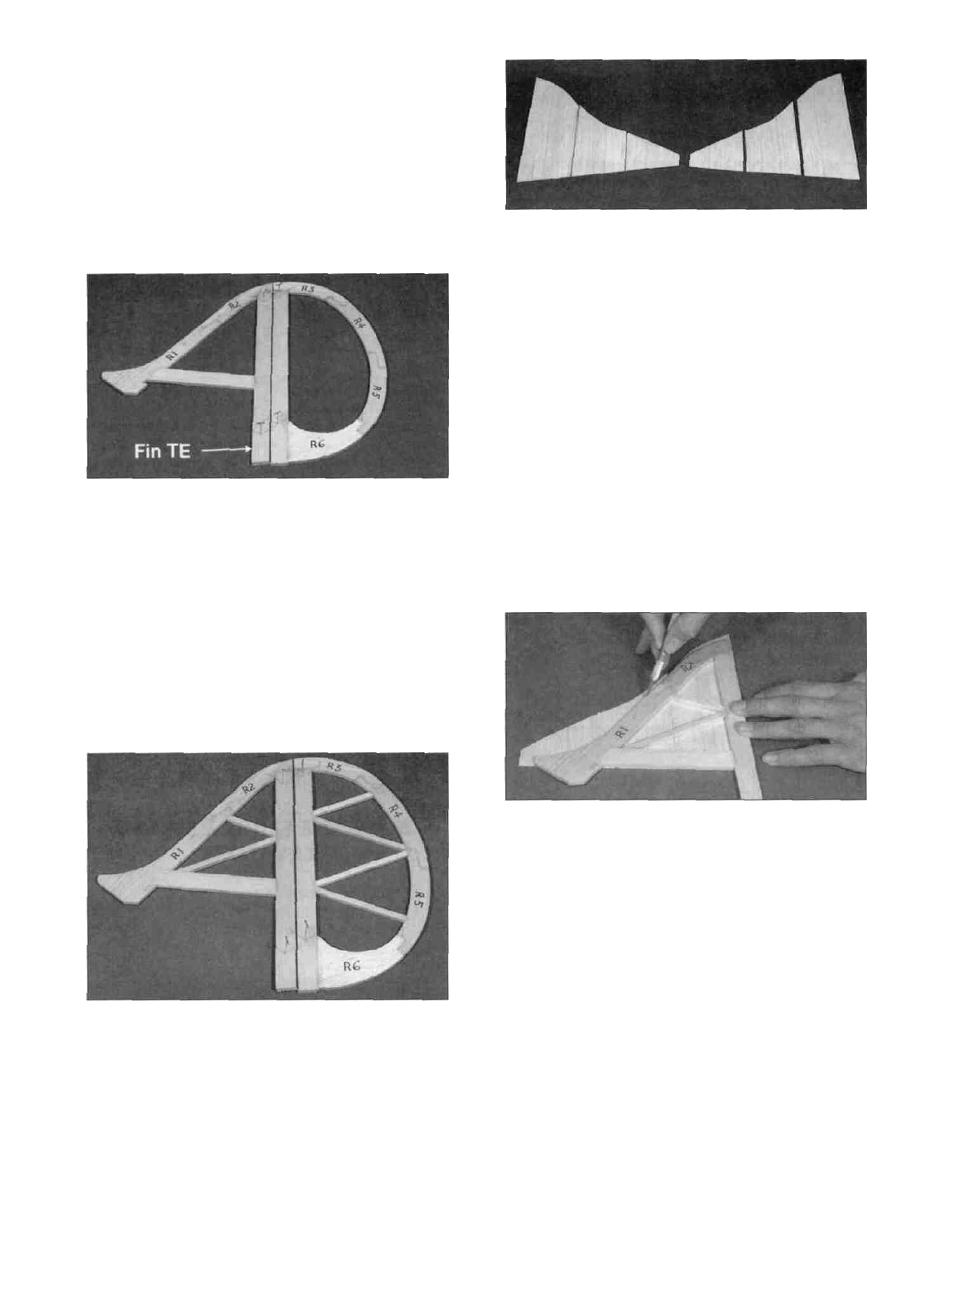
TAIL FEATHERS
BUILD THE FIN AND RUDDER
D 1. Tape the fuselage side view portion of the
plan down onto your flat work surface Tape a
piece of waxed paper over the fin and rudder
portion of the plan.
D 5 Using the plan as a guide, cut 3 pieces of
1/16" x 3" balsa from a 1/16" x 3" x 24" balsa
sheet (SKY6S06) to form the fin sheeting as
shown in the photo Glue these together and
quickly wipe off any excess glue with a paper towel
before it cures Sand both sides smooth and then
cut and sand the correct angle into the bottom of
the sheeting so you don't have to cut it after it's
installed on the fin Make sheeting for both sides of
the fin.
HINT: Use new, sharp sandpaper when sanding
wood with glue joints in it The sharper grit will cut
through the glue much easier and produce better
results than worn out sandpaper
D 2 Working over the plan, cut and assemble the
fin and rudder framework using the die-cut 3/16"
balsa fin and rudder parts (SKY6S01 and
SKY6S02) and the 3/16" x 3/4" x 24" balsa sticks
(SKY6S05) as shown in the photo Sort through
the 3/16" x 3/4" x 24" balsa sticks and pick the
hardest two Use the hardest one later for the
stab trailing edge and use the next hardest one
here for the fin trailing edge Pin the parts in place
over the plan as you assemble them, but be
careful you don't glue the rudder to the fin
D 6 Glue the sheeting to one side of the fin.
Notice that the grain runs vertical on the fin.
Keep the fin flat while attaching the sheeting After
the side sheeting is installed, trim it flush with the
leading and trailing edges of the fin NOTE: Do not
cut through the sheeting and into the
framework. Always cut into the work surface'
D 3. Cut the fin and rudder "ribs" from the 3/16" x
1/4" x 24" balsa sticks (SKY6S04). Glue these in
place with CA.
D 4. Sand both sides of the fin and rudder
smooth with a fine grit sanding block.
D 7 Glue the other side sheeting in place Be sure
the fin is kept flat until the glue cures Trim and sand
the sheeting flush with the leading and trailing
edges of the framework Carve and sand the
leading edge to a nice rounded shape as shown on
the plans, but keep the trailing edge square.
- 7 -