Assemble the fuselage – Great Planes Super Skybolt 60 Kit - GPMA0170 User Manual
Page 12
D D 5. Trial fit a die-cut 1/8" balsa top aft fuse
doubler (SKY6F07) and a die-cut 1/8" balsa
bottom aft fuse doubler (SKY6F08) together.
Sand them slightly if necessary to achieve a good
fit, and glue them together.
ASSEMBLE THE FUSELAGE
D D 6. Test fit the aft fuse doubler half in place
behind the front fuse doubler half. Sand the two
halves if needed to get them to fit together tightly
and match up with the plans. Glue them together
with CA, and sand both sides of the doubler
smooth with a sanding block.
D D 7. Position the doubler on top of the fuse
side and align their bottom and front edges. Glue
the doubler to the fuse side by applying thin CA
around all edges of the doubler, including the
lightning holes. Use plenty of thin CA to allow it to
wick into the joints as far as possible.
D 1. Trial fit the die-cut 1/8" ply formers F3, F4
and F5 (SKY6F10 and SKY6F12) to make sure
they fit into the appropriate slots in both fuselage
sides. If there is any excess glue in any of the fuse
doubler slots, clean it out with a hobby knife. If it is
necessary to trim any of the formers, be sure to
trim both sides of the formers the same amount to
keep them symmetrical.
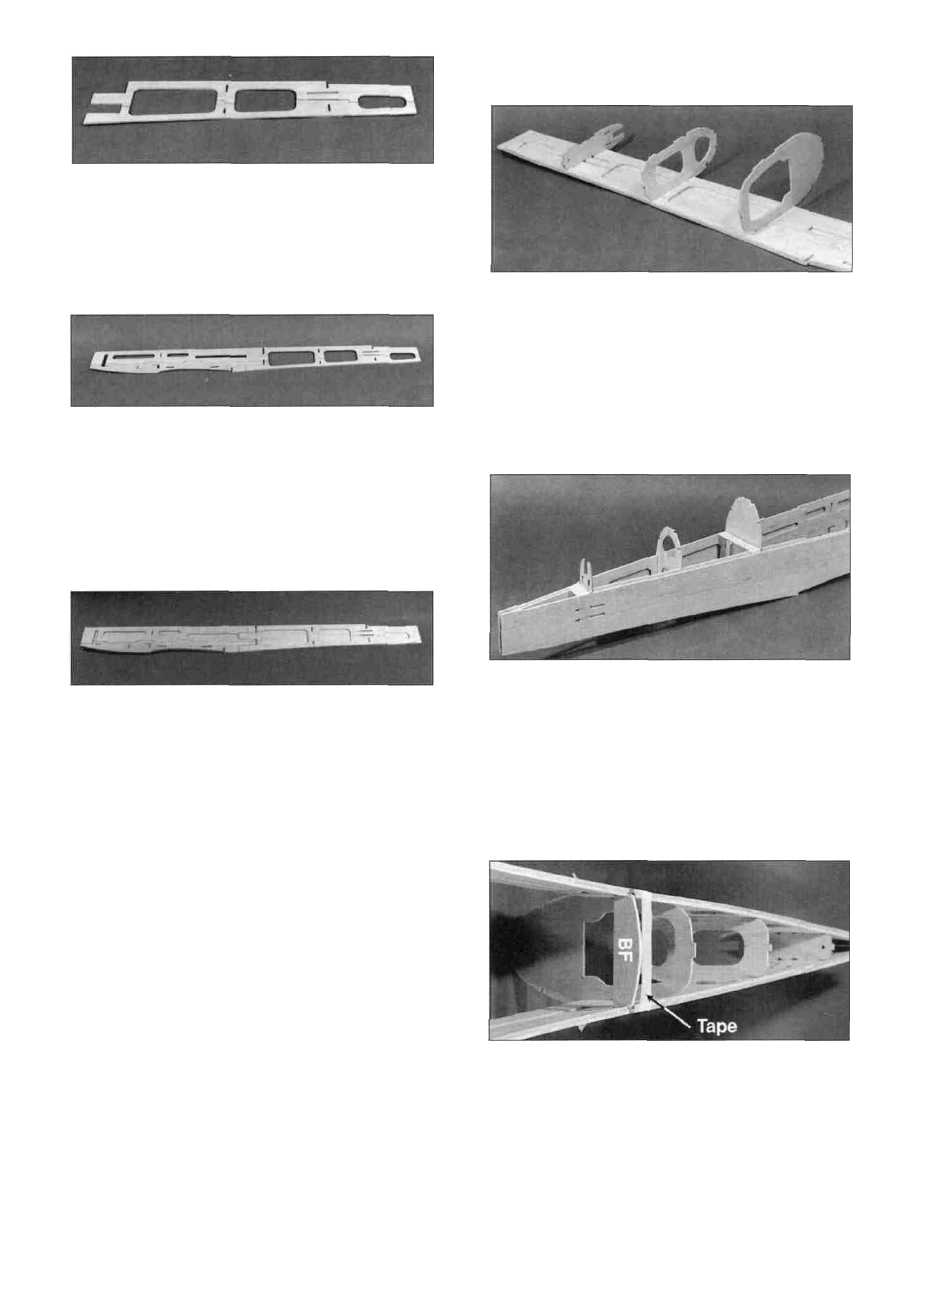
D 2. Assemble formers F3, F4 and F5 between
the two fuse sides and use masking tape to pull
the fuse sides together. Make sure all the tabs are
seated in their notches, and add a drop or two of
thin CA to the top notches of each former. Use only
as much glue as required to tack things together.
We will come back and securely glue everything in
a few steps.
D D 8. Inspect all glue joints for gaps and add
thick CA if necessary to strengthen the joints.
D 9. Repeat the above steps to make another
fuse side and doubler. When gluing the doubler
to the fuse side, make sure you assemble a
RIGHT and a LEFT set of sides!
D 10. Place the two assembled fuse sides
together. Sand the edges as necessary to make
the two sides identical. Also sand the sides of
each assembly smooth with a fine sanding block.
D 3. Fit the die-cut 1/8" ply belly former (BF)
(SKY6F12) into its notches to make sure it seats
all the way into the notches. Pull the fuse sides
together and glue the belly former into place.
Masking tape can be used to hold the fuselage
together while the glue cures.
12