Great Planes Super Skybolt 60 Kit - GPMA0170 User Manual
Page 32
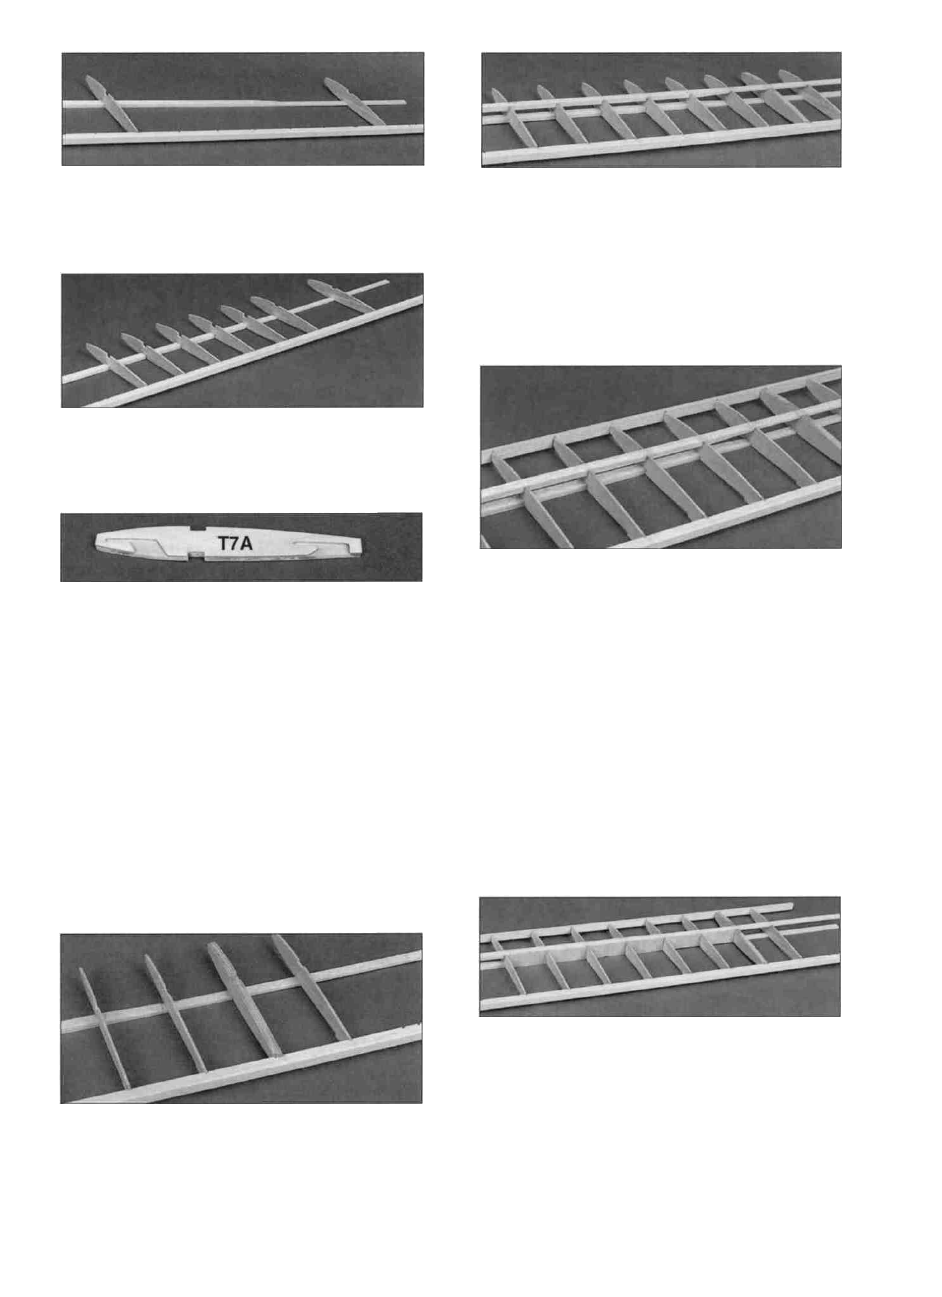
D D 6. Use the notched TE to accurately position
the outer T6 rib and glue it to the spar and the TE.
D D 11. Glue the top spar in place (with the
doubler on the bottom). Make sure it is fully seated
in the notches so it does not protrude above the
top surface of the ribs. Remember, the spar
doubler stops just before the first T6 rib.
D D 7. Install the remaining T5 and T6 ribs. Glue
them to the spar and the TE with thin CA.
D D 8. Punch out the two 1/16" ply T7A ribs
(SKY6W13) and the four 1/8" ply T7B (SKY6W11)
ribs. Carefully glue one T7B rib to each T7A rib
using thick CA just as you did earlier for the bottom
wing. Apply the glue to the T7A ribs and use the
glue sparingly to avoid getting glue in the l-strut
cut-outs.
D D 9.Carefully glue a T7B in place on the other
side of each T7A's. Again, apply the glue to the
T7A rib and be careful with the CA to avoid getting
it in the cut-outs. Apply thin CA around the edges
of the rib assembly but do not get it in the slots.
LI LI 12. Test fit a leading edge in place. Center it
vertically on each rib and glue it with CA.
NOTE: In the following steps you'll find it
necessary to remove some of the pins holding
the wing down to your building board. As you
do, take other steps as necessary to continue
holding the wing down, such as by applying
weight to the top of the wing, or by relocating
the pins.
D D 10. Glue a T7 assembly in place with the cut-
outs (slots) on the bottom.
D D 13. Glue the pre-cut 1/16" balsa vertical grain
shear webs to the rear edge of the spars in the
first 6 rib bays (from T5 to T7). Also glue shear
webs on the front edge of the spars in the first 4
rib bays. NOTE: You may wish to trial fit and trim
each web before gluing it in. The webs must be
securely glued to the spars.
- 3 2 -