Great Planes Super Skybolt 60 Kit - GPMA0170 User Manual
Page 46
Check the fit of the two panels. The spars, leading
and trailing edges should all meet up nicely. If they
don't, sand where needed and re-check the fit.
When satisfied with the fit, glue the two panels
together with thick CA or epoxy. Make sure the
spars and leading and trailing edges line up with
each other, and the wing is up against former F2.
D 10. Remove the l-strut and bend the locking wire
backwards about 45 degrees just above the marks
you made. Do this to both ends of both struts.
D 11. Final sand the struts to prepare them for
finishing. You can cover the struts with MonoKote
or you can paint them. If you decide to paint them,
first fill the wood grain with polyester finishing resin
or something similar to obtain a smooth looking
paint job.
D 3. After the glue is completely cured, carefully
remove the bottom wing from the l-struts and place
it on your work surface with the leading edge down.
JOIN AND SHEET THE BOTTOM
WING
D 1. Flip the fuselage upside down and install the
top wing. Insert the l-struts into their respective
slots in the top wing.
D 4. Trial fit the die-cut 1/16" ply aft dihedral
brace (SKY6W07) in place. You may have to sand
the ends to get it to fit in if you sanded much on the
ends of the spars. Securely glue the brace to the
back of the spars.
D 2. Insert the l-struts into the bottom wing panels
and let the panels rest on the fuselage wing saddle.
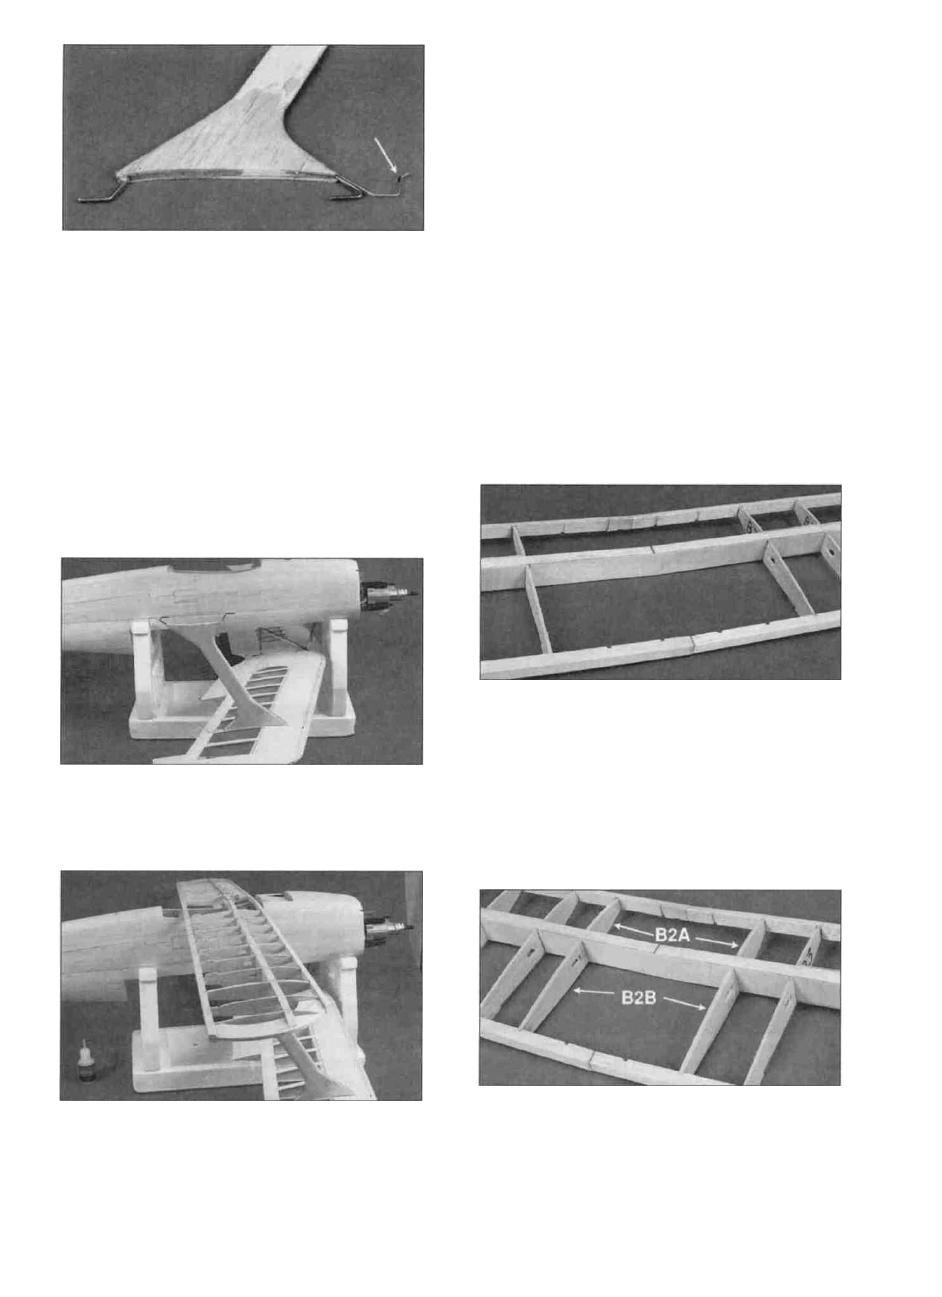
D 5. Install the die-cut 1/8" balsa B2A and B2B
ribs (SKY6W04) as shown on the plans and in
the photo.
- 4 6 -