Great Planes Super Skybolt 60 Kit - GPMA0170 User Manual
Page 49
works OK) to hold the sheeting in place while the
glue cures. It is important to keep the wing flat
during this process as the LE sheeting will help
"lock" the wing together. We won't glue the
sheeting to the wing tip until later.
D 23. Flip the wing over, and carefully trim off the
jig tabs on the bottom of the wing. A razor saw
works well for this. Use a sanding block with fine
grit sandpaper to touch up where the tabs were,
and to blend the ribs into the TE. Be careful not to
change the shape of the ribs during this step.
D 20. Install the opposite wing panel top sheeting
following the same procedure. Cut and sand the
root end of the sheeting to fit nicely against the LE
sheeting already installed.
D 24. Add the two remaining 1/16" x 7/8" x 28"
balsa TE sheets just as you did earlier on the top
surface. Do one panel at a time, and be careful to
keep from warping the wing during these steps.
HINT: An aileron placed under the TE will keep it
straight while the glue is curing.
0 25. Install the two remaining 1/16" x 2-1/8" x 28"
bottom wing LE sheets, using the same procedure
outlined in steps 15-20. Be sure to keep the wing
absolutely flat during this step to avoid warps.
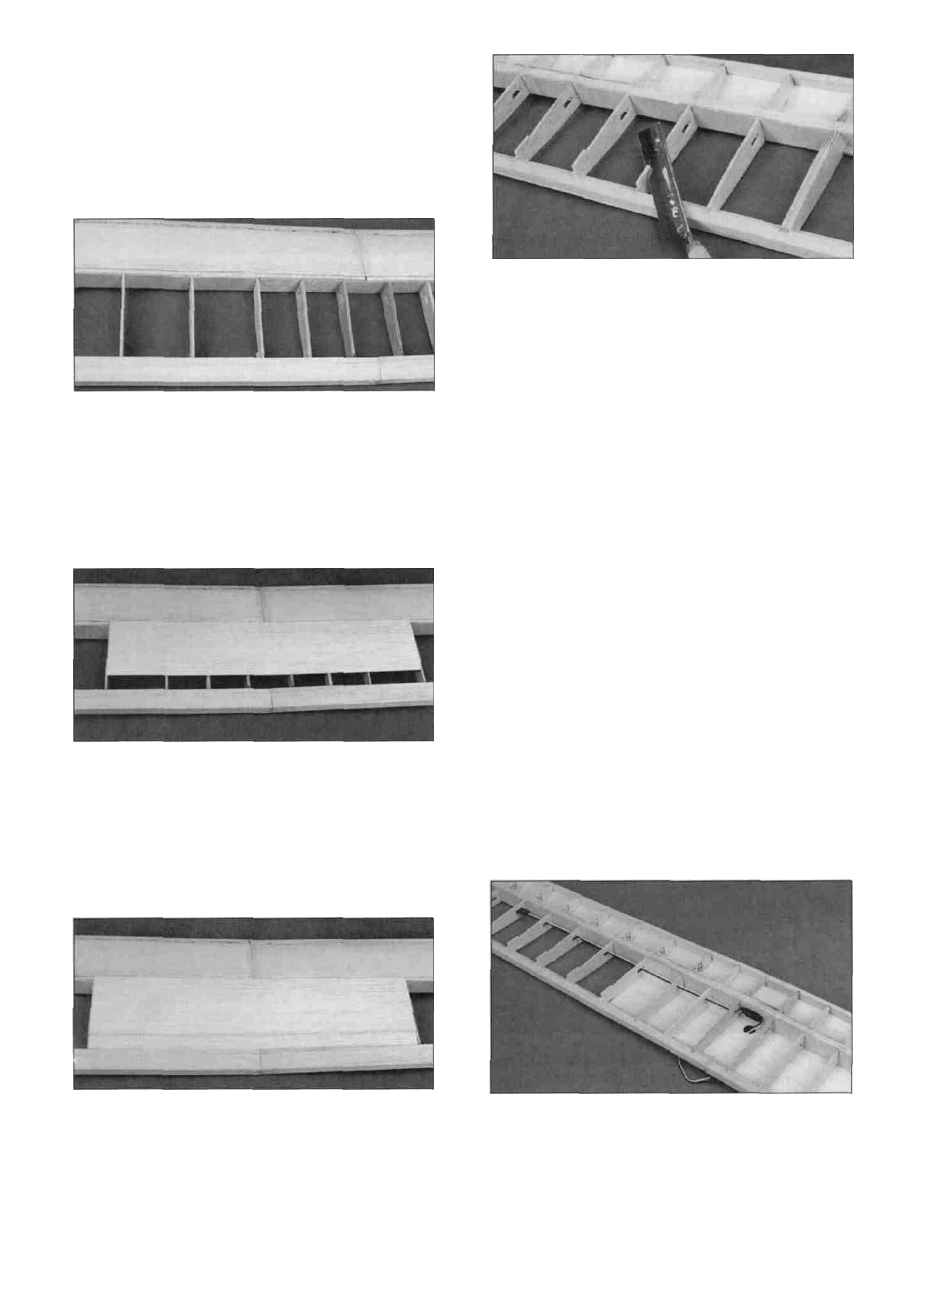
D 21. Position one of the 1/16" x 2-5/8" x 13-1/2"
wing center sheets as shown in the photo, and
glue it in place (against the LE sheeting). Allow the
sheeting to gently bend between the B1 ribs.
FINISH THE BOTTOM WING
IF YOU ARE USING ONLY ONE
AILERON SERVO SKIP TO STEP 2
D 22. Lay a 1/16" x 2-5/8" x 13-1/2" piece of balsa
center sheeting in place over the gap. Mark where
to cut it, trim it to fit, and glue it in place.
D 1. The aileron servo extension cables need to
be installed now. Approximately 24" of extensions
are required for each aileron. We used one
49-