Assemble the cowl – Great Planes Super Skybolt 60 Kit - GPMA0170 User Manual
Page 59
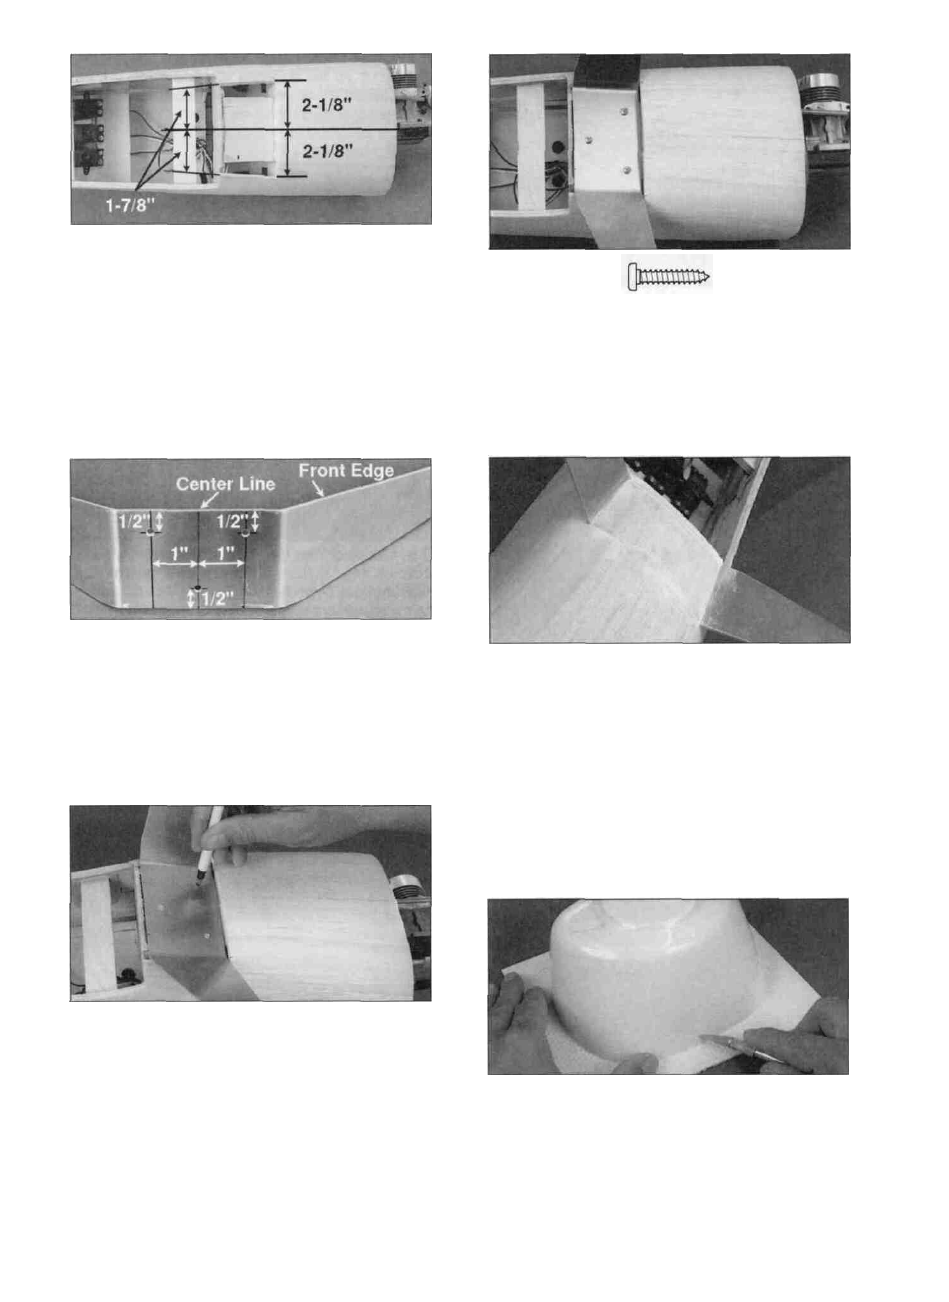
D 2. Now measure 2-1/8" to each side of the
center of the fuse bottom, and make a mark on the
saw cut you just made. Measure 1-7/8" to each
side of the center at F2, and make a mark on the
rear edge of the sheeting. Connect the marks on
each side with straight lines. Then cut along these
lines with a hobby knife. Remove the bottom piece
by pulling it loose from F2. Save this piece, as it
will be glued back on later.
#6 x 3/4" Sheet Metal Screw
D 5. Securely mount the gear with the three #6 x
3/4" sheet metal screws (SCRW018) provided.
Put a drop of thin CA on each screw to keep them
from coming loose.
D 3. Measure and mark the centerline of the
aluminum landing gear (L4-U). Draw a line 1" on
both sides of the line you just drew. Now draw lines
1/2" from the front and back edges of the gear.
The photo above will help clarify this. Drill 5/32"
holes where shown on the photo above.
D 6. Trim the bottom piece you cut out earlier to fit
back in, and glue it in place. Sand the bottom of
the fuse smooth again, and fill in any gaps with
HobbyLite model filler.
D 4. Test fit the landing gear on the 1/4" ply
landing gear plate so it is centered on the plate
and the straight edge of the gear legs is facing
forward. Sand the balsa wood corners if needed to
permit the gear to sit flat on the ply plate. Mark on
the ply plate where to drill the mounting holes.
Remove the gear, and drill 3/32" holes through the
landing gear plate.
ASSEMBLE THE COWL
D 1. Trim the ABS cowl front (COWL009) and the
ABS cowl back (COWL010) out of their bases by
cutting 3/16" below the molded-in scribe lines with
a hobby knife. Sand the cut edges smooth.
59-