Great Planes Super Skybolt 60 Kit - GPMA0170 User Manual
Page 45
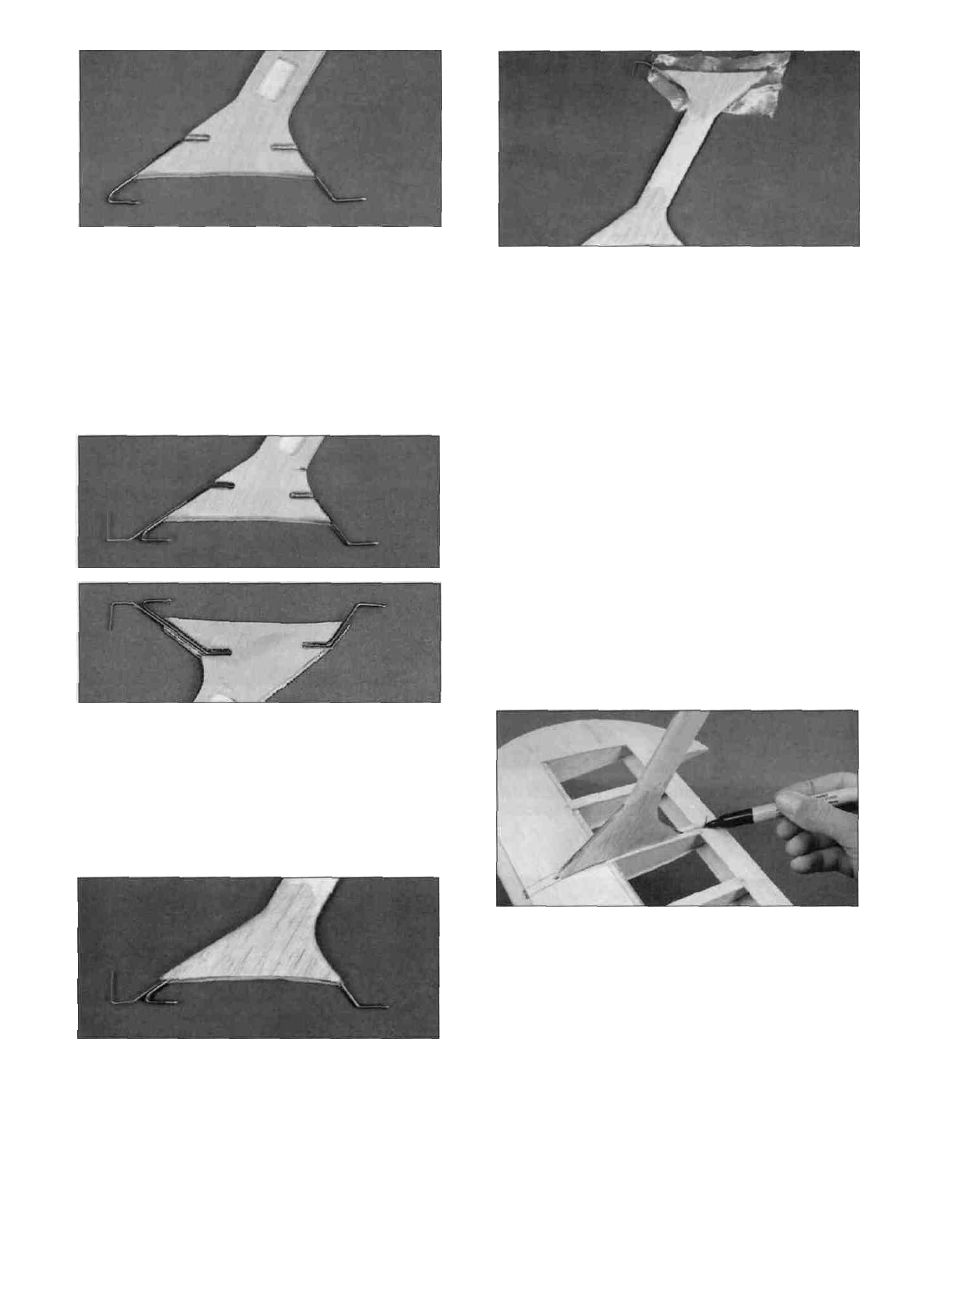
and one of each goes into each end of the I-struts.
The wires should be positioned in the strut so the
top parts of the top wires and the bottom parts of
the bottom wires line up with the plan This will set
the correct -1 degree of incidence between the top
and bottom wings The photo shows how the wires
should be installed IMPORTANT Make sure both
of the l-struts are exactly the same height and
have the same incidence angle
D 7 Fill the horizontal wire slots with thick CA by
holding the l-struts up and allowing the CA to flow
into each slot The 1/16" wires should be glued in
place as securely as possible Apply some
lightweight (3/4 o z ) fiberglass cloth on both sides
and both ends of each l-strut as shown in the photo.
D 8 Mark one strut "Left" and the other one
"Right" Also mark the top and bottom of each one.
Refer to the plans to determine the top and bottom.
D 5 Glue the 1/32" locking wires (WBNT183) in
place behind the rear wires as shown in the photo
and on the plans These locking wires should only
be glued along the inner 1" because they have to
bend out to unlock the l-struts Add thick CA to all
the wires to securely glue everything in place Do
not allow the glue to drip down and glue the 1/32"
wires to the 1/16" wires below the balsa sheeting.
D 6 Sand the exposed plywood smooth to
remove any glue bumps, and install the remaining
1/16" hard balsa sheeting Sand the sheeting flush
with the edges of the plywood Then round off the
edges to achieve a smooth, aerodynamic cross
section on the entire strut.
D 9 Sight down the wires on each end of the I-
struts to make sure the horizontal parts of both
wires are perfectly aligned with each other If they
are not, gently bend them until they are Test fit the
l-struts into the slots in both the top and bottom
wings The left strut should be fitted into the left
wing panels and the right one into the right wing
panels. The wires can be bent slightly if needed to
get the smooth sliding action desired Make sure
the struts will slide far enough forward to allow the
locking wires to snap down into place With the
locking wires snapped into position, mark on each
locking wire where the surface of the wing is.
- 4 5 -