Fuselage assembly – Great Planes Super Skybolt 60 Kit - GPMA0170 User Manual
Page 11
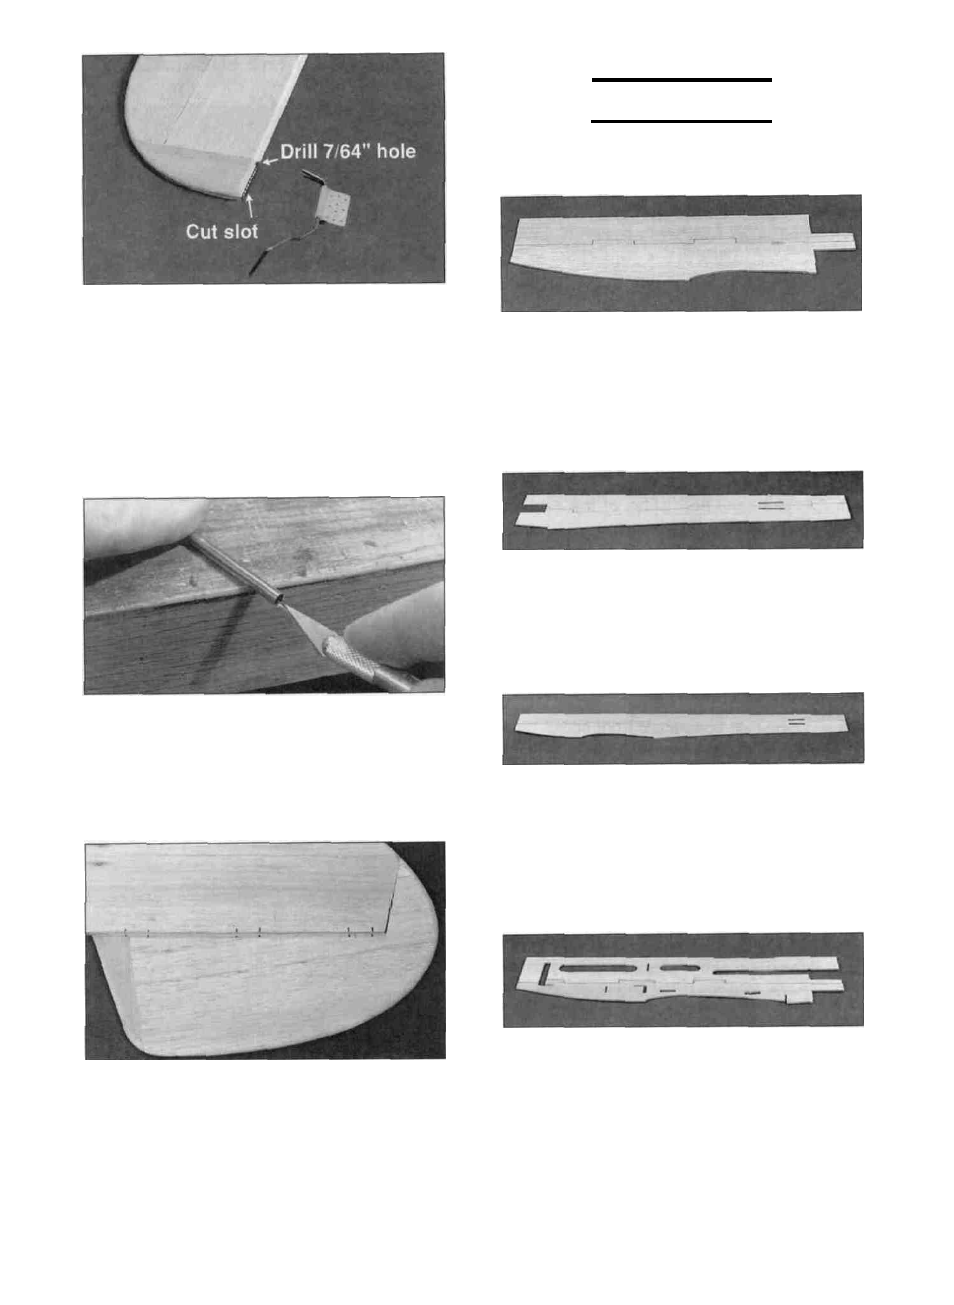
D 3 Refer to the plans and mark the location of
the tailgear (WBNT128) on the rudder Drill a 7/64"
hole in the rudder (the hole is drilled slightly
oversize to allow for positioning, and to create a
hard epoxy sleeve" around the wire) Then groove
the rudder leading edge to accept the tailgear wire
and the nylon bearing Mark the location of nylon
bearing on the fin and cut a slot for it.
FUSELAGE
ASSEMBLY
PREPARE FUSE SIDES
D D 1 Working over the fuselage side view
covered with waxed paper, trial fit a die-cut 1/8"
balsa top front fuse side (SKY6F01), and bottom
front fuse side (SKY6F02) together, sanding
slightly if necessary for a good fit Make sure they
line up with the plans, and glue them together
HINT: Using a hobby knife, sharpen the inside of
one end of a 1/8" diameter tube, and use it to cut
the groove in the leading edge of the rudder (and
ailerons if applicable)
D 4. Trial fit all these parts together using the
hinges Sand the aerodynamic balance" part of
the elevators to get them to match up with the
stab Do not glue the hinges until after covering
the surfaces.
D D 2 Trial fit a die-cut 1/8 balsa top aft fuse
side (SKY6F03) and a die-cut 1/8" balsa bottom
aft fuse side (SKY6F04) together Sand them
slightly if necessary to achieve a good fit, and
glue them together.
D D 3 Test fit the aft fuse side half in place
behind the front fuse side half Sand the two
halves if needed to get them to fit together tightly
and match up with the plans Glue them together
with CA Then sand both sides smooth with a
sanding block
D D 4 Working over the fuselage side view still
covered with waxed paper, trial fit a die-cut 1/8" balsa
top front fuse doubler (SKY6F05), and bottom
front fuse doubler (SKY6F06) together, sanding
slightly if necessary for a good fit Make sure they
line up with the plans, and glue them together.
11