Build the top wing – Great Planes Super Skybolt 60 Kit - GPMA0170 User Manual
Page 31
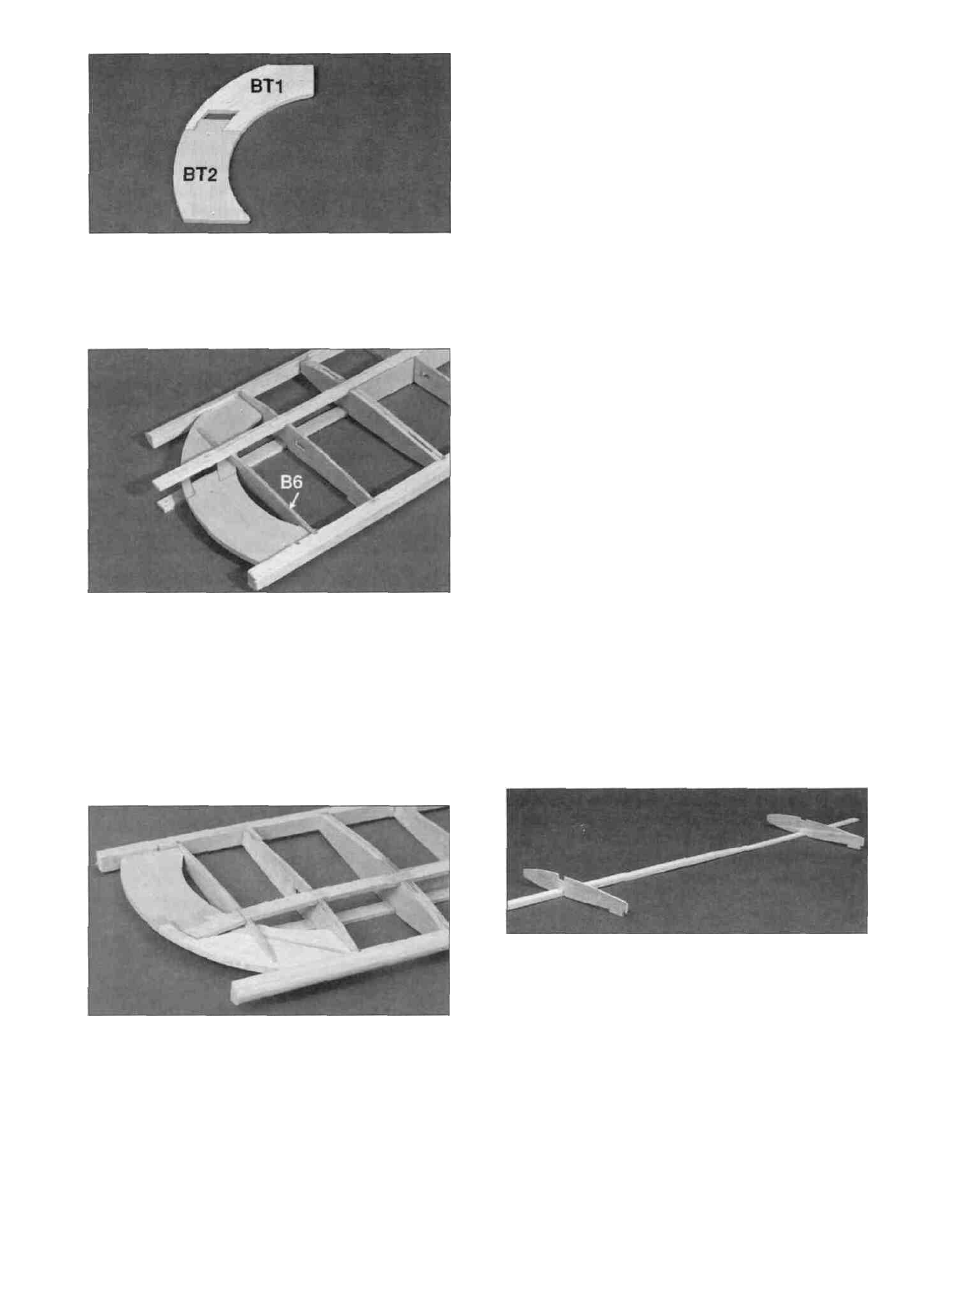
D D 16 Assemble a bottom wing tip by gluing a
BT1 to a BT2 (SKY6W05) as shown in the photo.
Sand both sides of the wing tip smooth.
wing tip cut-out After this glue has cured, add thick
CA to each spar in the razor saw slit to reinforce
the joint there.
D D 19 Cut the leading and trailing edges off to
match the contour of the wing tip. Do not sand or
shape them yet
D 20. Go back to step 1 and assemble the other
wing half Be sure to build a right and a left
wing panel! This is all we will do to the bottom
wing until later.
D D 17 Set rib B6 (SKY6W01) in place but do not
glue it yet Slide the wing tip into place through rib
B6 to check its fit When satisfied with the fit, glue
the wing tip to the leading and trailing edges and to
rib B4 Glue rib B6 in place, but do not glue it to
the spars yet. Make sure the wing tip is centered
vertically on the leading and trailing edges.
BUILD THE TOP WING
D D 1 Tape the TOP wing plan to your flat work
surface, and cover the wing drawing with waxed
paper (so you won't glue the wing to the plan')
IMPORTANT: Do not cut the left and right wing
panel drawings apart. The wing halves are joined
over the plans to achieve the correct sweep.
D D 2 Carefully punch out all the die-cut 3/32"
and 1/8" balsa TOP wing ribs (SKY6W01 and
SKY6W02) Sand the edges slightly to remove
any die-cutting irregularities or "fuzz".
D D 3 Cross-pin one of the spars you assembled
earlier to the plan with the spar down, and the
doubler up and near the root The tapered end of
the spar doubler should end between the last T5
rib and the first T6 rib.
D D 18 Use a razor saw to make a cut about
halfway through each spar near the outside edge
of rib B6 This will allow the spars to bend there
without affecting the rest of the wing Cut the spars
to the correct length so they will fit down into the
wing tip cut-out Glue the spars to one another, rib
B6 and the wing tip so they are centered in the
D D 4 Glue the first T5 rib onto the spar and
place (do not glue) the outer T6 rib on the spar in
its correct position Use a 90-degree triangle to
keep the ribs vertical.
D D 5 Position a TE in place by working the rear
end of the T5 rib into the second 3/32" wide notch
in the TE Refer to the plans to help you correctly
position the TE Center (vertically) the TE on the
T5 rib and glue it in place with thin CA.
-31 -