Comtrol RocketPort Serial Hub Si Driver Installation for Windows 98 User Manual
Page 12
Installing the Device and Driver
12
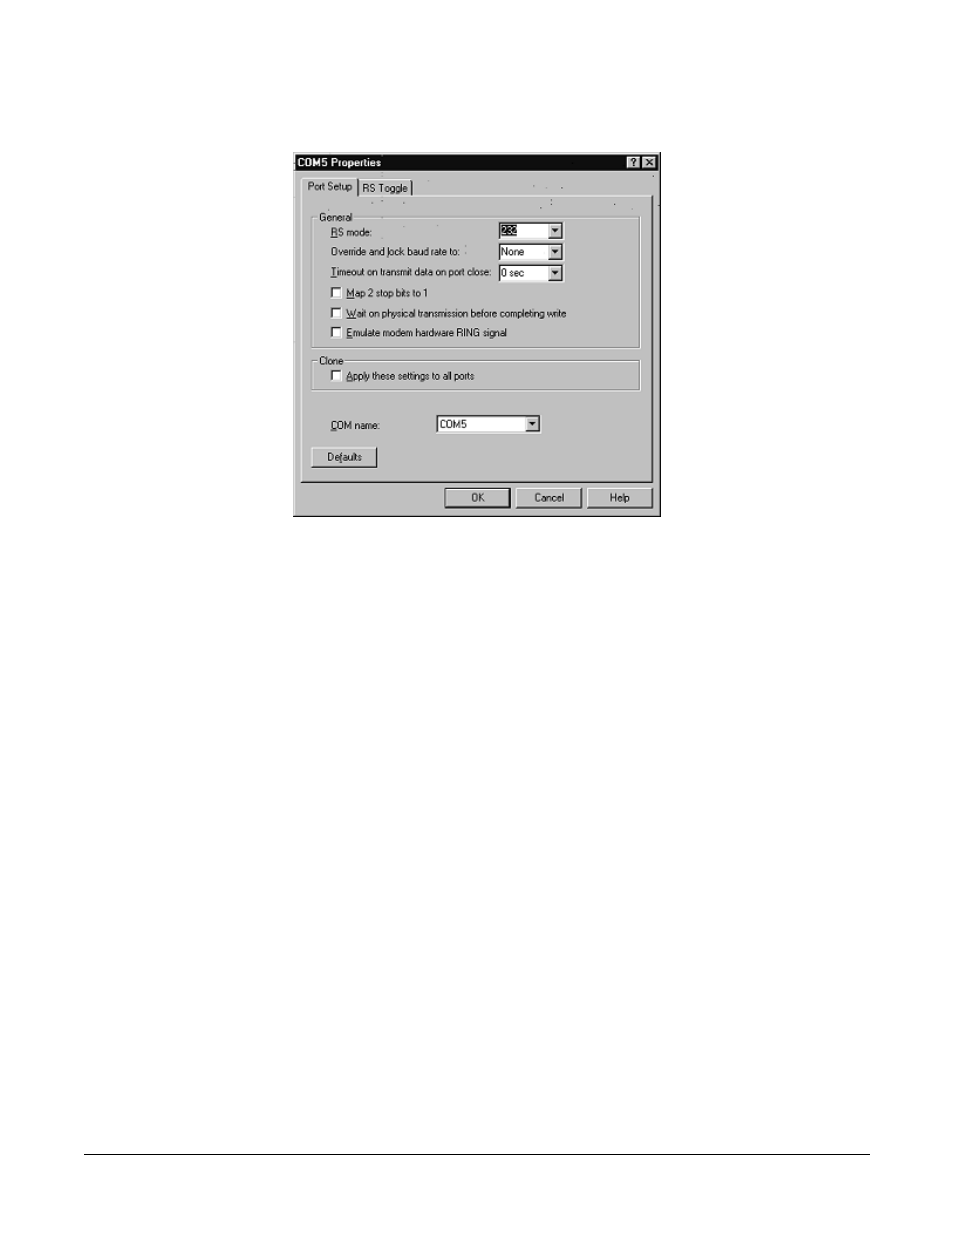
21. Highlight any COM port that you want to configure and click Properties. The Port Properties window
displays:
22. Select the appropriate mode to match the peripheral that you are connecting to the selected COM port.
23. Optionally, make any necessary changes to fit your environment:
a.
Lock the baud rate to access higher or lower rates than are normally permitted by your Windows
applications.
b.
Set a time delay on the transmit data before a port closes.
Note: You can select the length of time to wait for data to clear the transmit buffer, before a host
application closes the port. If data is still in the transmit buffer, you can set a delay time to allow
the buffer to empty. This is typically used with slower peripheral devices such as printers, to give the
data sufficient time to flush through the system.
c.
Map 2 stop bits to 1.
Note: You can use this option to map 2 stop bits to 1 bit. If the application you are using is hard coded to
use two stop bits and you are receiving framing errors, you can implement this option. Leave this
box unchecked to enable stop bits to pass through unchanged.
d.
Wait for physical transmission before completing write.
Note: Use this option to force all write packets to wait until the transmit data has physically completed
the transmission before returning completion to the host application. The default mode (box not
checked) is to buffer the data in the transmit hardware buffer and return completion as soon as the
packet is in the buffer.
e.
Emulate modem hardware ring signal.
Note: This emulates a hardware RI (ring indicator) signal.
f.
Clone port settings.
Note: If this box is checked, the changes you make in the COM Properties screen are applied to all ports
on this serial hub. If this box is not checked, the changes you make to the Port Setup options apply
to the selected port only.
g.
COM name.
Note: Use the droplist to select the desired COM name for the selected port. Port numbering is defined by
the computer controlling the port and is neither automatic nor required to be sequential. Be careful
not to overlap port numbers (for example, by creating two “COM6” ports), as this will disable the
affected ports.
You can select Not Configured, if you do not want this port available on this particular
installation.