Carl Goldberg GPMA1968 Tiger 60 ARF User Manual
Page 8
8
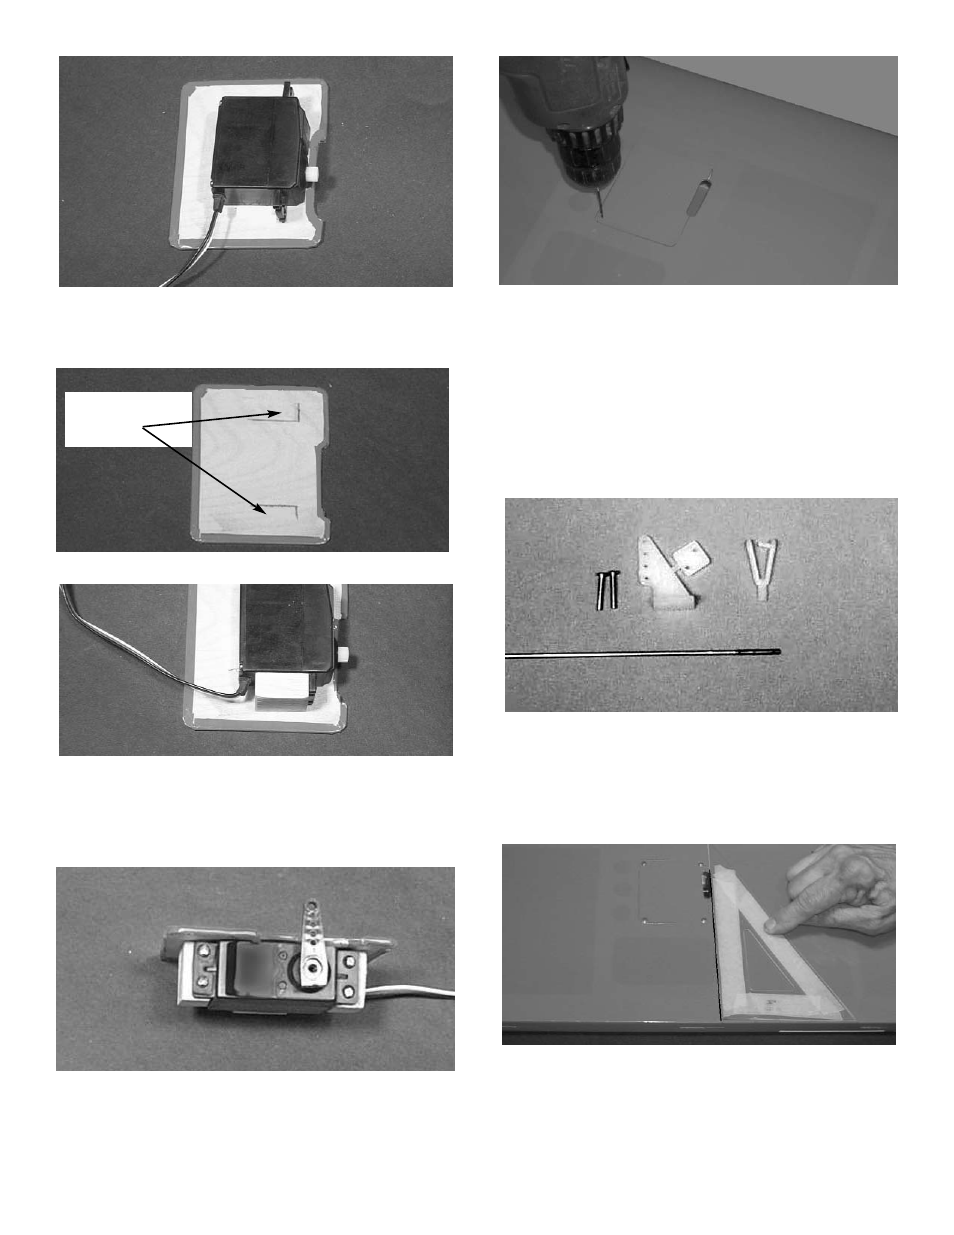
2.
With the servo door upside down on the work
surface, place the servo on top of the door
with the servo arm post centered vertically
and horizontally with the servo door notch.
Mark the location of the servo, as shown.
3.
Remove the servo from the door.
Spread epoxy on the servo mounting blocks
and, making sure the wood grain on both
mounting blocks runs vertically, glue the
blocks in place along the marks just made.
4.
Place the servo door on the wing and drill a
1/16" hole on each corner.
Using the #2 x 3/8" screw and #2 washer
supplied with this kit, screw the door to the
mounting plate.
5.
Repeat the above steps for the second
aileron servo.
AILERON CONTROL HORN INSTALLATION
1.
Collect the following items
(2) Silicone snap link keepers
(2) Large control horn with back plate
(4) 2-56 x 3/4" screw
(2) 2mm x155mm threaded wire
(2) Snap link
2.
With the aileron servo door in place, make a
mark at a 90º degree angle to the trailing
edge and in line with the servo arm.
When the epoxy is dry, drill 1/16" holes into
the servo blocks and, using the screws sup-
plied with the radio, mount the servo onto the
blocks.
SERVO MOUNTING
BLOCKS WILL GO
HERE