Carl Goldberg GPMA1968 Tiger 60 ARF User Manual
Page 13
13
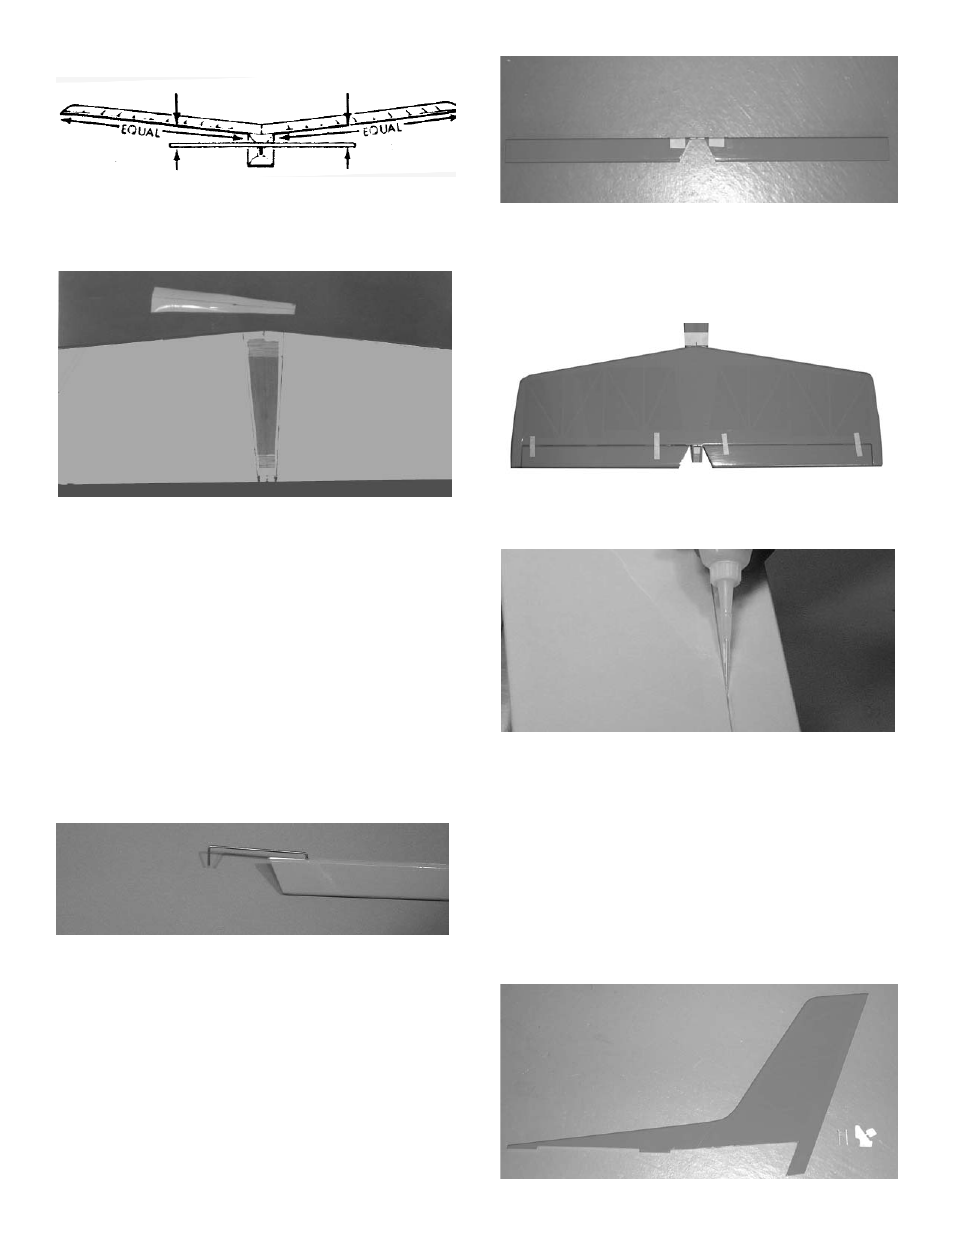
9.
When satisfied with the alignment of the
stab, temporarily tape securely in place.
Turn over the plane and mark the area on the
bottom of the stab where it rests on the fuse.
Remove the stab from the fuse and, working
1/4" inside the drawn lines, carefully remove
the covering from the bottom of the stab. BE
CAREFUL TO AVOID CUTTING THE
WOOD
10.
Spread epoxy on both the bottom of the stab
and the stab platform of the fuse.
Replace the stab on the platform and, after
again checking the alignment of the stab to
the wing, allow the epoxy to dry thoroughly.
8.
Make sure the stab is level (parallel) with the
wing and insert paper strip shims, if neces-
sary.
13.
As with the installation of the ailerons, insert
a straight pin in the center of each jet hinge.
Slide the hinges halfway into the elevator
and then slide the entire assembly into the
hinge slots in the stabilizer.
Allow the elevator/stab assembly to dry for at
least 10 minutes before flexing the elevator.
FIN INSTALLATION
1.
Collect the following items:
(1) Fin
11.
Take the elevator joiner wire and trial fit
into each elevator half. Make sure eleva-
tors will lie flat and the leading edge is
straight. Adjust the wire if necessary.
12.
When satisfied with the fit, mix some 30
minute epoxy and work it into the holes in
the elevators and apply in the slots. Insert
the wire and use masking tape to hold in
place until dry. Lay the elevators on a flat
surface to ensure they stay flat and use a
straight edge along the leading edge.
Make sure the elevator is centered between
the stab tips. If desired, tape the elevator to the
stab to keep the pieces together.
14.
Keeping the stab and elevator in posi-
tion, remove the pins and apply 3 or 4 drops of
Zap thin CA to each hinge location.