Tail-dragger option – Carl Goldberg GPMA1968 Tiger 60 ARF User Manual
Page 26
26
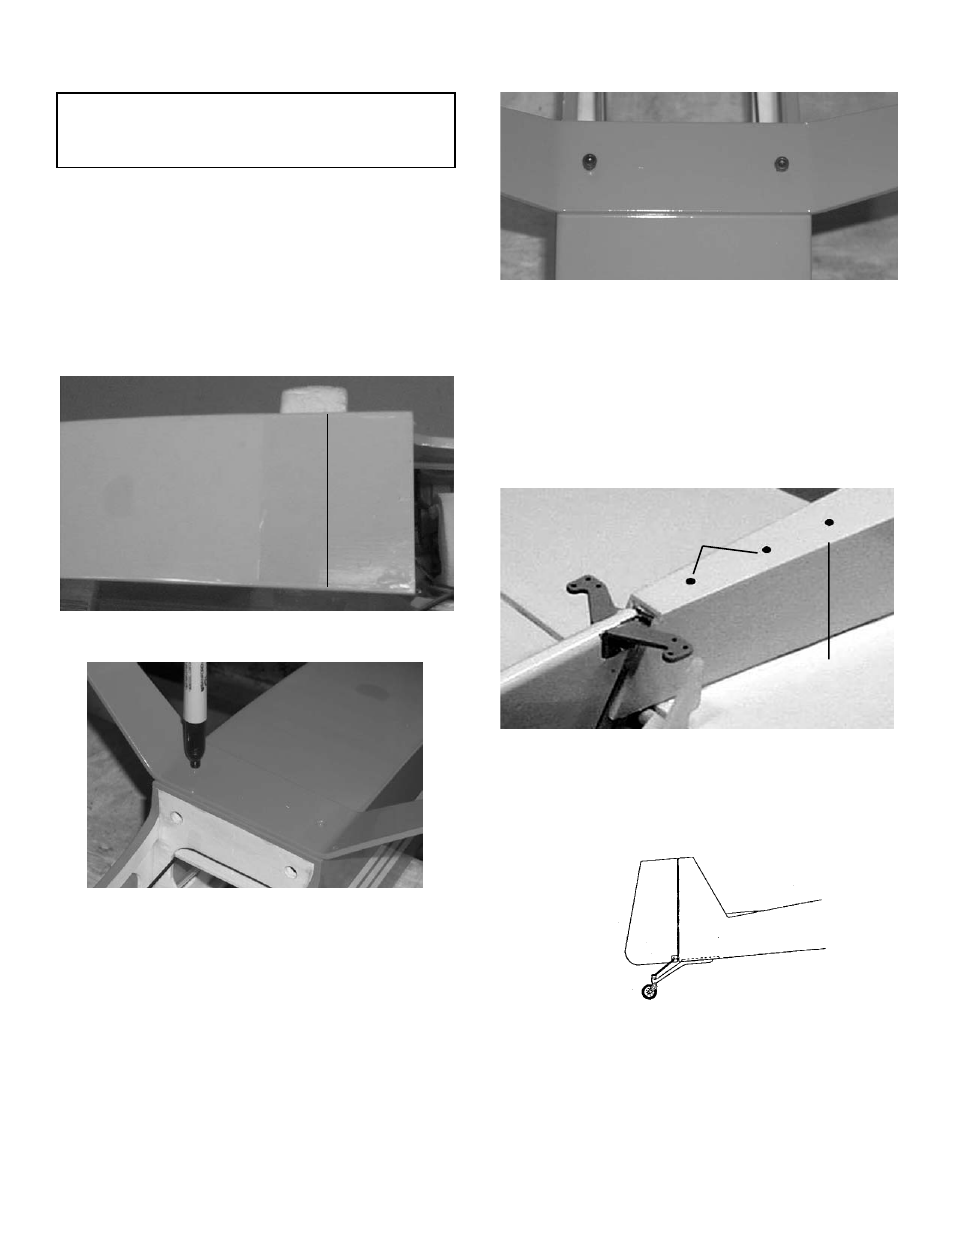
LANDING GEAR INSTALLATION
TAILWHEEL INSTALLATION
1.
To configure your Tiger 60 as a tail-dragger,
you will need to purchase the following
items. These items are not included in this
kit.
(1)
landing gear (Goldberg item #1321
(4)
6-32 x 1/2" socket head screw
(4)
#6 washer
(4)
6-32 blind nut
2.
Measure
1-5/8”
forward from the radio
compartment and draw a line across the fuse.
3.
Center the gear on the fuse, flush at the front
of the radio comparment ,just behind the
drawn line.
Mark the location of the mounting holes on
the fuse.
Using a 5/32" drill bit, drill holes through the
fuse at each mark.
4.
Reach inside the fuse and press a 6-32 blind
nut into the landing gear mounting block at
each hole location.
Insert the 6-32 socket head screws and #6
washers into each hole and tighten down
until the blind nuts are firmly seated in the
mounting block.
5.
Temporarily remove the screws and washers
and reposition the landing gear on the fuse.
Screw the landing gear in place.
6.
Return to the Main Landing Gear installation
earlier in this book and install the wheels.
TAIL-DRAGGER OPTION
1.
Purchase (1) tailwheel (CGP item #6900)
which includes mounting hardware.
2.
Install the dual rudder control horn furnished
with the tailwheel, as shown. This control
horn may be installed either before or after
the rudder is mounted on the fin.
3.
Locate the holes on the bottom rear of the
fuse and cut away the covering.
4.
4-40 blind nuts have been pre-installed at the
factory.
Using the 4-40 x 1/2" phillips head screws
(supplied with the tailwheel), mount the tail-
wheel onto the fuselage.
5.
Install the springs with enough tension to
allow the tailwheel to be turned without mov-
ing the servo.
TAILWHEEL HOLES
ANTENNA EXIT
HOLE
NOTE: The tail-dragger option is not recommended
for novice pilots. It is best to get plenty of
practice with a tri-gear before converting
your Tiger 60 ARF into a tail-dragger.