Kistler-Morse KM L-Cell Bolt-On User Manual
Page 63
Chapter 6. Microcell Installation on Vertical Pipe Legs
6-6
9.
See Figure 6-14. Apply a generous bead of sealant to the inside
flange of the environmental cover. Add extra sealant to the cable
exit channel and between cable and support.
A. Align the environmental cover over the installed Microcell, with
the cable through the cover’s exit channel.
B. Press the cover against the support, squeezing out the sealant
around the edges. Be careful not to squeeze too much sealant
out.
C. Use your finger to smooth the sealant around all edges and
joints, eliminating areas where moisture may pool, especially
along the top edge. Verify the sealant forms a continuous,
watertight seal. Ensure the cable exit channel is completely
sealed.
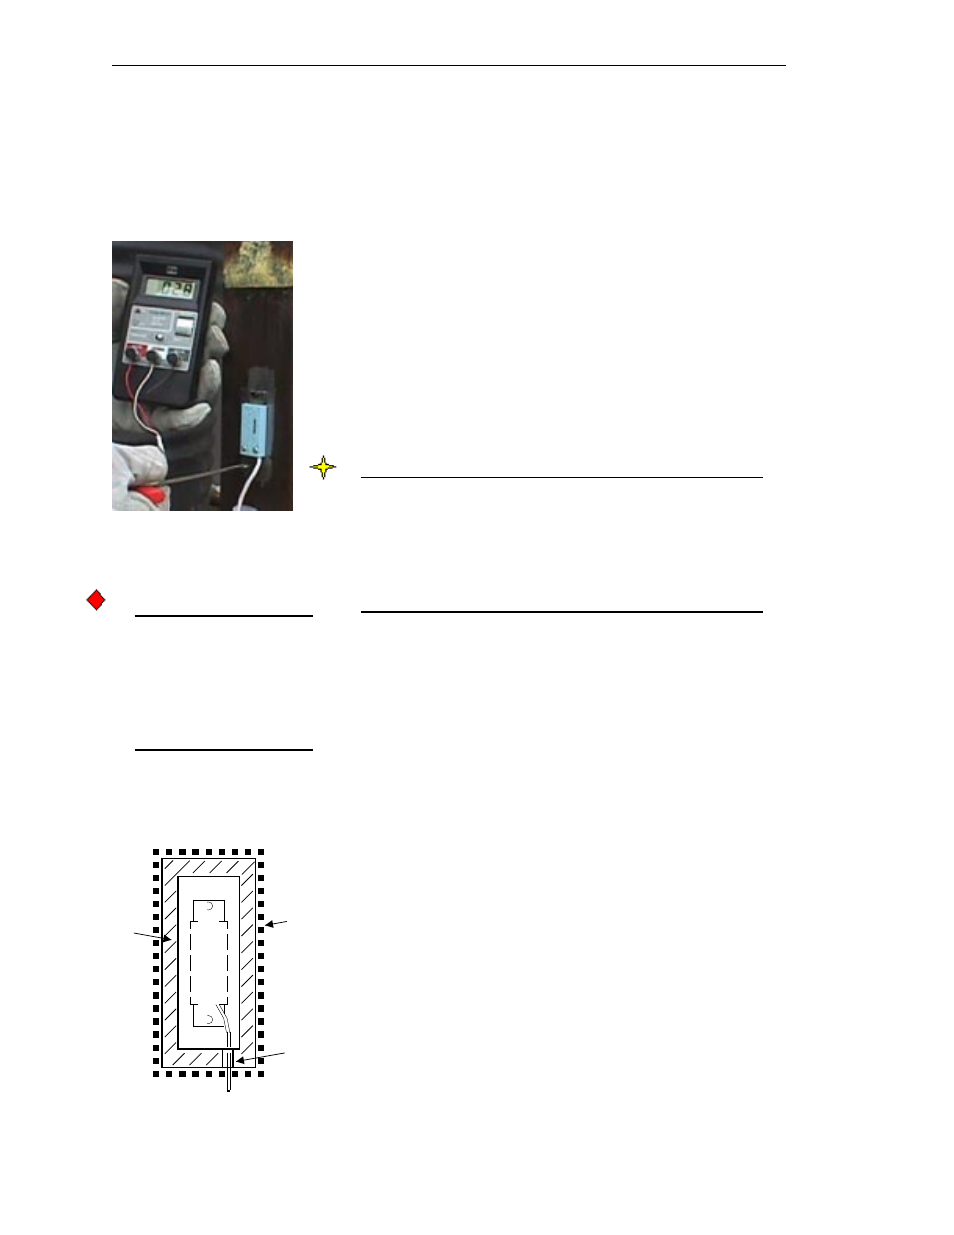
5.
Using the T-handle driver, slowly tighten the top screw. While
turning the T-handle driver, monitor the Test Meter carefully.
If the voltage goes outside the range -100 to +100 mV while
tightening, stop immediately and evaluate the following:
• If the voltage jumped outside the range -100 to +100 mV, it may
indicate a burr or rough surface. Remove the screws holding the
Microcell to the leg. Check for and remove burrs and surface
roughness (refer to Surface Preparation for removing surface
roughness). Repeat Steps 1 through 5.
• If the voltage gradually moved outside the range -100 to +100
mV, slowly loosen the screw until the voltage is within range
again and proceed to Step 6.
6.
Repeat Step 5 for the bottom screw. If the voltage is outside the
range -100 to +100 mV, attempt to bring the reading within range by
loosening the screw being torqued, tightening the other screw, or
some combination of loosening and tightening. If you have
difficulty staying within the range, try turning each screw
1
/4 turn at a time until both screws are tightened. Fig 6-13.
Note
If the following occurs while tightening screws, check Microcell
resistance using a DMM (described in Appendix E, Trouble-
shooting):
• Voltage does not change or changes less than 25 mV as you
turn a screw, or
• Voltage changes randomly as you turn a screw (i.e., not in a
consistent direction).
7.
To complete installation, ensure that:
• Both screws are tightened until the T-handle driver flexes in
torsion,
1
/
4
turn past the point where the screw stops turning,
with this flexing procedure repeated several times to ensure the
screw is tight, and
• Voltage is in the range -100 to +100 mV.
8.
Prior to installing the environmental cover(s), ensure the mating
surface(s) on the leg is free of dirt and grease. Reclean if necessary,
being careful not to remove the rust inhibitor on the bare metal.
CAUTION
Only use Sikaflex 1A
polyurethane sealant or
Dow Corning RTV 739 or
RTV 738. Other sealants
may contain acetic acid,
which is harmful to sensors
and electronics.
Figure 6-14. Environmental Cover
Cable Exit
Channel
Continuous
Sealant
All-Around
(wipe
smooth)
Apply
Sealant to
Inside
Flange of
Cover
Figure 6-13.