Measurement procedure in charge plate monitor mode – KEYENCE SK-H Series User Manual
Page 7
7
E SK-H
6
Turn the power off.
Press the power button again.
The unit turns off.
Measurement Procedure in Charge Plate Monitor Mode
In charge plate monitor mode, three types of measurements are possible: ion
balance (IB), positive static elimination speed (Decay+), and negative static
elimination speed (Decay-).
Measurement
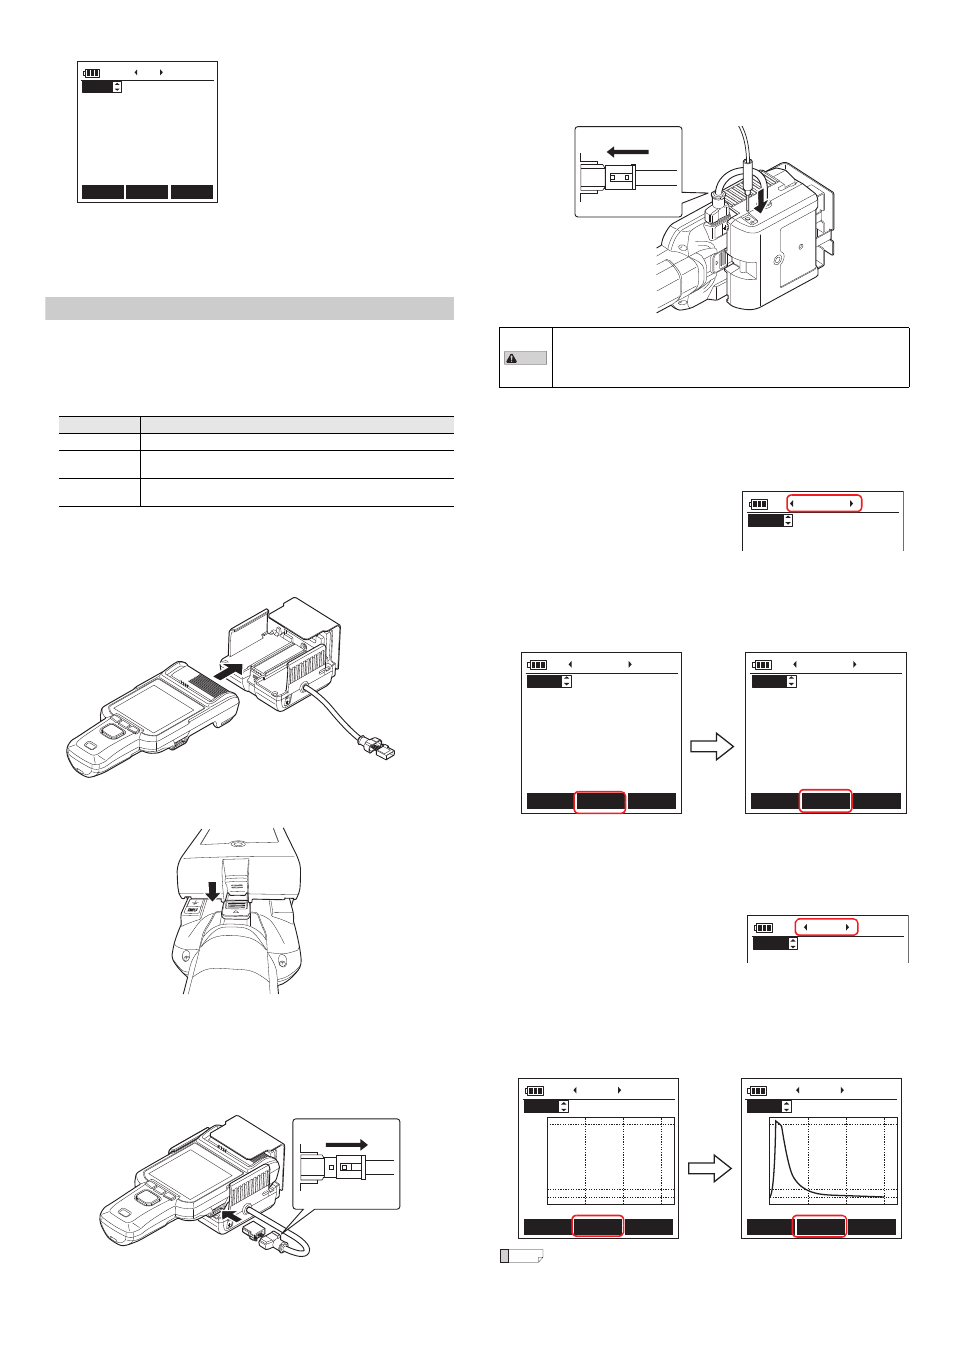
Connecting the ionizer monitor (SK-H055)
1
Insert the SK-H into the ionizer monitoring unit.
Insert the SK-H as far as possible.
2
Slide the lock on the back of the ionizer monitoring unit until you
hear a click.
3
Insert the ionizer monitoring unit's connector cable into the
connector of the SK-H until you hear a click.
Unlock the lock cover, and then insert the ionizer monitoring unit’s connector
cable into the connector of the SK-H while ensuring that the lock cover does
not cover the connector.
Measurement
Details
Ion Balance
This mode measures the ion balance.
Decay
+
This mode charges the IMU unit to a positive voltage and measures the
static elimination time.
Decay
-
This mode charges the IMU unit to a negative voltage and measures the
static elimination time.
No.002
NEAR
V
°C
%
----
−−.−
−−
8/28 15: 02
15: 18
MENU
START
RANGE
z
Record number switching
You can use the
S
and
T
keys to switch
the record number.
* You can only switch between record
number screens when the unit is not
performing a measurement. You can
switch the record number regardless of
the display mode.
If the record number is 100 and you
continue to switch it forward, the record
number will return to 1.
Lock cover
Unlocked
4
Cover the connector with the lock cover to fix the cable in place, and
then connect the grounding wire.
Connect the grounding wire to the grounding terminal on the side of the ionizer
monitoring unit. Use D-class grounding.
Ion balance measurement procedure
1
Turn the power on, and then press the "MENU" (F1) key to display
the "MENU" screen.
Under "MODE," select "Charge Plate."
2
Select "Ion Balance" as the item to
measure.
Use the W and X keys to switch between
the screens until "Ion Balance" is
displayed at the top of the screen.
3
Perform the measurement.
Point the unit at the location to be measured.
Static elimination time measurement procedure
1
Turn the power on, and then press the "MENU" (F1) key to display
the "MENU" screen.
Under "MODE," select "Charge Plate."
2
Select "Decay+" or "Decay-" as the
item to measure.
Use the W and X keys to switch between
the screens until "Decay+" or "Decay-" is
displayed at the top of the screen.
3
Perform the measurement.
Point the unit at the location to be measured.
Reference
To stop the measurement, press "STOP." Alternatively, the
measurement stops automatically after 99 seconds elapse.
CAUTION
Before you attach the IMU unit, check that the sensor unit is
facing the front. Attaching the IMU unit with the sensor unit not
facing the front prevents the unit from performing accurate
measurements, which may lead to product breakdown or damage.
Lock cover
Locked
No.005
9/05 9: 21
9: 21
Ion Balance
No.005
V
°C
%
+
2
sec
1.5
25.3
54
9/05 9: 21
9: 21
MENU
START
ZERO
Ion Balance
No.005
V
°C
%
+
2
sec
1.5
25.3
54
9/05 9: 21
9: 21
CANCEL
STOP
Ion Balance
Press the "START" (F2) key to
start the measurement.
Press the "STOP" (F2) key to
stop the measurement.
No.001
8/23 16: 12
15: 52
Decay+
No.001
15: 52
MENU
START
Decay +
No.013
0.8s
2
3s
1.0
0.1
+
9V
0kV
1
0
−−.−s
10
15s
1.0
0.1
−−−
0kV
5
0
15: 22
CANCEL
STOP
Decay +
Press the "START" (F2) key to
charge the monitor and start the
measurement.
When the voltage drops below
100 V, stop the measurement of
the time.