Hangar 9 P-51D Blue Nose 60 ARF User Manual
Page 8
14
Hangar 9 P-51 Mustang 60 ARF Assembly Manual
15
Hangar 9 P-51 Mustang 60 ARF Assembly Manual
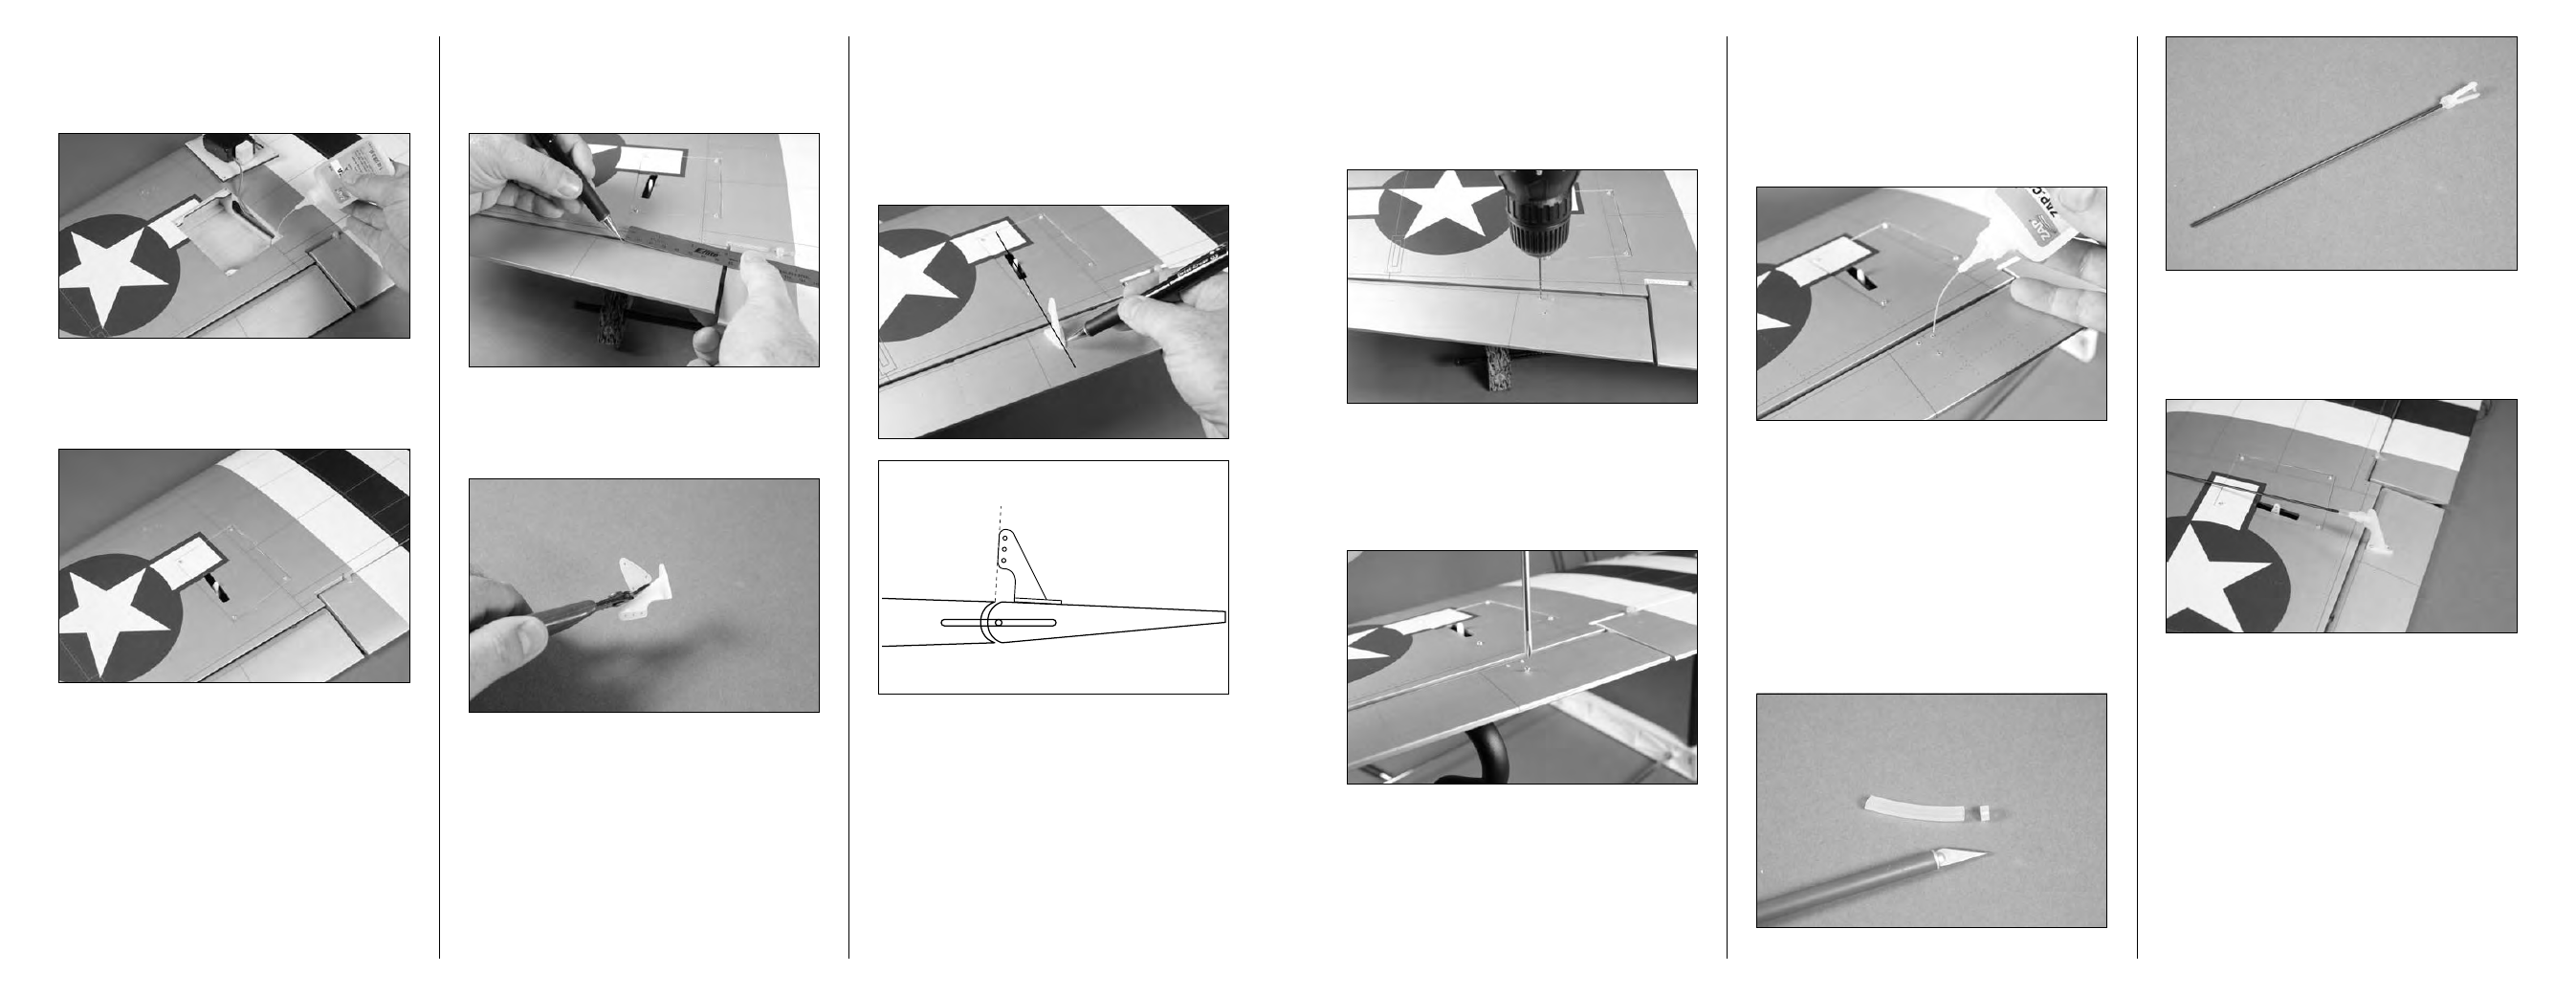
Step 23
Use a drill and 1/16-inch (1.5mm) drill bit to drill start holes
for the aileron control horn. Only drill about 1/4-inch (6mm)
into the aileron to avoid drilling through the top of the
aileron. There is a hard point in the wing so you will need to
be careful when drilling.
Step 24
Use a #1 Phillips screwdriver to start the three #2 x 3/8-inch
sheet metal screws in each hole. Leave about 1/16-inch
(1.5mm) of the screw exposed when threading them into the
aileron.
Step 25
After threading the screws into the holes, you will need to
apply 2–3 drops of thin CA into each hole to harden the
surrounding wood. This provides a harder surface for the
screws making them more secure when installed. Skipping
this step may not provide a secure mounting of the aileron
control horn, which could cause it to fail in flight.
Step 26
Once the CA has cured, you can attach the control horn to
the aileron using three #2 x 3/8-inch sheet metal screws,
tightening them with a #1 Phillips screwdriver.
Step 27
Use a hobby knife with a #11 blade to cut a 1/4-inch (6mm)
piece of tubing from the 2-inch (52mm) safety tubing
included with the kit. Slide the tubing on a clevis, and then
thread the clevis 10-turns on a 6-inch (152mm) threaded
pushrod.
Step 28
Connect the clevis to the center hole of the aileron control
horn. Slide the safety tubing onto the clevis so it won’t open
accidentally in flight.
Step 18
Apply 2–3 drops of thin CA into each hole to harden the
surrounding wood. This provides a harder surface for the
screws making them more secure when installed.
Step 19
Use a #1 Phillips screwdriver and four #2 x 3/8-inch sheet
metal screws to secure the servo cover to the wing.
Step 20
Use a ruler to measure in 2
15
/
16
-inch (75mm) from the inside
edge of the aileron. Use a pencil to make a small mark on
the aileron.
Step 21
Use side cutters to remove the servo horn backplate from a
control horn.
Step 22
Position the control horn on the aileron so the center of the
horn is aligned with the mark made in the previous step.
When positioning the control horn, align the front edge of
the horn with the edge of the fixed surface as shown to
minimize any differential of the control surface. Use a pencil
to transfer the location for the three mounting screws on the
aileron.