Aileron servo installation, Sand this end – Hangar 9 P-51D Blue Nose 60 ARF User Manual
Page 6
10
Hangar 9 P-51 Mustang 60 ARF Assembly Manual
11
Hangar 9 P-51 Mustang 60 ARF Assembly Manual
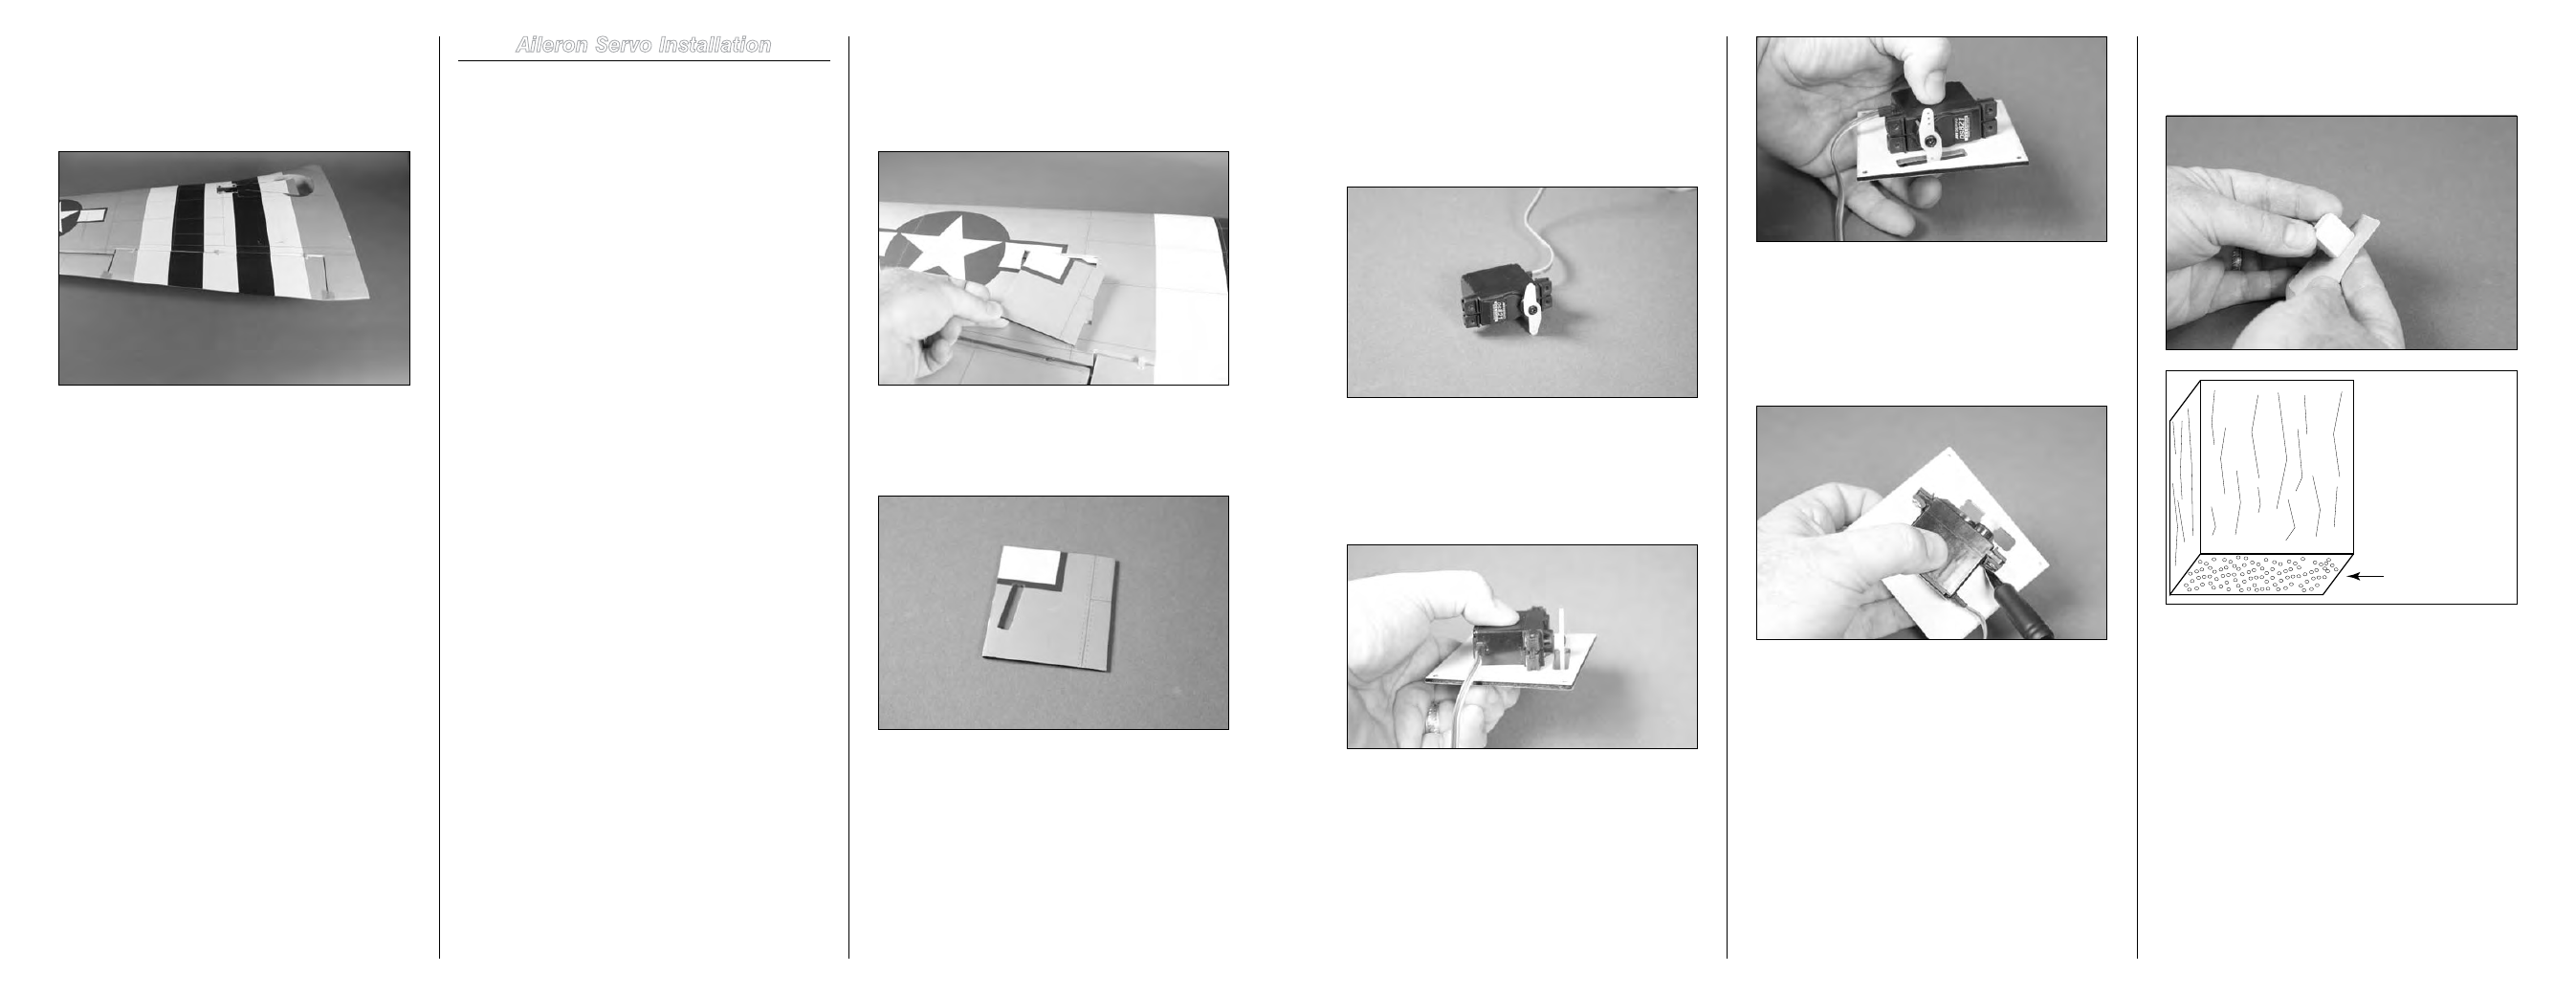
Step 3
Use the radio system to center the servo for the aileron.
Remove the original arm from the aileron servo and install
a 180-degree arm so it is perpendicular to the center line of
the servo. You will be connecting the linkage to a hole that
is 9/16-inch (14mm) from the center of the servo arm, so
make sure your servo arm meets these requirements.
Step 4
Position the servo on the bottom side of the servo cover
so the servo arm is centered in the opening in the cover as
shown. The servo must also be parallel to the opening so the
arm can move freely through its entire range of movement.
Step 5
Use a pencil to mark the servo cover for the position of the
servo mounting blocks on the aileron servo cover. Make the
mark behind the brass eyelets and alongside the servo. Make
sure to mark for both blocks without allowing the servo to
move on the cover.
Step 6
Use medium grit sandpaper to scuff the ends of two servo
mounting blocks as shown.
Sand this end
Step 18
Once you have test fit the flap without glue, you can now
remove the flap and use hinge glue to secure the flap to the
wing panel. Use small pieces of low-tack tape to hold the
flap in position until the hinge glue fully cures.
Step 19
Repeat Steps 13 through 18 to hinge the remaining flap and
aileron of the opposite wing panel.
Aileron Servo Installation
Required Parts
Wing panel (right and left)
Servo mounting block (4)
#2 x 3/8-inch sheet metal screw (16)
Control horn with backplate (2)
2-inch (52mm) safety tubing
6-inch (152mm) threaded pushrod (2)
12-inch (305mm) servo extension (2)
Pushrod keeper (2)
Clevis (2)
Servo (2)
Receiver
Transmitter
Receiver battery
Tools and Adhesives
30-minute epoxy
Sandpaper
Mixing stick
Pliers
Covering iron
Pencil
Clamp (2)
Medium grit sandpaper
Drill
T-pin
Ruler
Phillips screwdriver: #1
Side cutter
Thin CA
Felt-tipped pen
Pliers
Hobby knife with #11 blade
Drill bit: 1/16-inch (1.5mm), 5/64-inch (2mm)
Rotary tool and cutoff wheel
Step 1
Remove the aileron servo cover from the wing. Make sure
to remove all the tape that was holding the cover in position.
You may need to use a covering iron to seal the covering
back on the wing and cover before proceeding.
Step 2
Use a hobby knife with a new #11 blade to remove the
covering from the slot in the aileron servo cover.