Cockpit details and installation – Hangar 9 P-51D Blue Nose 60 ARF User Manual
Page 32
62
Hangar 9 P-51 Mustang 60 ARF Assembly Manual
63
Hangar 9 P-51 Mustang 60 ARF Assembly Manual
Step 6
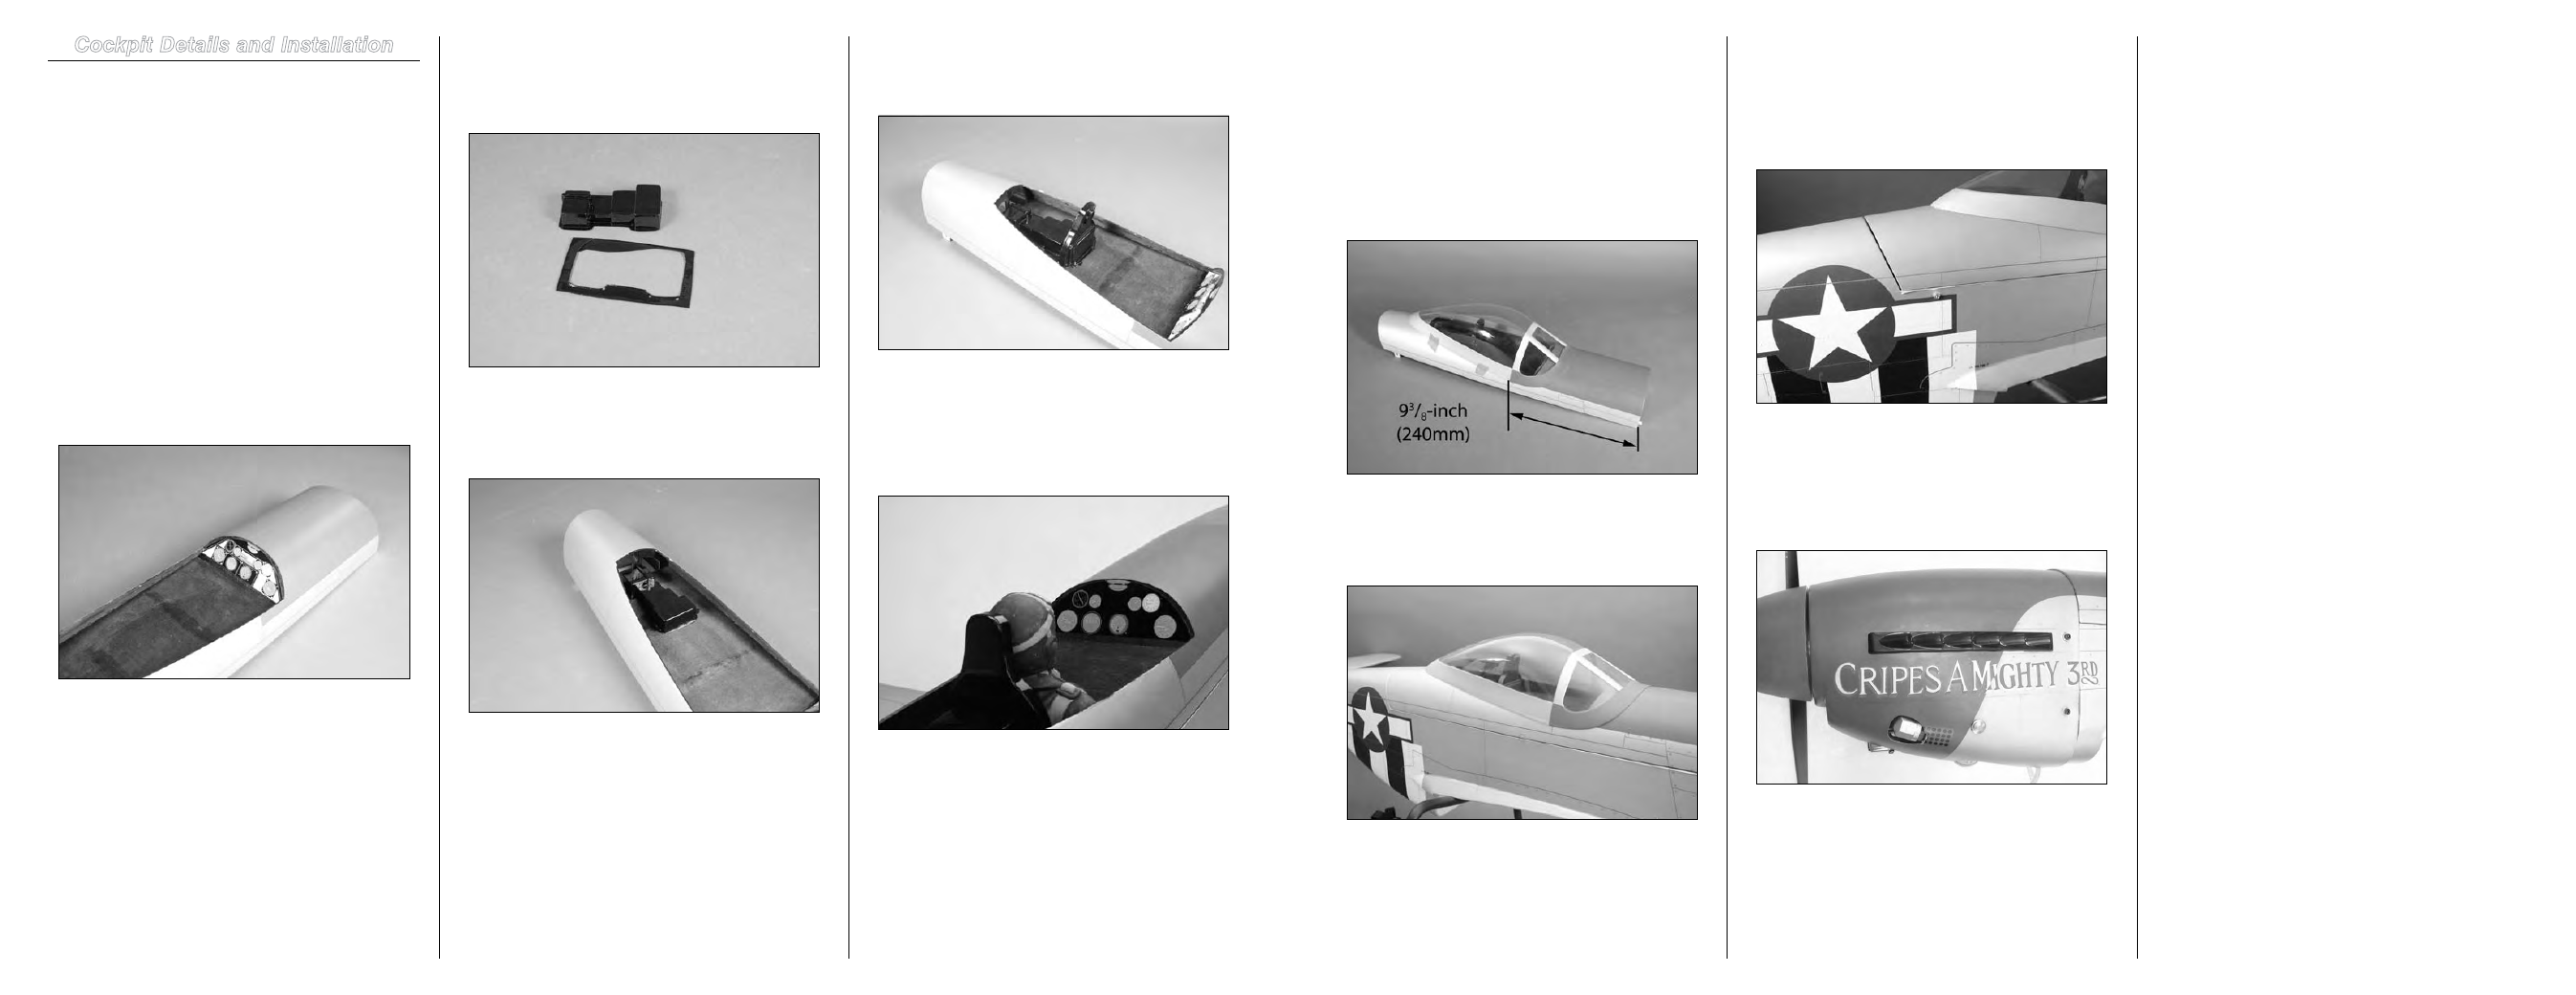
Use medium grit sandpaper to lightly sand the inside edge
of the canopy where it contacts the canopy hatch. Use a
paper towel and rubbing alcohol to remove any debris or oils
after sanding. Apply a thin bead of canopy glue around the
bottom inside edge of the canopy. Position the canopy on
the cockpit hatch so the rear edge of the frame around the
canopy is 9
3
/
8
-inch (240mm) behind the front edge of the
hatch. Use low-tack tape to hold the canopy in position until
the glue fully cures.
Step 7
Position the canopy hatch back on the fuselage. Remember
to insert the pins at the front first.
Step 8
There are two holes in the fuselage at the rear of the canopy
hatch. Use a hobby knife and #11 blade to remove the
covering. The canopy is secured using two 3mm x 15mm
socket head machine screws that are tightened using a
2.5mm hex wrench or ball driver.
Step 9
A pencil can be used to draw the scale panels lines and
rivets on the cowling. Use a flexible ruler to help in aligning
the panels lines to those you will be drawing on the cowling.
For more details visit www.horizonhobby.com.
Step 10
If you have purchased one of the optional decal sheets, use
the box or go to the Horizon Hobby website (http://www.
horizonhobby.com/Products/Default.aspx?ProdID=HAN2420)
for the P-51 Mustang to assist in locating each of the decals.
Mix a drop of dish washing detergent in a spray bottle and
lightly mist the area where the decal will be placed so it
can be slid on the airframe. Use a paper towel to squeegee
the decal and remove the majority of the liquid from under
the decal. Allow the decal to set overnight to remove the
remaining liquid and bubbles.
Cockpit Details and Installation
Required Parts
Cockpit hatch
Instrument panel decal
Scale radio
Scale backrest
Scale pilot (optional)
Clear canopy
3mm x 15mm socket head machine screw (2)
Tools and Adhesives
Hobby scissors
Canopy glue
Low-tack tape
Thin CA
Medium CA
Pencil
Hex wrench or ball driver: 2.5mm
Hobby knife with #11 blade
Step 1
Remove the instrument panel from the decal sheet. Apply the
decal as shown.
Hint
: Wait a few minutes before proceeding to make
sure the decal is going to adhere to the cockpit. If it
does not, apply a thin bead of thin CA around the edge
of the decal to keep it from peeling away from the
cockpit.
Step 2
Use hobby scissors to trim the excess material from the
scale radio. Make sure to leave a small flange so the scale
radio can be glued in the cockpit.
Step 3
Position the scale radio in the cockpit area. Use medium CA
to glue the scale radio to the cockpit floor as shown.
Step 4
The scale backrest is then installed right in front of the scale
radio. Use medium CA to glue the scale backrest in position.
Step 5
At this time you will need to decide if you want to install the
optional scale pilot. Use the photos on the box to determine
the correct location for the pilot. Use medium CA to glue the
pilot in position in the cockpit.