Wing and belly pan installation – Hangar 9 P-51D Blue Nose 60 ARF User Manual
Page 30
58
Hangar 9 P-51 Mustang 60 ARF Assembly Manual
59
Hangar 9 P-51 Mustang 60 ARF Assembly Manual
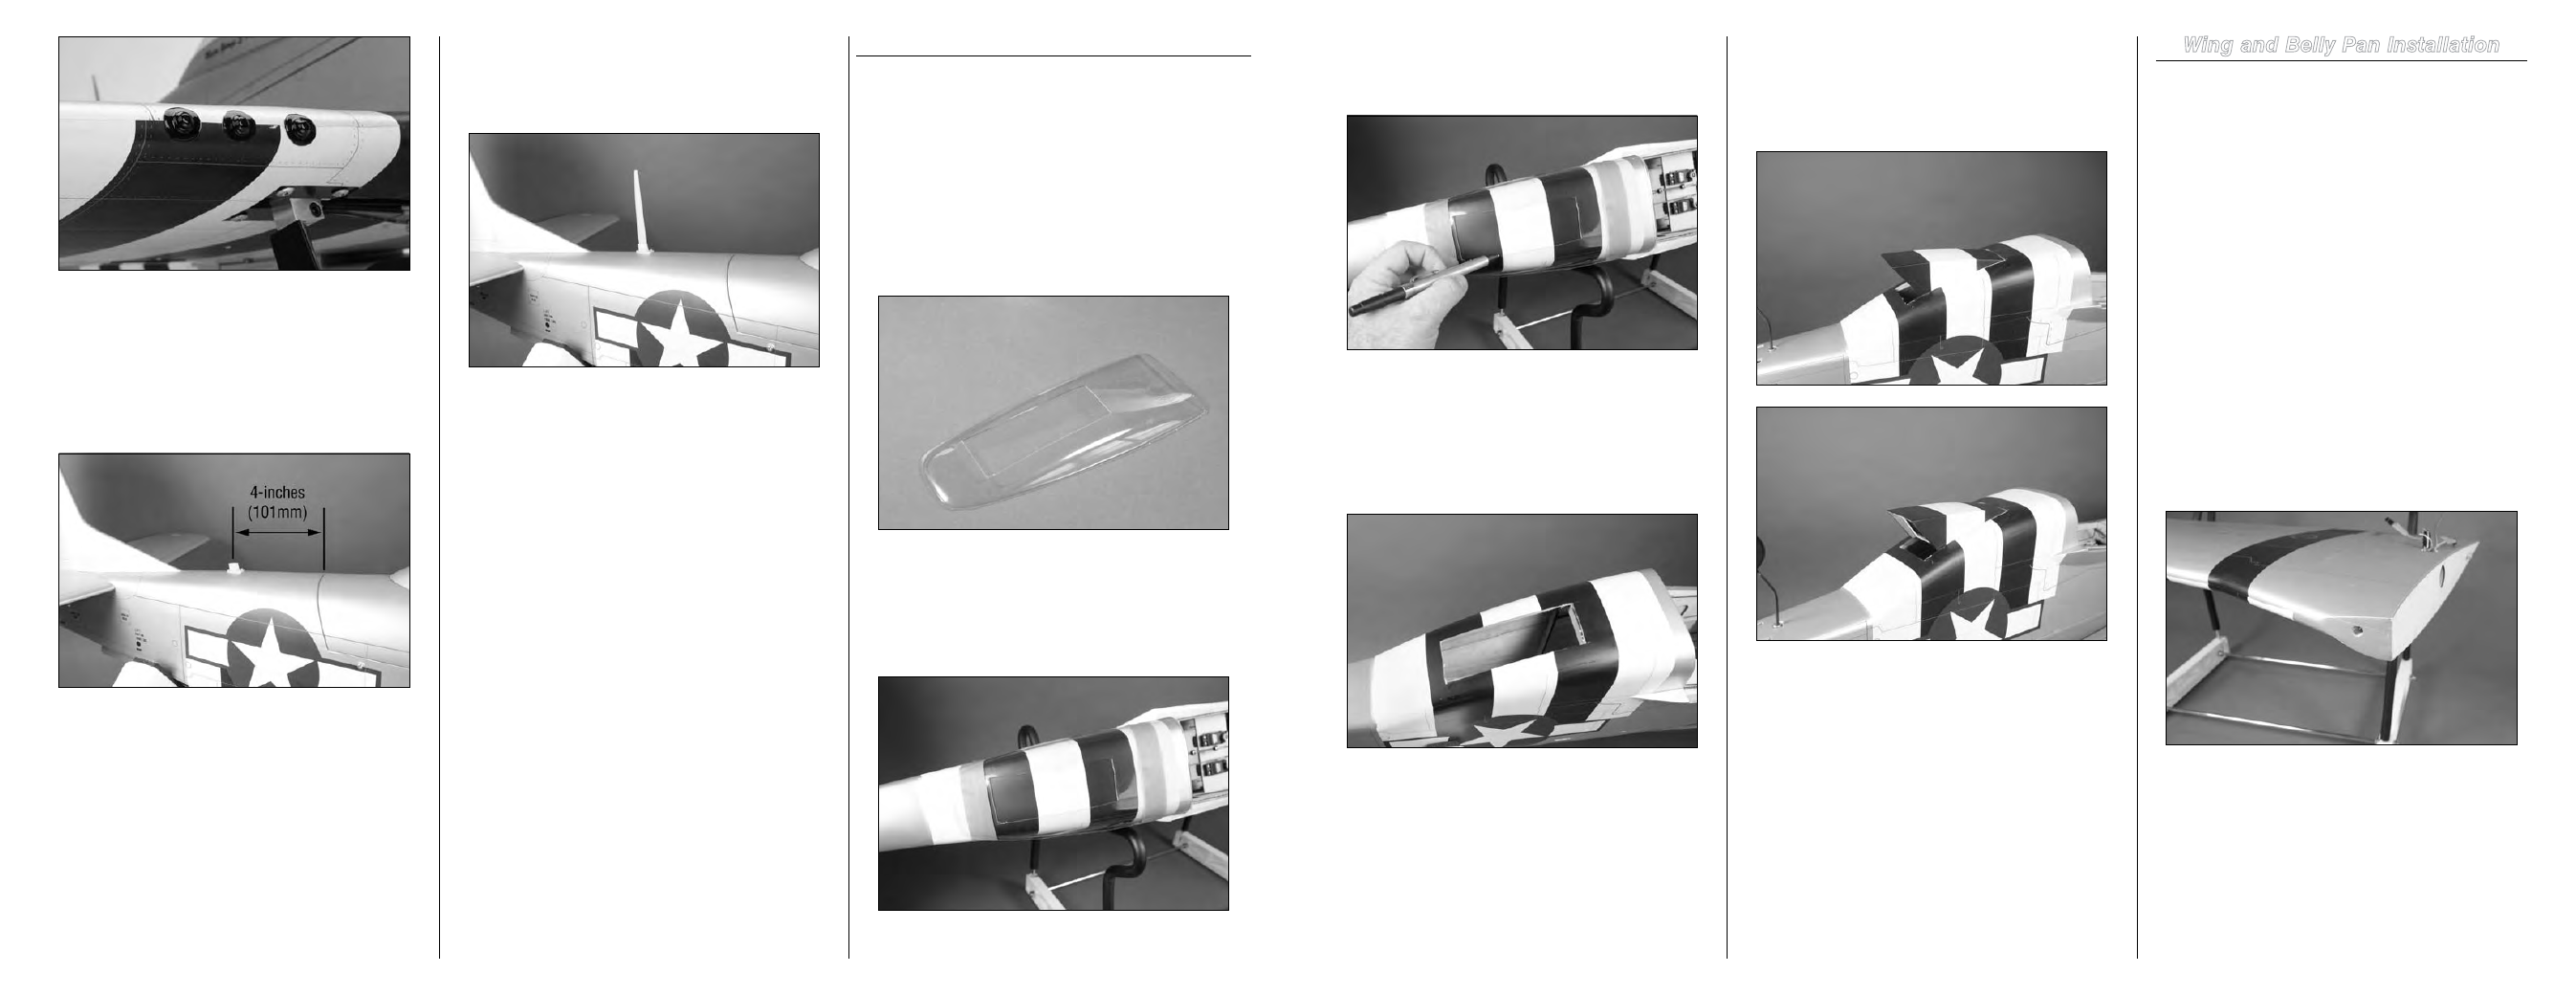
Step 10
Use a felt-tipped pen to trace the outline of the cutout of the
template on the bottom of the fuselage.
Step 11
Remove the template from the fuselage. Using a hobby knife
with a new #11 blade, carefully cut along the lines drawn in
the previous step. It is better to trim inside the lines and fit
the exhaust, rather than to cut too large and not have the
exhaust fit into the opening.
Step 12
Test fit the radiator exhaust into the opening made in the
previous step. You may need to trim the opening to fit the
scoop perfectly. Once fit, use medium CA to glue the scoop
to the fuselage.
Wing and Belly Pan Installation
Required Parts
Fuselage assembly
Wing dowel (2)
1/4-20 blind nut (2)
Wing tube
1/4-inch washer (2)
Wing bolt plate (2)
Radiator scoop
#6 x 2
1
/
4
-inch wood screw (2)
Wing assembly (right and left)
1/4-20 x 1
1
/
2
-inch socket head machine bolt (2)
Tools and Adhesives
Hobby knife with #11 blade Medium CA
Channel lock pliers
Thin CA
Phillips screwdriver: #2
Ruler
Pencil
Hex wrench or ball driver: 3/16-inch
Step 1
Use a hobby knife with a #11 blade to remove the covering
at the leading edge of the wing for the wing dowel.
Step 6
Use three #2 x 3/8-inch sheet metal screws and a #1 Phillips
screwdriver to attach the antenna mast mount to the top of
the fuselage. Position the mount so it is centered 4-inches
(101mm) behind the edge of the canopy hatch as shown.
Make sure to harden the holes with CA when installing the
mount.
Step 7
Insert the antenna mast into the mount. The antenna can be
easily removed to prevent it from becoming damaged while
transporting your aircraft.
COOLING ExHAUST FOR ELECTRIC VERSION
Note
: The following steps are required to install the
radiator exhaust for the electric version of your aircraft.
This will allow air to pass through the fuselage to
provide cooling for the batteries. You can still install
the exhaust for a glow-powered aircraft, but it is not
necessary to do so.
Step 8
Use hobby scissors and a hobby knife with a #11 blade to
remove the center from the radiator scoop template.
Step 9
Place the radiator exhaust template on the bottom of the
fuselage. It is shaped to fit snugly on the fuselage. Use
low-tack tape to secure the template to the bottom of the
fuselage.