Add, change and delete hotspot, E-map monitoring settings, E-map live preview – COP-USA NVMS 1000 User Manual
Page 47: 3 e-map monitoring settings, 4 e-map live preview
44
NVMS-1000 User Manual
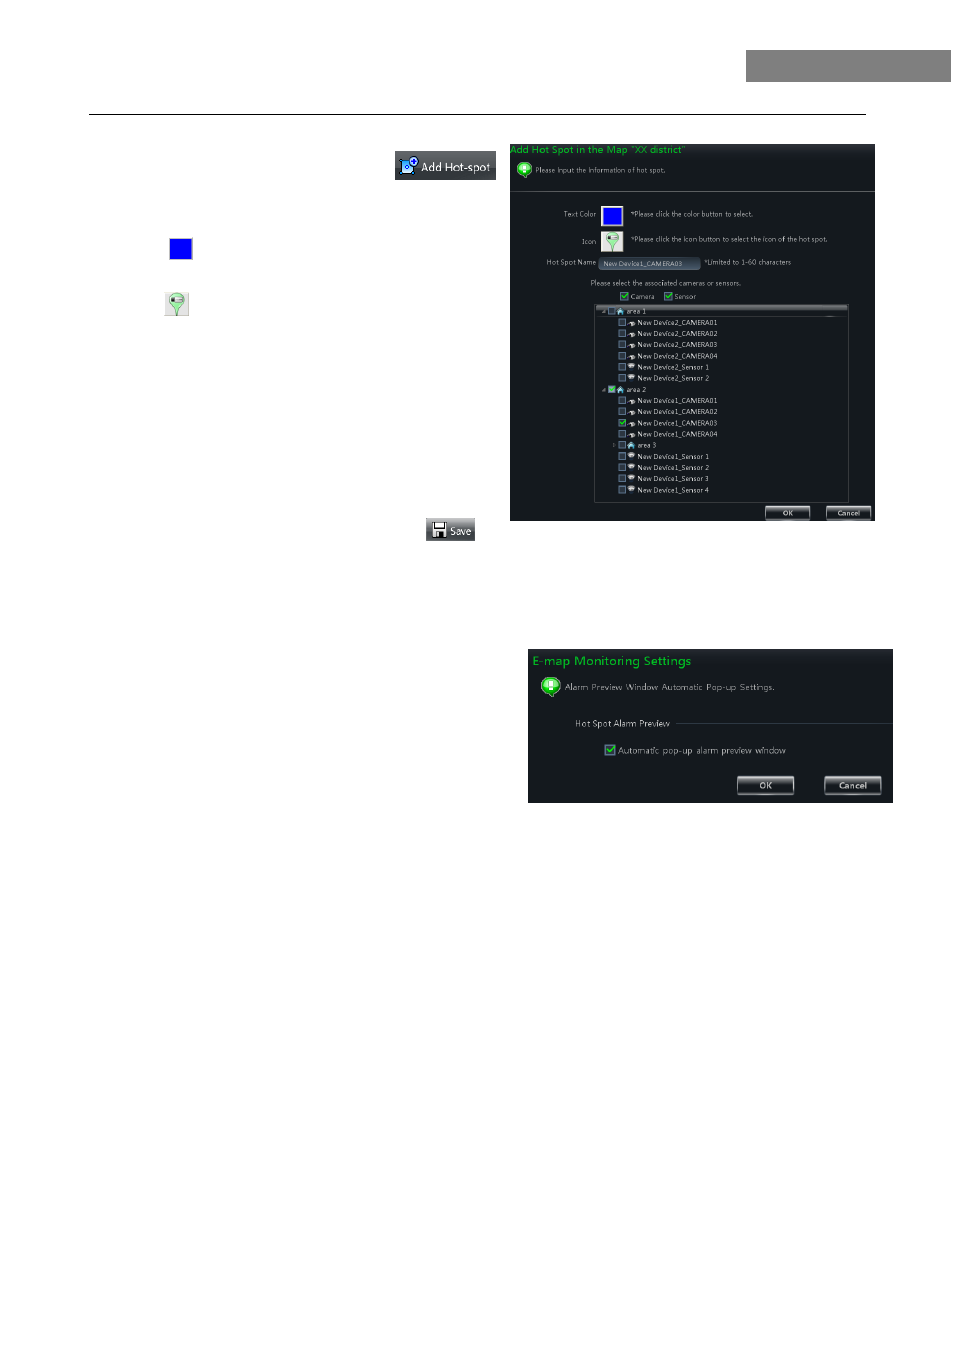
9.2.3 Add, Change and Delete Hotspot
In the E-map interface, choose a map, click
to enter the interface.
① Check associated cameras and sensors
② Click
to choose text color displaying under
hotspot.
③ Click
to choose an icon for the hotspot
④ Edit a name for the hotspot.
There is another way to add hotspot.
Select a map and double click the camera, or drag the
camera to the map for adding hotspot.
Note:
The hotzones or hotspots will focus on the map in the
same position after being added. You should drag them to
the corresponding positions on the map. Click
to
save the settings.
9.3 E-map Monitoring Settings
In the E-map interface, click “Monitory Settings of E-map”
on the left side to enter the interface.
Check ―Automatic Pop-up Alarm Preview Window‖
,then
click 【OK】 button to save the setting. If the configured hot
spots raise the alarm, the preview image will pop up
automatically
9.4 E-map live preview
In the E-map interface, click “Monitory with E-map” on the left side to enter the interface.
Note:
If the item ―Edit E-map‖ appears on the below of menu bar in the E-map interface, the current interface is
monitory with E-map interface. Double clicking a hotspot will switch to the its map
The icon of hotspot will become a flashing light if this hotspot raises the alarm. What’s more, there will be
preview windows on the right side if you had checked ―Automatic Pop-up Alarm Preview Window‖. Clicking the
alarm preview image will switch to the map whose hotspot issues alarm.