Setting the cmrv instrument address, Gas purge option installation – Cannon Instrument CMRV-5000 User Manual
Page 20
14
CANNON
®
Mini-Rotary Viscometer
CMRV-5000 Instruction & Operation Manual
Version 1.0b—August, 2011; CANNON
®
Instrument Company
2139 High Tech Road • State College, PA • 16803 • USA
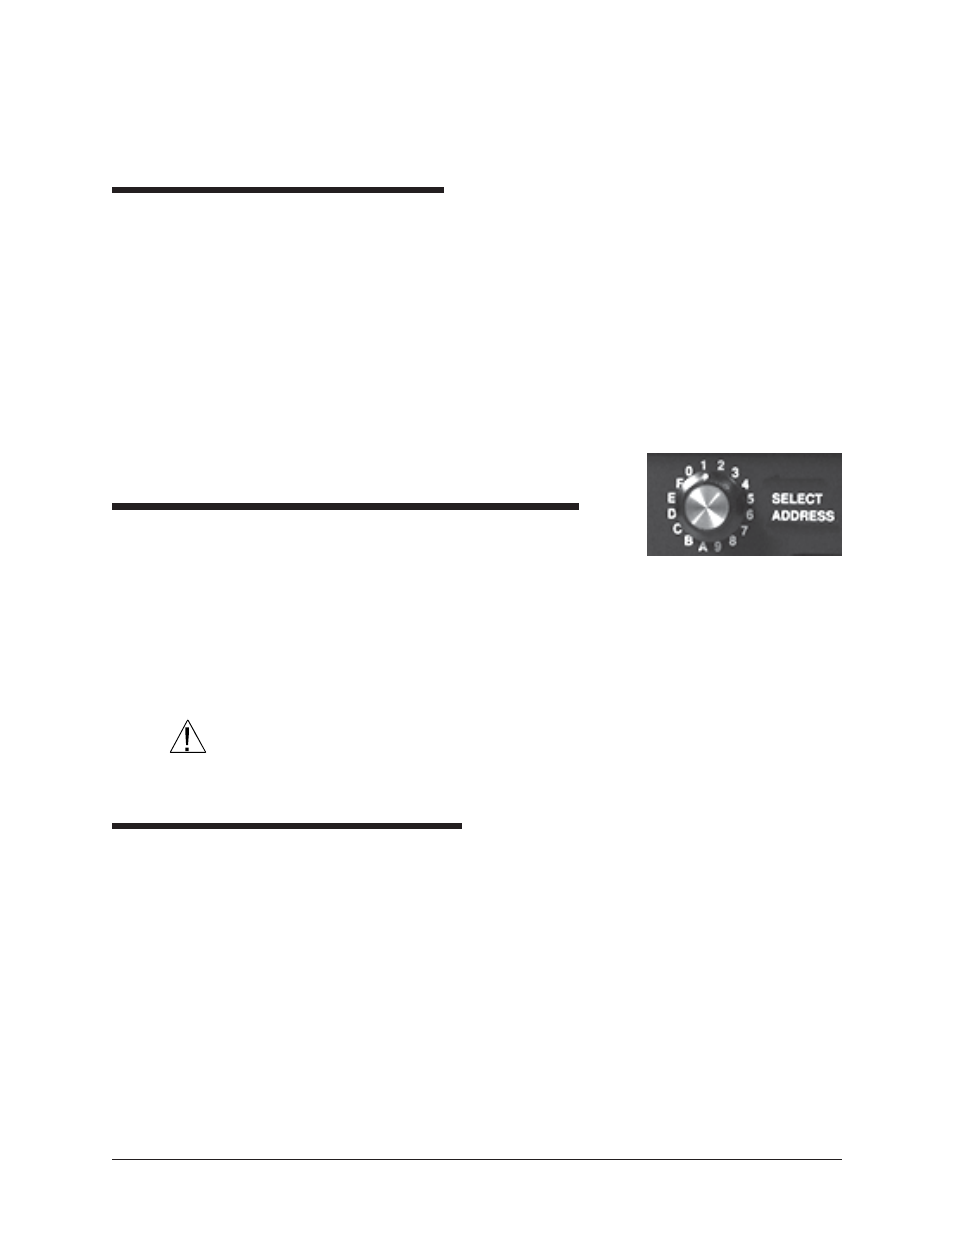
Address selection knob
CAUTION
Do NOT plug or unplug the pulleywheel assembly when the instrument
power is ON! To disconnect the sensor, pull it out by the knurled portion of
the plug.
Firmware installation notes
Download button
Current firmware is installed on your instrument during factory check-
out. However, the CMRV-5000 is capable of receiving firmware updates
from the computer.
When installing firmware, place the instrument in the firmware down-
load mode by pressing the DOWNLOAD button adjacent to the serial
port on the rear of the Controller. Follow the software prompts of the
firmware installation program to upgrade your instrument.
NOTE
If the DOWNLOAD button is pressed inadvertently, switch off the CMRV-
5000 power for at least four seconds, then
restore power to the unit.
Setting the CMRV instrument address
When installing/connecting a new CMRV
instrument, you must set the instrument
address using the SELECT ADDRESS
dial on the rear of the CMRV Controller.
This dial offers 16 settings (0-9, A-F).
Procedure
To set the address, rotate the dial (see photo) to a setting not currently in
use by other CMRV instruments.
CAUTION
The MRVW software will not function correctly unless each networked
CMRV instrument is set to a different address (see APPENDIX D for
multi-unit configuration).
Gas Purge option installation
If you have purchased the Gas Purge option for your CMRV instrument,
locate the Gas Purge kit, including the gas purge regulator, connecting
hardware, installation mounting bracket, and quick-connect gas purge
line. Obtain a Phillips screwdriver and follow the installation instructions
below:
1. Remove the two "plug" screws on the center of the left side panel of
the head unit (as viewed from the front of the unit). The screws are
located between the grillwork and are aligned vertically approxi-
mately 82.5 mm (3.25") apart.
2. Align the mounting bracket of the gas purge assembly with the screw
holes so that the connecting hardware on the attached regulator faces
the rear of the head unit. Secure with the Phillips-head screws provided.