Installing the recording paper, Installing the paper stacker – Panasonic KX-F560 User Manual
Page 6
Attention! The text in this document has been recognized automatically. To view the original document, you can use the "Original mode".
1. Installation and Connection
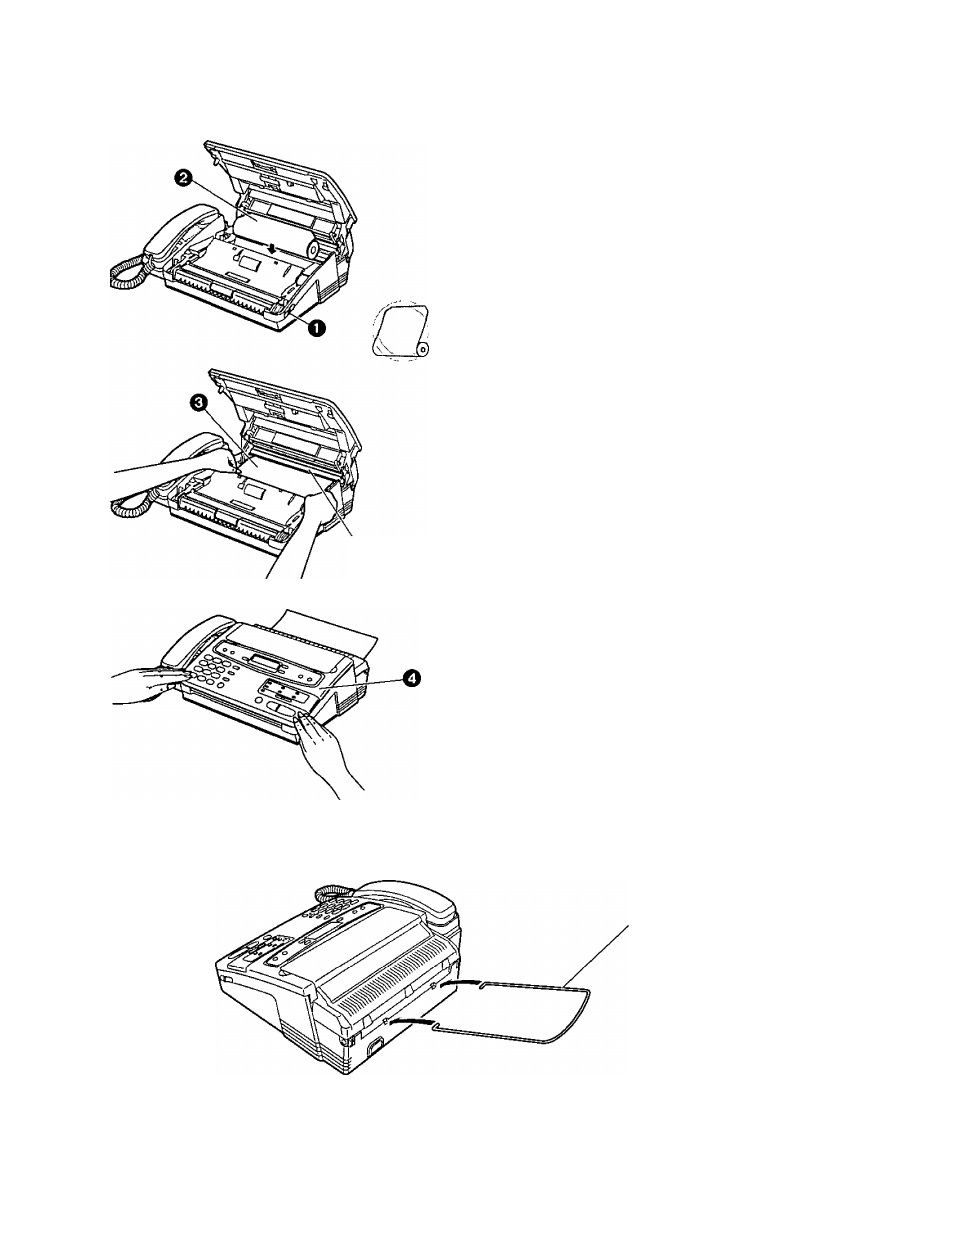
Installing the recording paper
Green bar
(SzB'
0 Slide the lever toward you to open the top
cover.
^ Place a recording paper roll in the unit.
—Make sure that the shiny side of the
paper is facing up and that there is no
slack, tape or glue residue on the
paper roll.
o
Insert the leading edge of the recording
paper under the green bar.
© Close the top cover carefully by gently
pressing down on both ends.
Note:
•
Use only the included roll or specified
recording paper, or else the print quality
may be affected and/or excessive thermal
head wear may occur.
• The start of some recording paper is
secured using glue or tape. Residue from
this glue/tape may cause the paper cutter to
jam immediately following installation of a
new roll. To prevent this, cut approximately
150mm (6 inches) from the new roll of paper
prior to installation.
• Equivalent recording paper sizes are;
216 mmx 30 m roll with 1 inch core,
216 mmx 50 m roll with 1 inch core.
•
For order number of recording paper, see
page 56.
Installing the paper stacker
Paper stacker