F. basic operation-5 fade, F-1, video fade-out (in), F-2. downstream key fade-out (in) – Panasonic WJ-MX50 User Manual
Page 32: F-3. audio fade-out (in), F. basic operation-5 : fade
Attention! The text in this document has been recognized automatically. To view the original document, you can use the "Original mode".
F.
Basic Operation-5
Fade
Synchronized fading makes it possible to operate the
Video, Downstream Key and Audio fades together, or in
any combination. Each of the three can be controlled
independently, via either Auto Fade or a manual Fader. The
following area shows the Fade Control Block.
Note
yfïïMO
Ù
□
B
■On
0~i
'r
g) ® @ ®
The VIDEO (80), DSK (82) and/or AUDIO (84) signals can
fade out to one of the following ; MATTE (81), WHITE (83),
BLACK (85), A (93), or B (94) signal.
F-1, Video Fade-Out (In)
•
Set the Fade Control (95) to the IN (OUT) position.
•
Select the fade out scene from: MATTE, WHITE, BLACK
A or B.
•
Press the VIDEO Button (80).
•
Slide the Fade Control (95) to the OUT (IN) position. The
IN (OUT) LED starts blinking (as the fade progresses)
then the OUT (IN) LED begins blinking after the fade is
halfway done. The OUT (IN) LED becomes continuously
on when the Fade Control (95) reaches the AUT (IN)
position.
If the automatic fading is to be operated, first
adjust the TRANSITION Control (91) to the desired
auto fading time. Then press the AUTO FADE
Button (92) when ready to execute. The Auto-Fade
can be stopped during Auto-fading by pressing this
button. The LED on the VIDEO Button (80) blinks
while stopping. The Auto-fading will start again by
pressing the AUTO FADE Button (92) again.
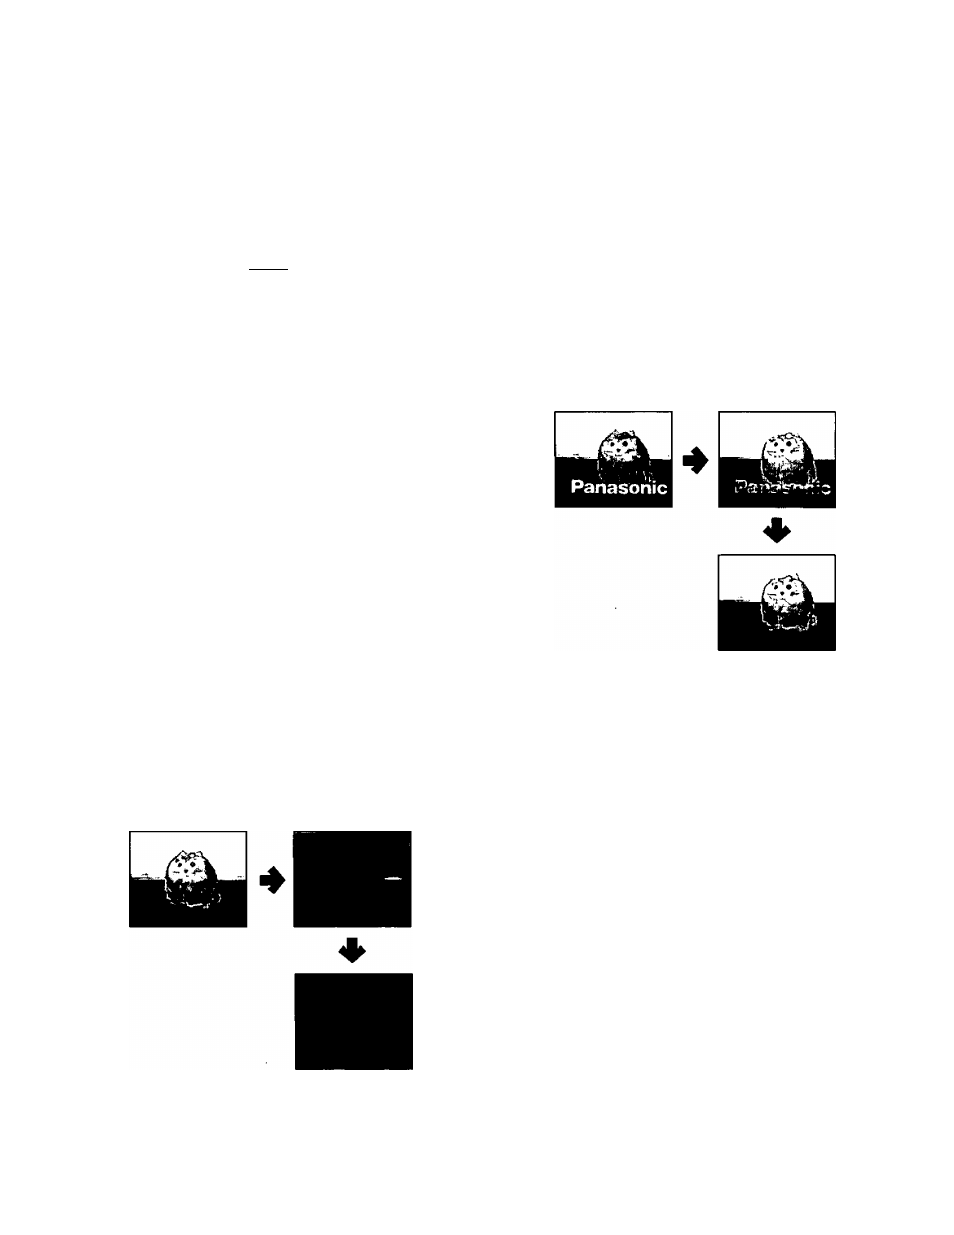
F-2. Downstream Key Fade-Out (In)
•
Set the Fade Control (95) to the IN (OUT) position
•
Press the DSK Button (82).
•
Slide the Fade Control (95) to.the OUT (IN) position. The
IN (OUT) LED starts blinking (as the fade progresses)
then the OUT (IN) LED begins blinking after the fade is
halfway done. The OUT (IN) LED becomes continuously
on when the Fade Control (95) reaches the OUT (IN)
position.
Note
If the automatic fading is to be operated, first
adjust the TRANSITION Control (91 ) to the desired
auto fading time. Then press the AUTO FADE
Button (92)when ready to execute. The Auto-Fade
can be stopped during Auto-fading by pressing
this button. The LEO on the DSK Button (82) blinks
while stopping. The Auto-fading will start again by
pressing the AUTO FADE Button (92) again.
F-3. Audio Fade-Out (In)
•
Set the Fade Control (95) to the IN (OUT) position.
•
Select the fade out scene from : MATTE, WHITE,
BLACK, A, or B.
•
Press the AUDIO Button (84).
•
Slide the Fade Control (95) to the OUT (IN) position. The
IN (OUT) LED starts slinking (as the fade progresses)
then the OUT (IN) LED begins blinking after the fade is
halfway done. The OUT (IN) LED becomes continuously
on when the Fade Control (95) reaches the OUT (IN)
position.
- 33 -