B-5. position control, C. basic operation-2 digital effect block, Negative – Panasonic WJ-MX50 User Manual
Page 19: C. basic operation-2 : digital effect bloc
Attention! The text in this document has been recognized automatically. To view the original document, you can use the "Original mode".
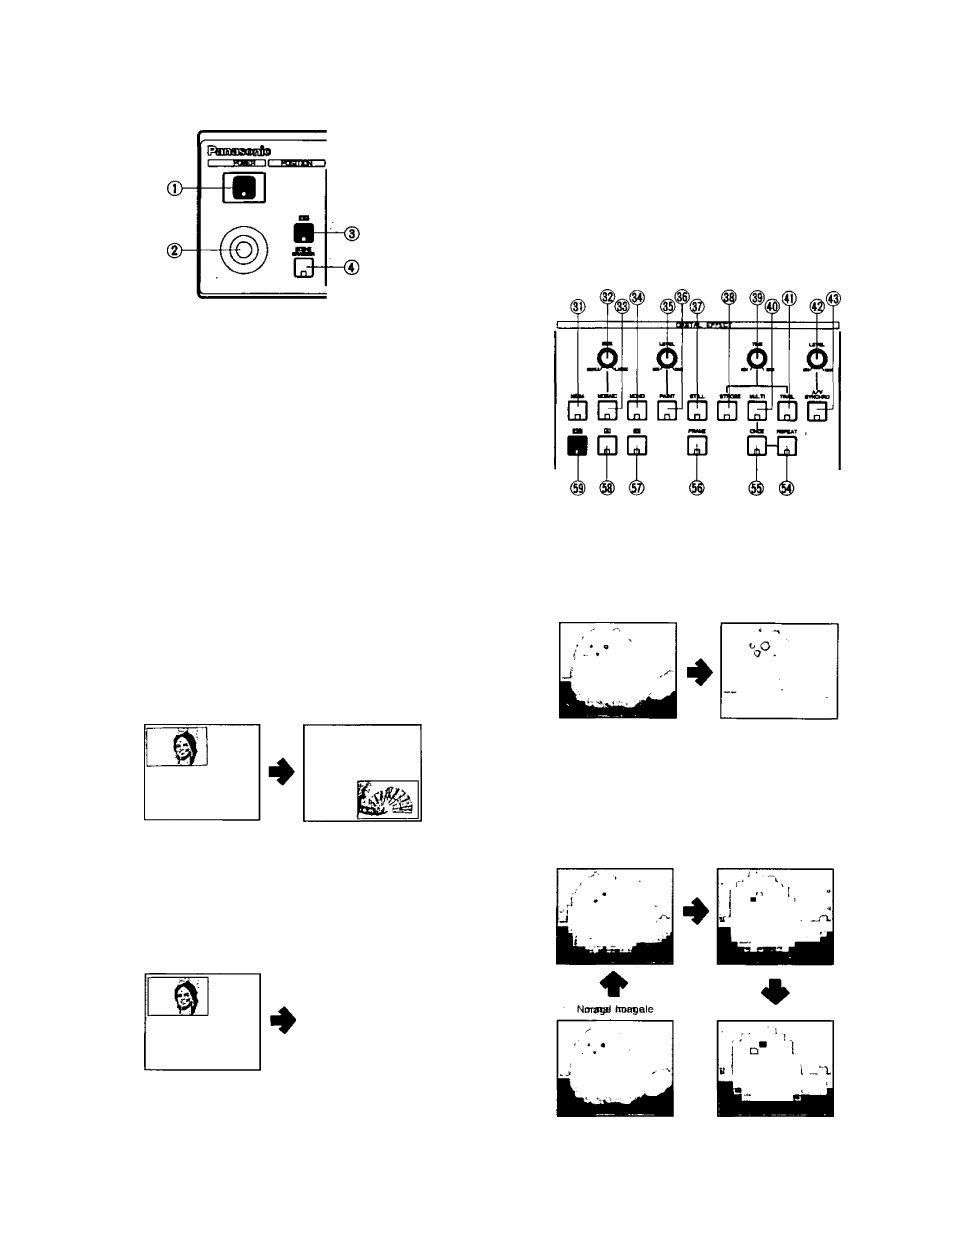
B-5. Position Control
The position of the specific wipe pattern can be
changed on the monitor screen using Position Control
function.
•
Press the Square Wipe Button {60) and select the
desired wipe pattern by pressing this button repeatedly.
•
(f necessary, change the aspect ratio by using the
Aspect Control (29) and Aspect ON/OFF. Button (30).
•
Press the ON Button (3). (The wiped size becomes
double.)
• Adjust the Mix/Wipe Lever (99) to obtain the desired
wipe size.
• Operate the Positioner Joystick (2). The position of the
wiped scene can he changed on the monitor screen.
When the SCENE GFIABBER Button (4) is selected
together with the ON Button (3), the scene in the wipe
pattern will be "grabbed".
Operate the Positioner Joystick (2). The position of the
"grabbed" wipe scene can be freely set on the monitor
screen.
Note:
When the ON Button (3) is turned off, the SCENE
GRABBER Button (4) becomes off.
C. Basic Operation-2
Digital Effect block
The following instructions detail the Digital Effect block
function which generates digital special effects for the
A-bus and B-bus source video signals. In order to add
the desired effect(s) on the A-bus (B-bus) signal, press the
A-Button (58) (B-Button (57)) and the ON-Button (59).
Notes:
1. The selected effect(s) can be added to either the A-bus
or B-bus at one time.
2. Without pressing the ON-Button (59), the digital
effect(s) will not applied on the A-bus or B-bus signal.
Negative
Press the NEGA Button (31). The negative image (like
a film negative) is obtained. The Color Correction can
also be added with this function.
Normal Image
Negative Image
2. Press the MOSAIC Button (33). A mosatc-like or
box-like pattern is obtained. The size of the mosaic
pattern can be adjusted continuously for up to 31
increments by adjusting the SIZE Control (32).
-
20
-