EFCO 8750XD User Manual
Page 42
EFCO 2012
Page 42
Series 8750XD Unitized Curtain Wall Installation Instructions
Section 15 - Deglaze / Re-glaze Procedures - SSG System
2. When
re-glazing an opening or openings at a structural silicone glazed, follow these instructions:
a. Using an approved solvent or cleaner, clean the glazing surfaces of all oils and other contaminants. The sealant manufacturer’s
preparation and application instructions should be followed exactly. Fresh sealant will adhere to cured sealant without primer. Primer may be
necessary if the sealant has been completely removed.
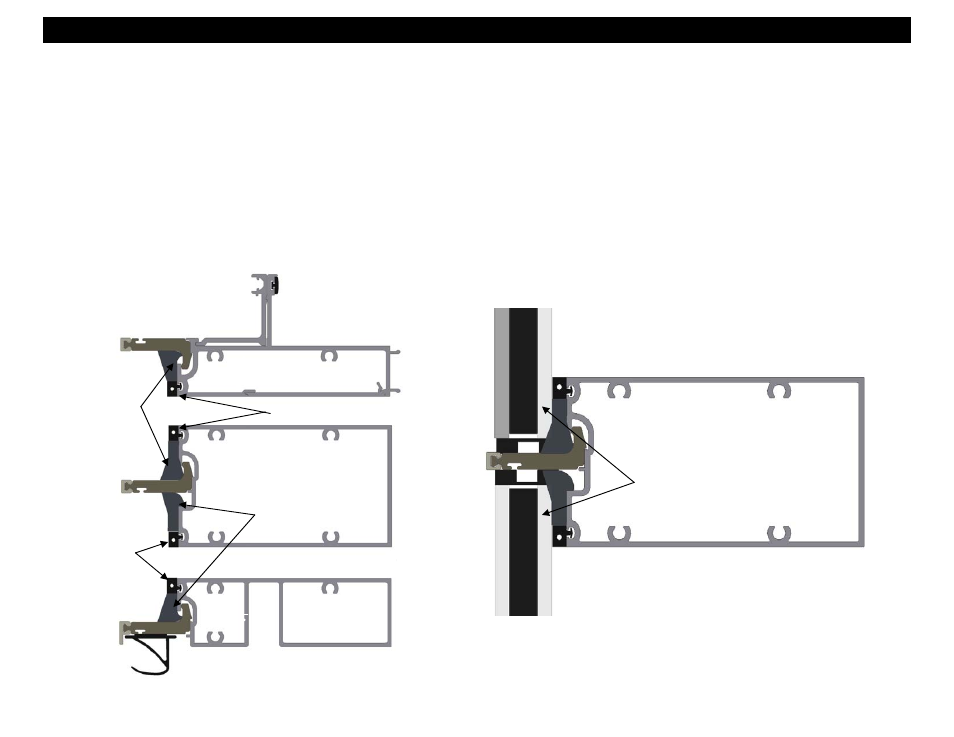
b. Replace WC18 preset spacer gasket with new gasket around the entire opening. Ensure the gaskets are firmly butted together in the corners.
c. Run a bead of sealant around the WC18 gasket as shown below. The joint must be filled with sealant in excess so that it will fill all voids between the
glazing and the WC18 gasket when the glazing is put in place. Tool the sealant into a beveled shape as shown below prior to setting the glazing.
Ensure no voids or air bubbles are present in the sealant. The glazing must be set within 10 minutes or before the sealant begins to skin over.
d. Carefully insert new setting blocks in the locations as noted in the approved shop drawings.
e. Clean the new glass or panel and set it in place, centered in the opening, setting on the setting blocks. Do not contaminate the sealant contact
surfaces of the glazing during handling. Press the glazing firmly against the spacer gaskets. Avoid sliding the glazing around on the spacers, as this
can force sealant into visible areas seen from the interior.
Apply new WC18
spacer gaskets.
WC18 Gasket
High modulus
silicone sealant.
Apply sealant
around the opening
and tool as shown.
Note:
Only silicone sealants which have been
developed and tested specifically for
structural glazing applications should
be used for re-glazing purposes.
Set glass but do
not apply the
exterior weather
seal until the
silicone has
cured.
Figure 103
Figure 104